This project is always evolving. I keep refining parts, adding better documentation, and deepening the breakdown as the build changes over time.
3D PrintingSewingUpholsteryFusion 360ElectronicsAirbrush
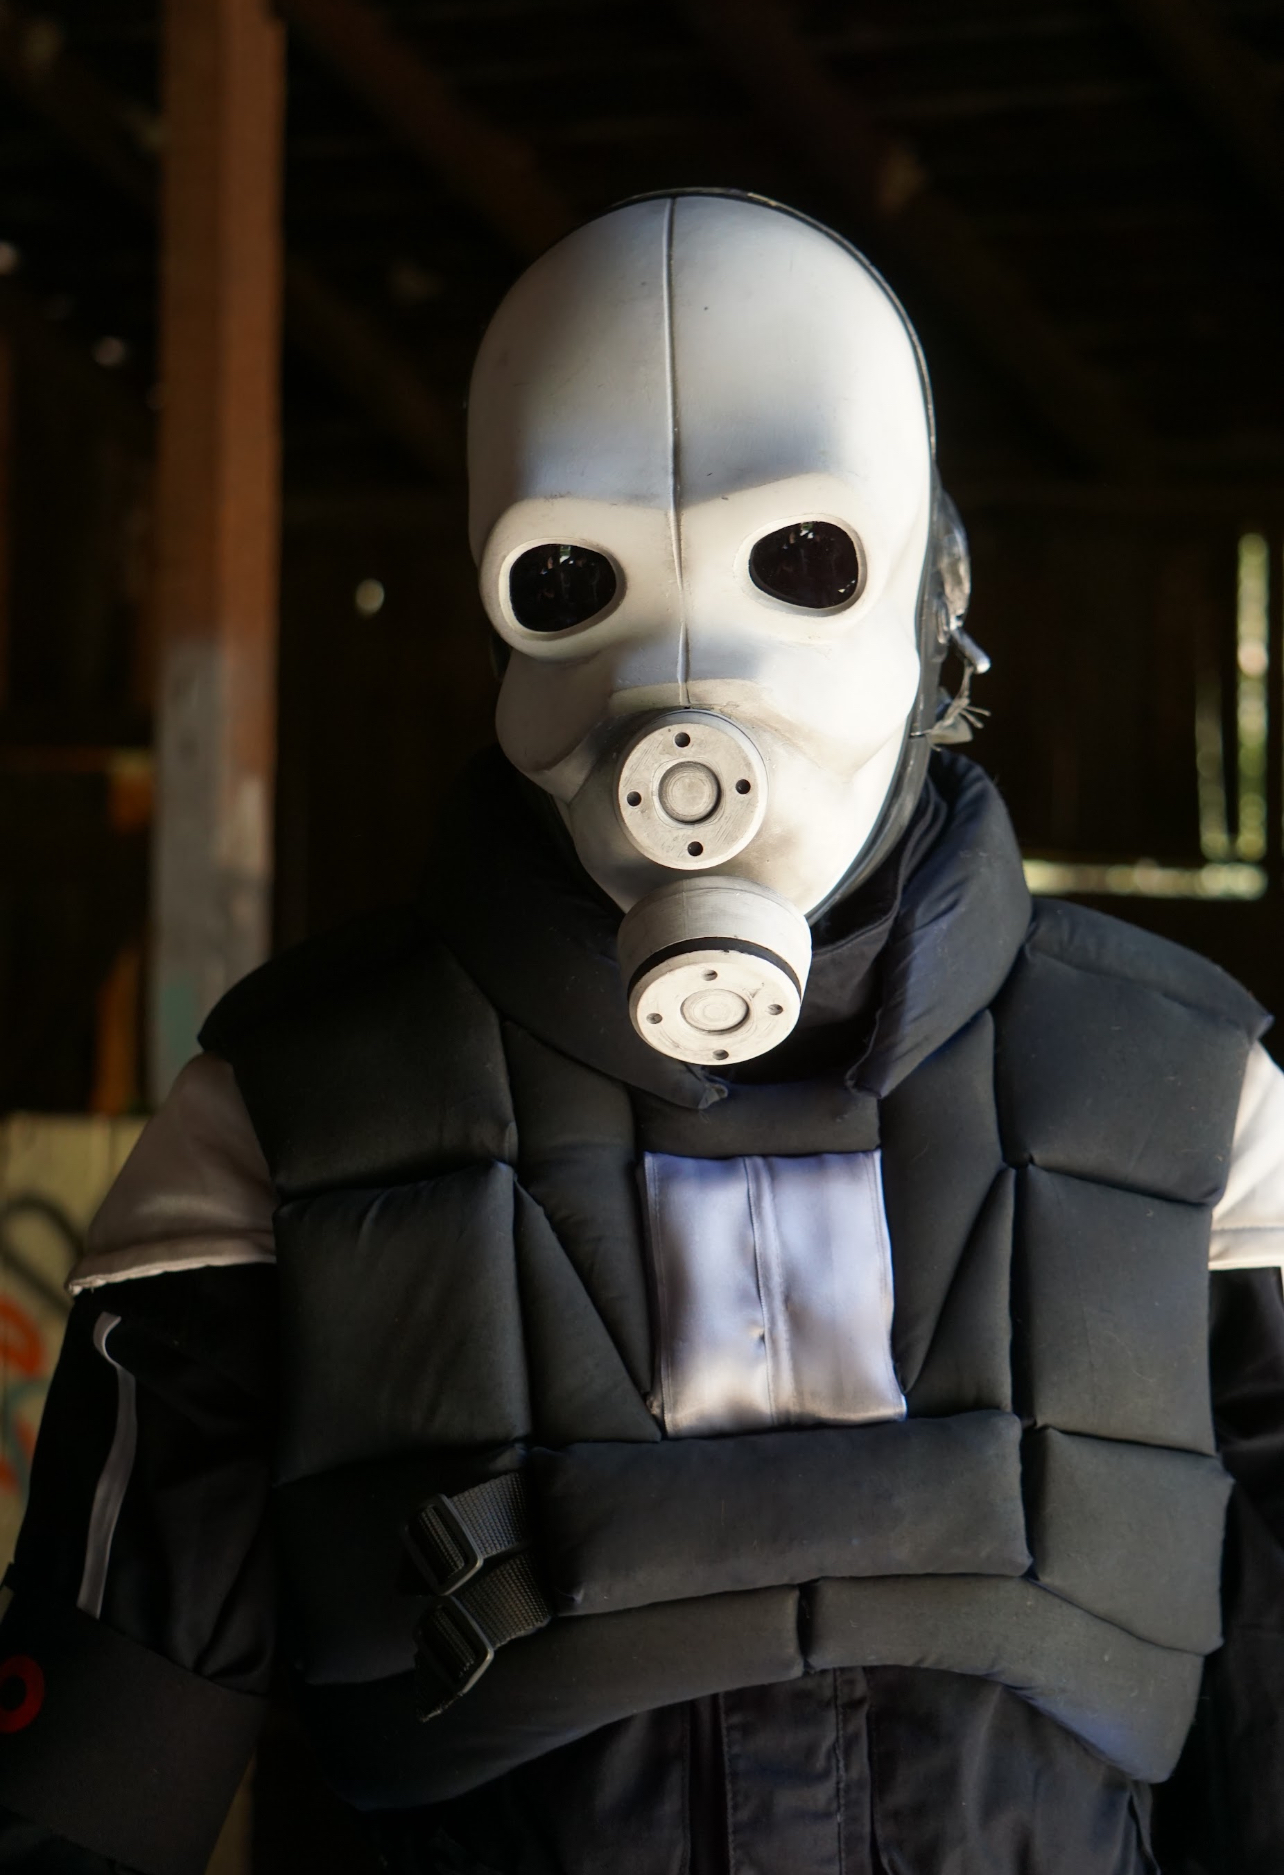
This Metrocop build is all about screen-accurate shapes, believable materials, and a wearable final silhouette. It pulls together hard-surface printed parts, soft goods, finishing work, and lighting details into one costume system.
A straighter portrait view that shows the mask finish, chest silhouette, and soft-goods layering without the lens distortion fighting the costume.
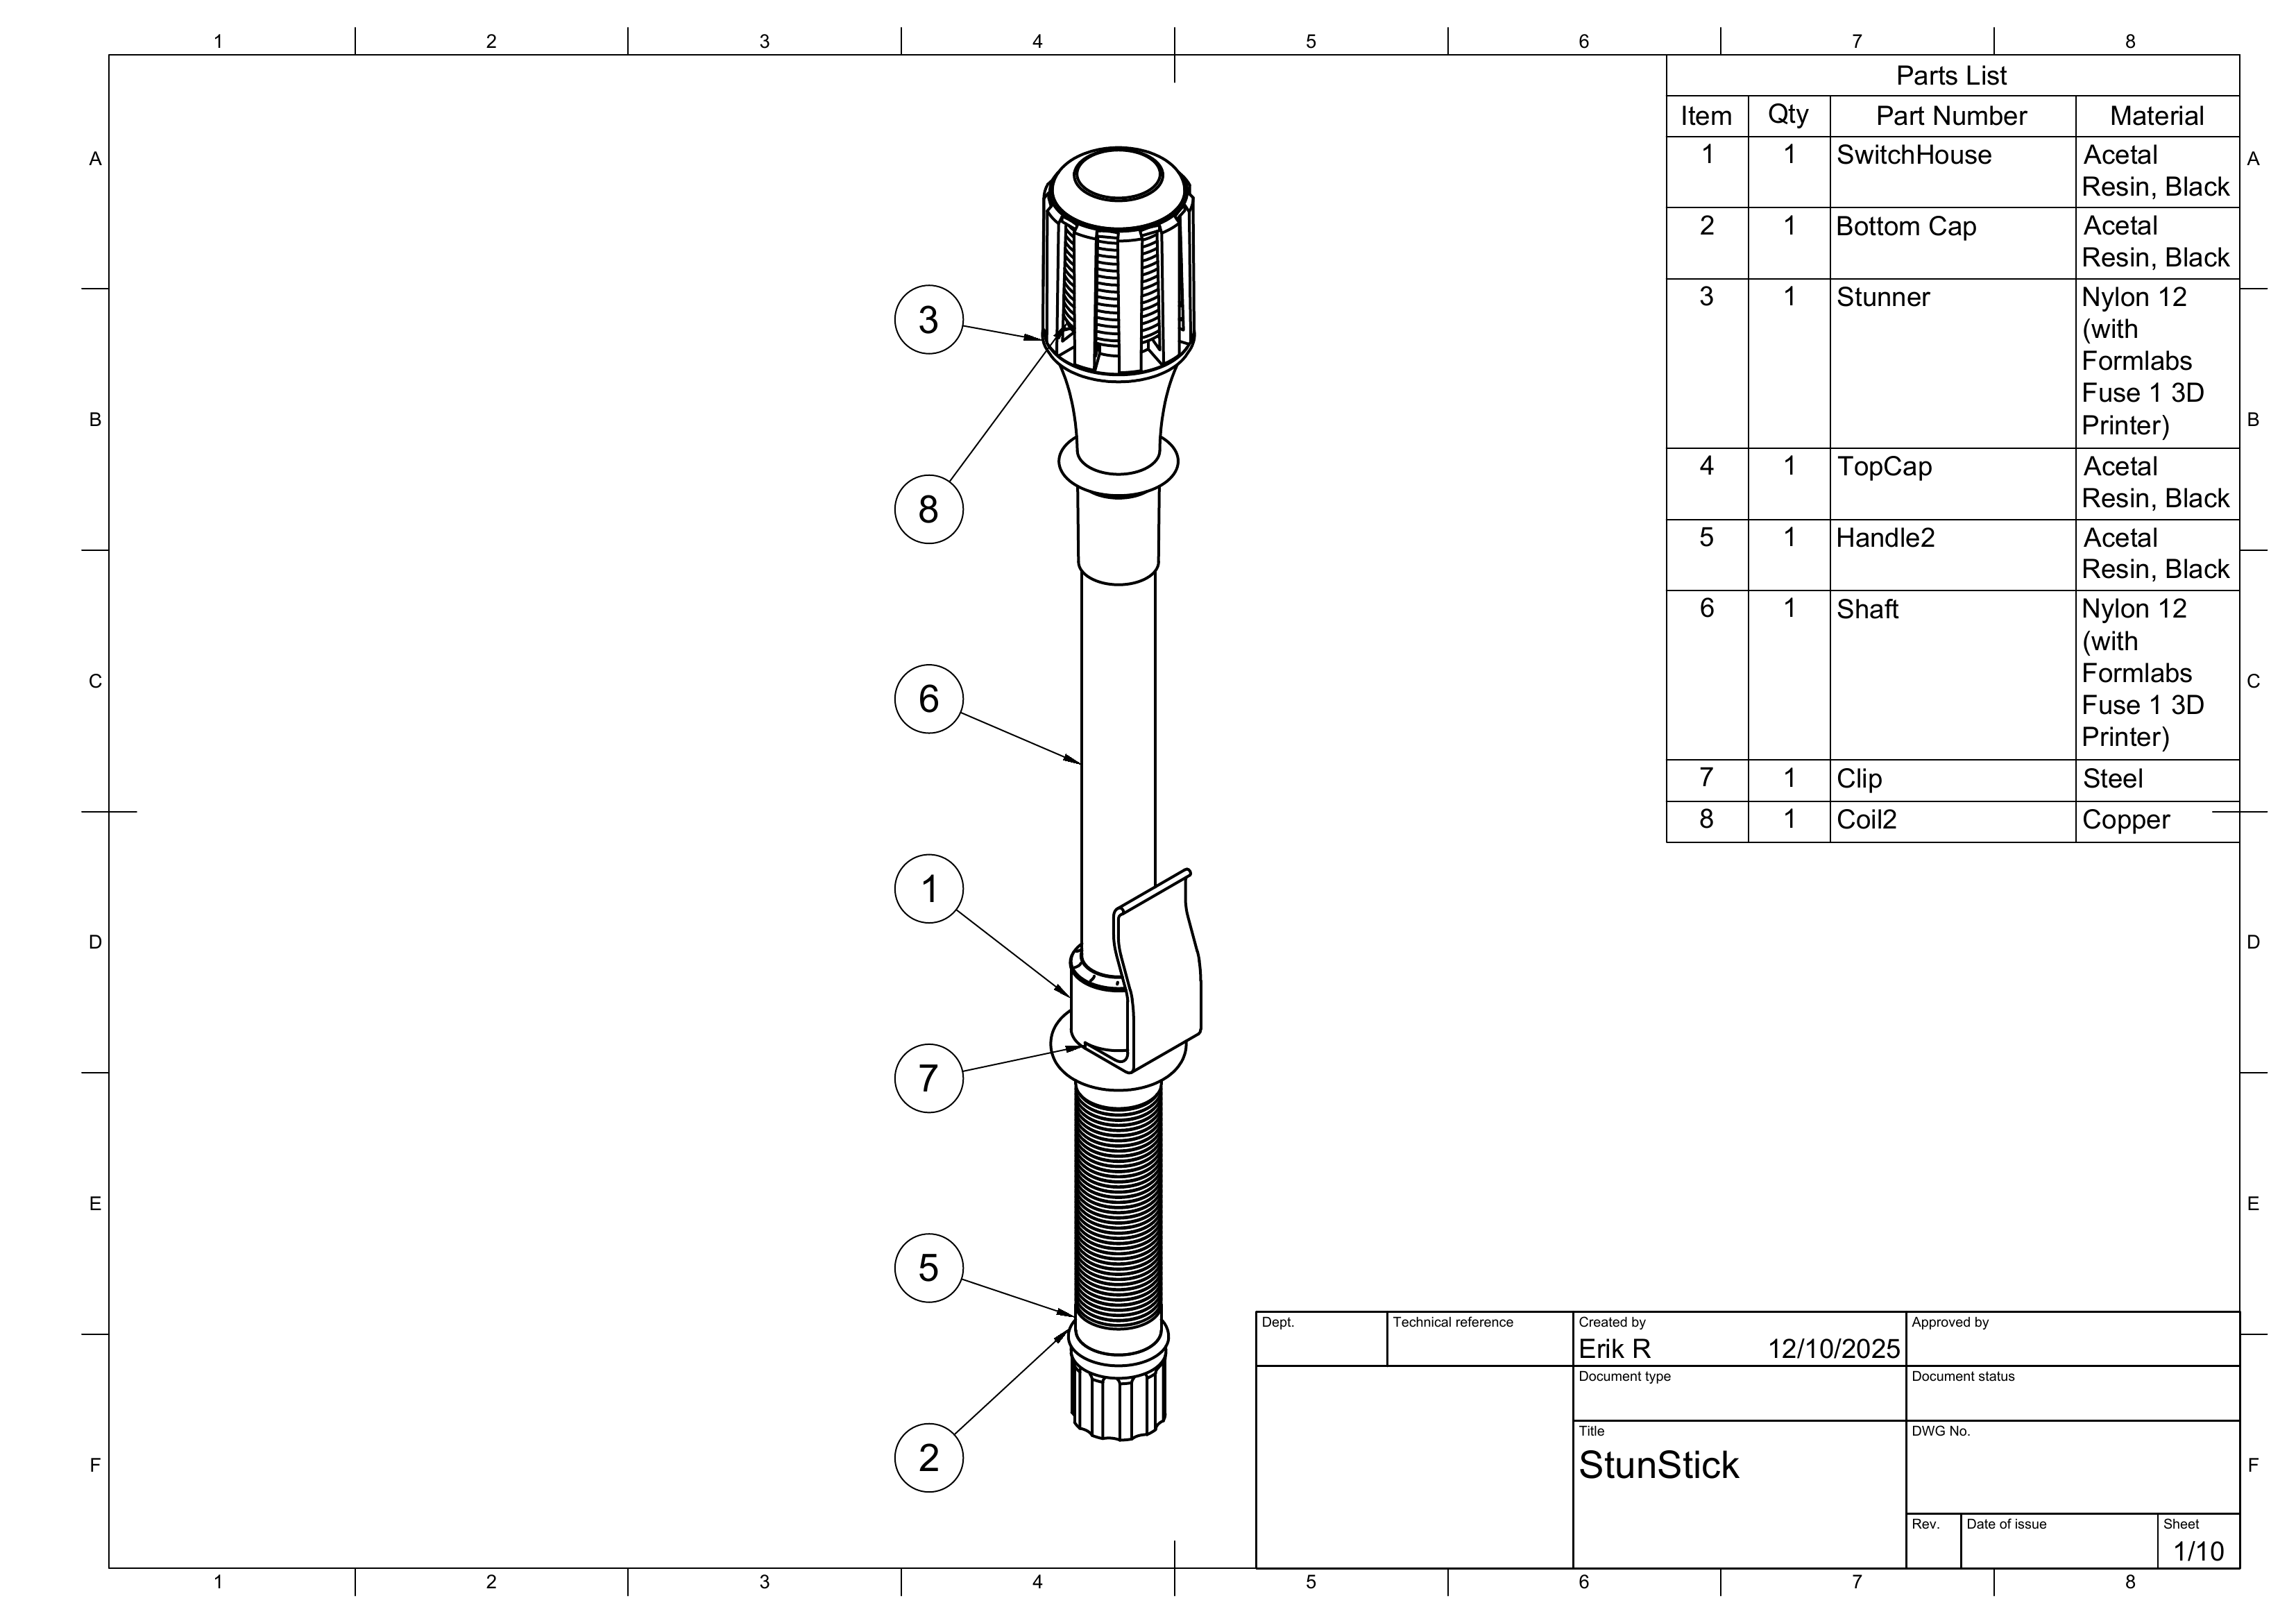
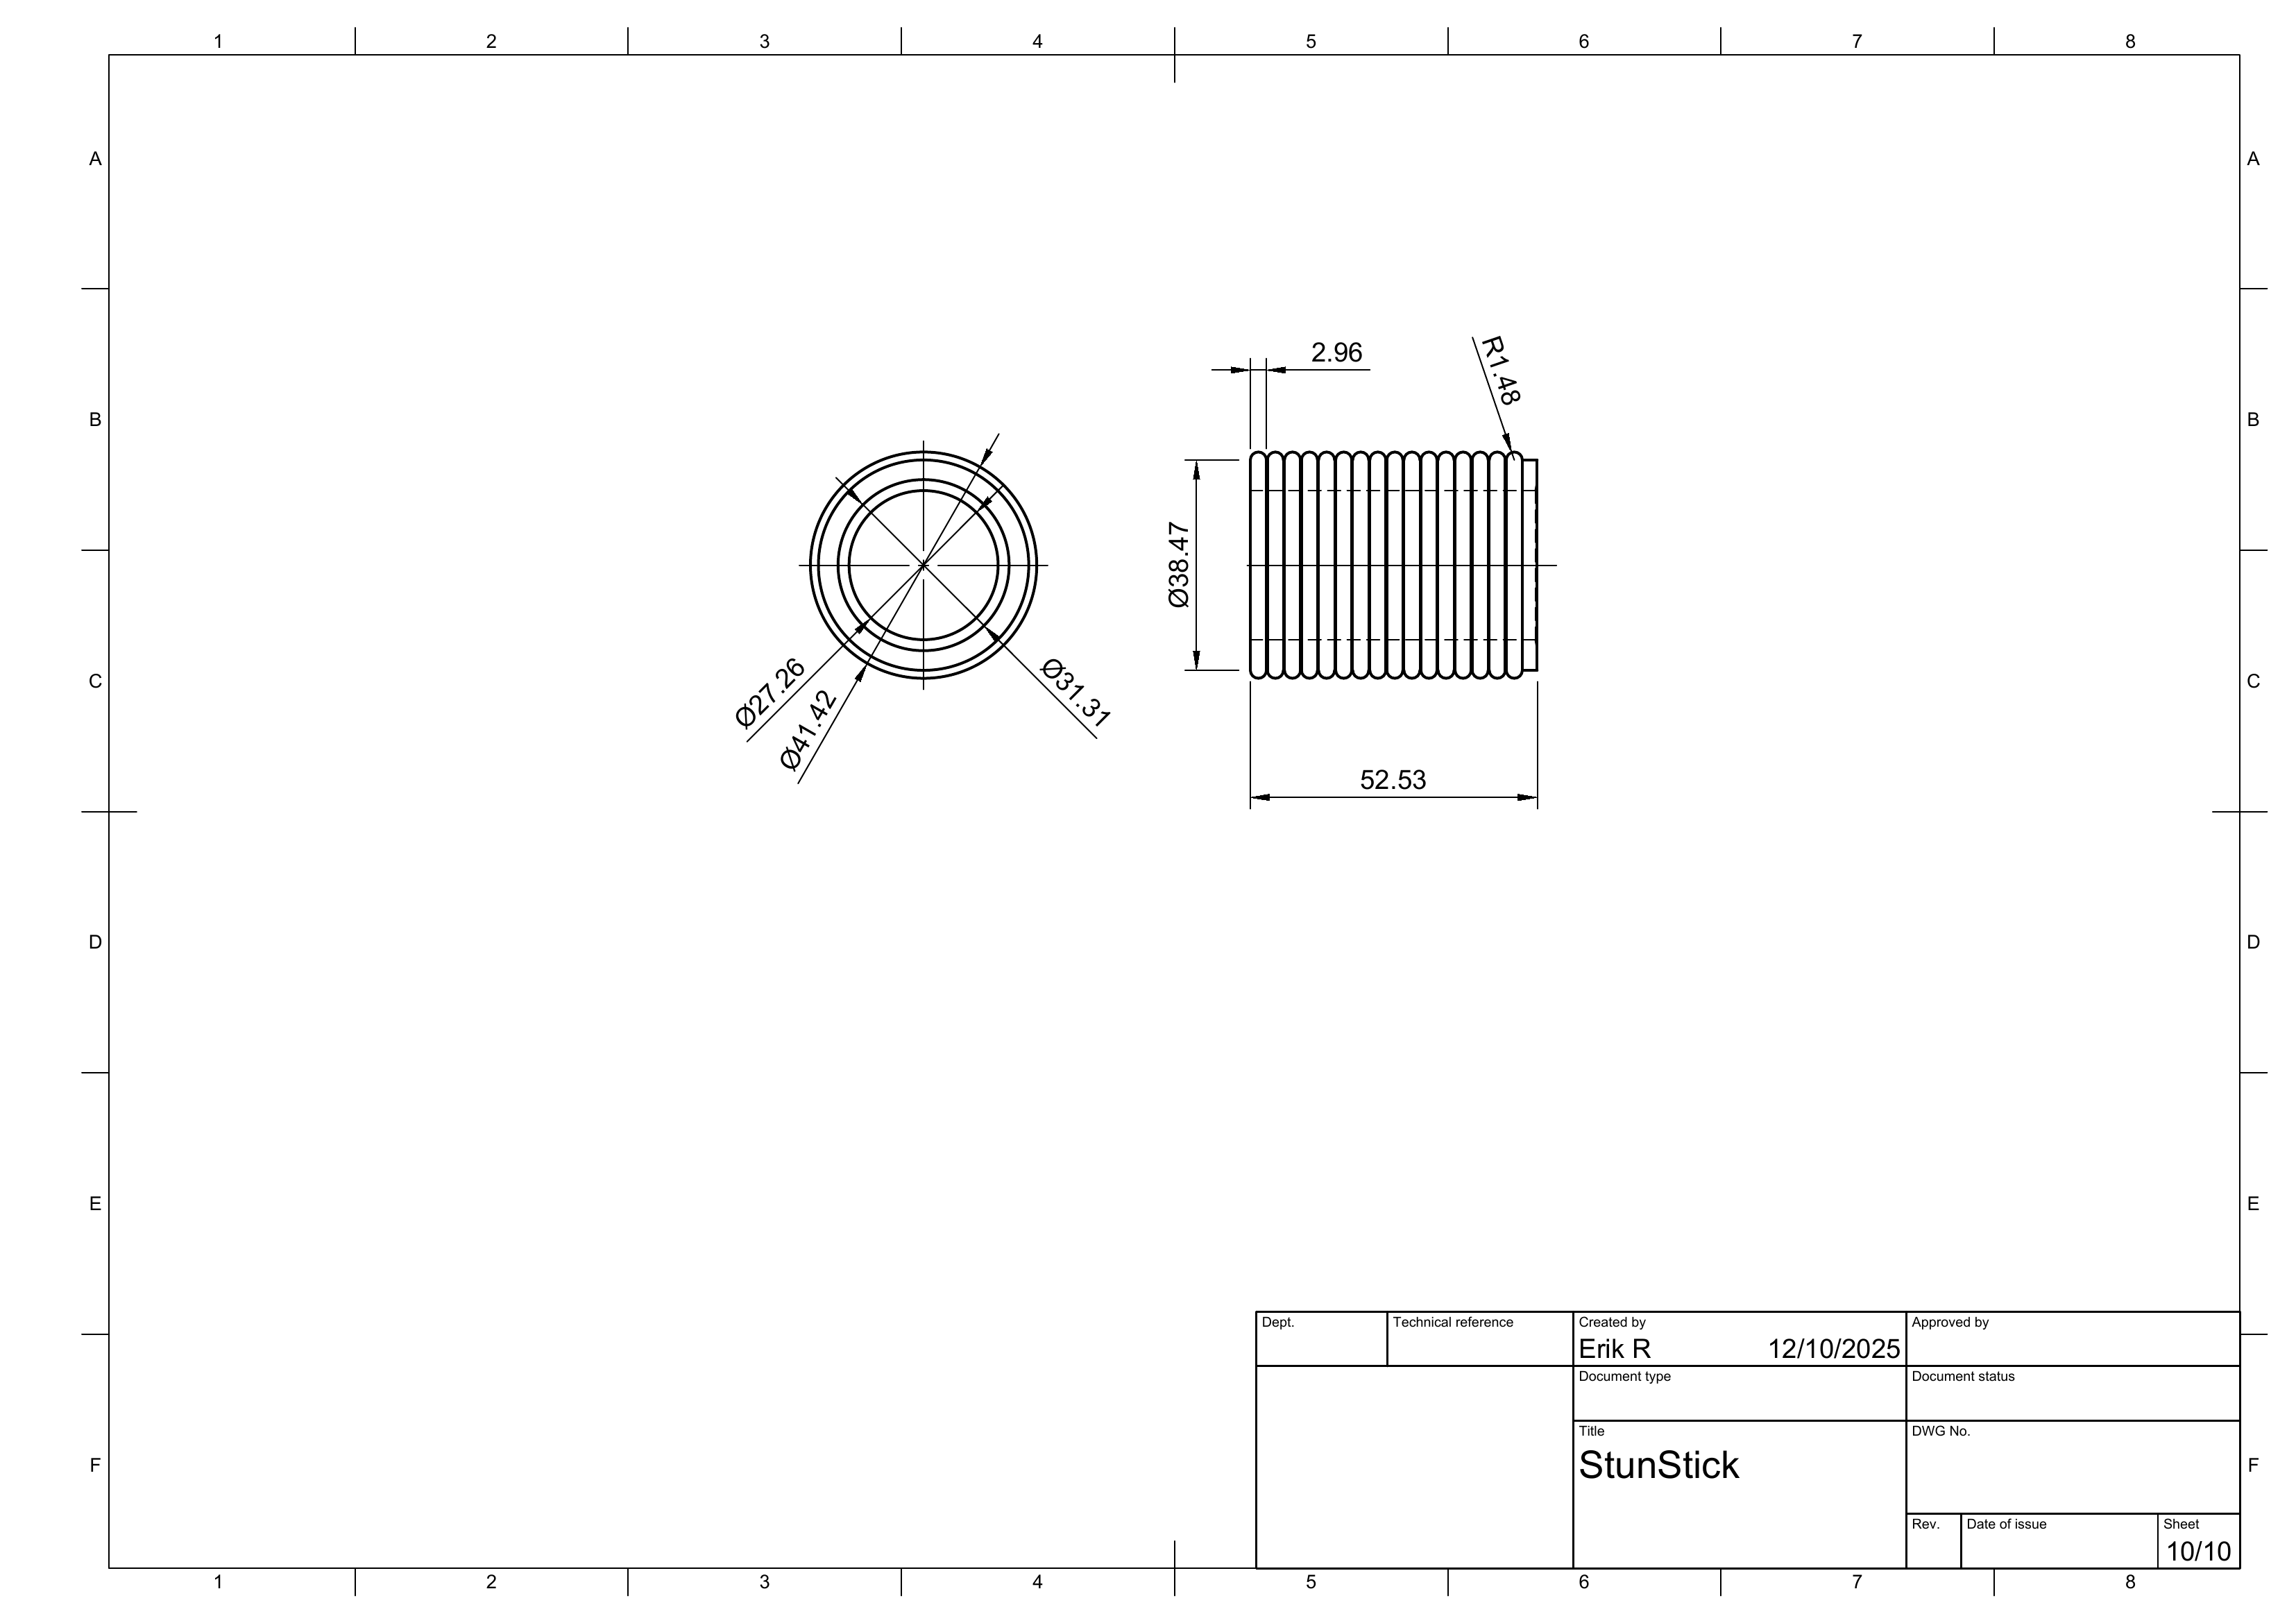
Stunstick
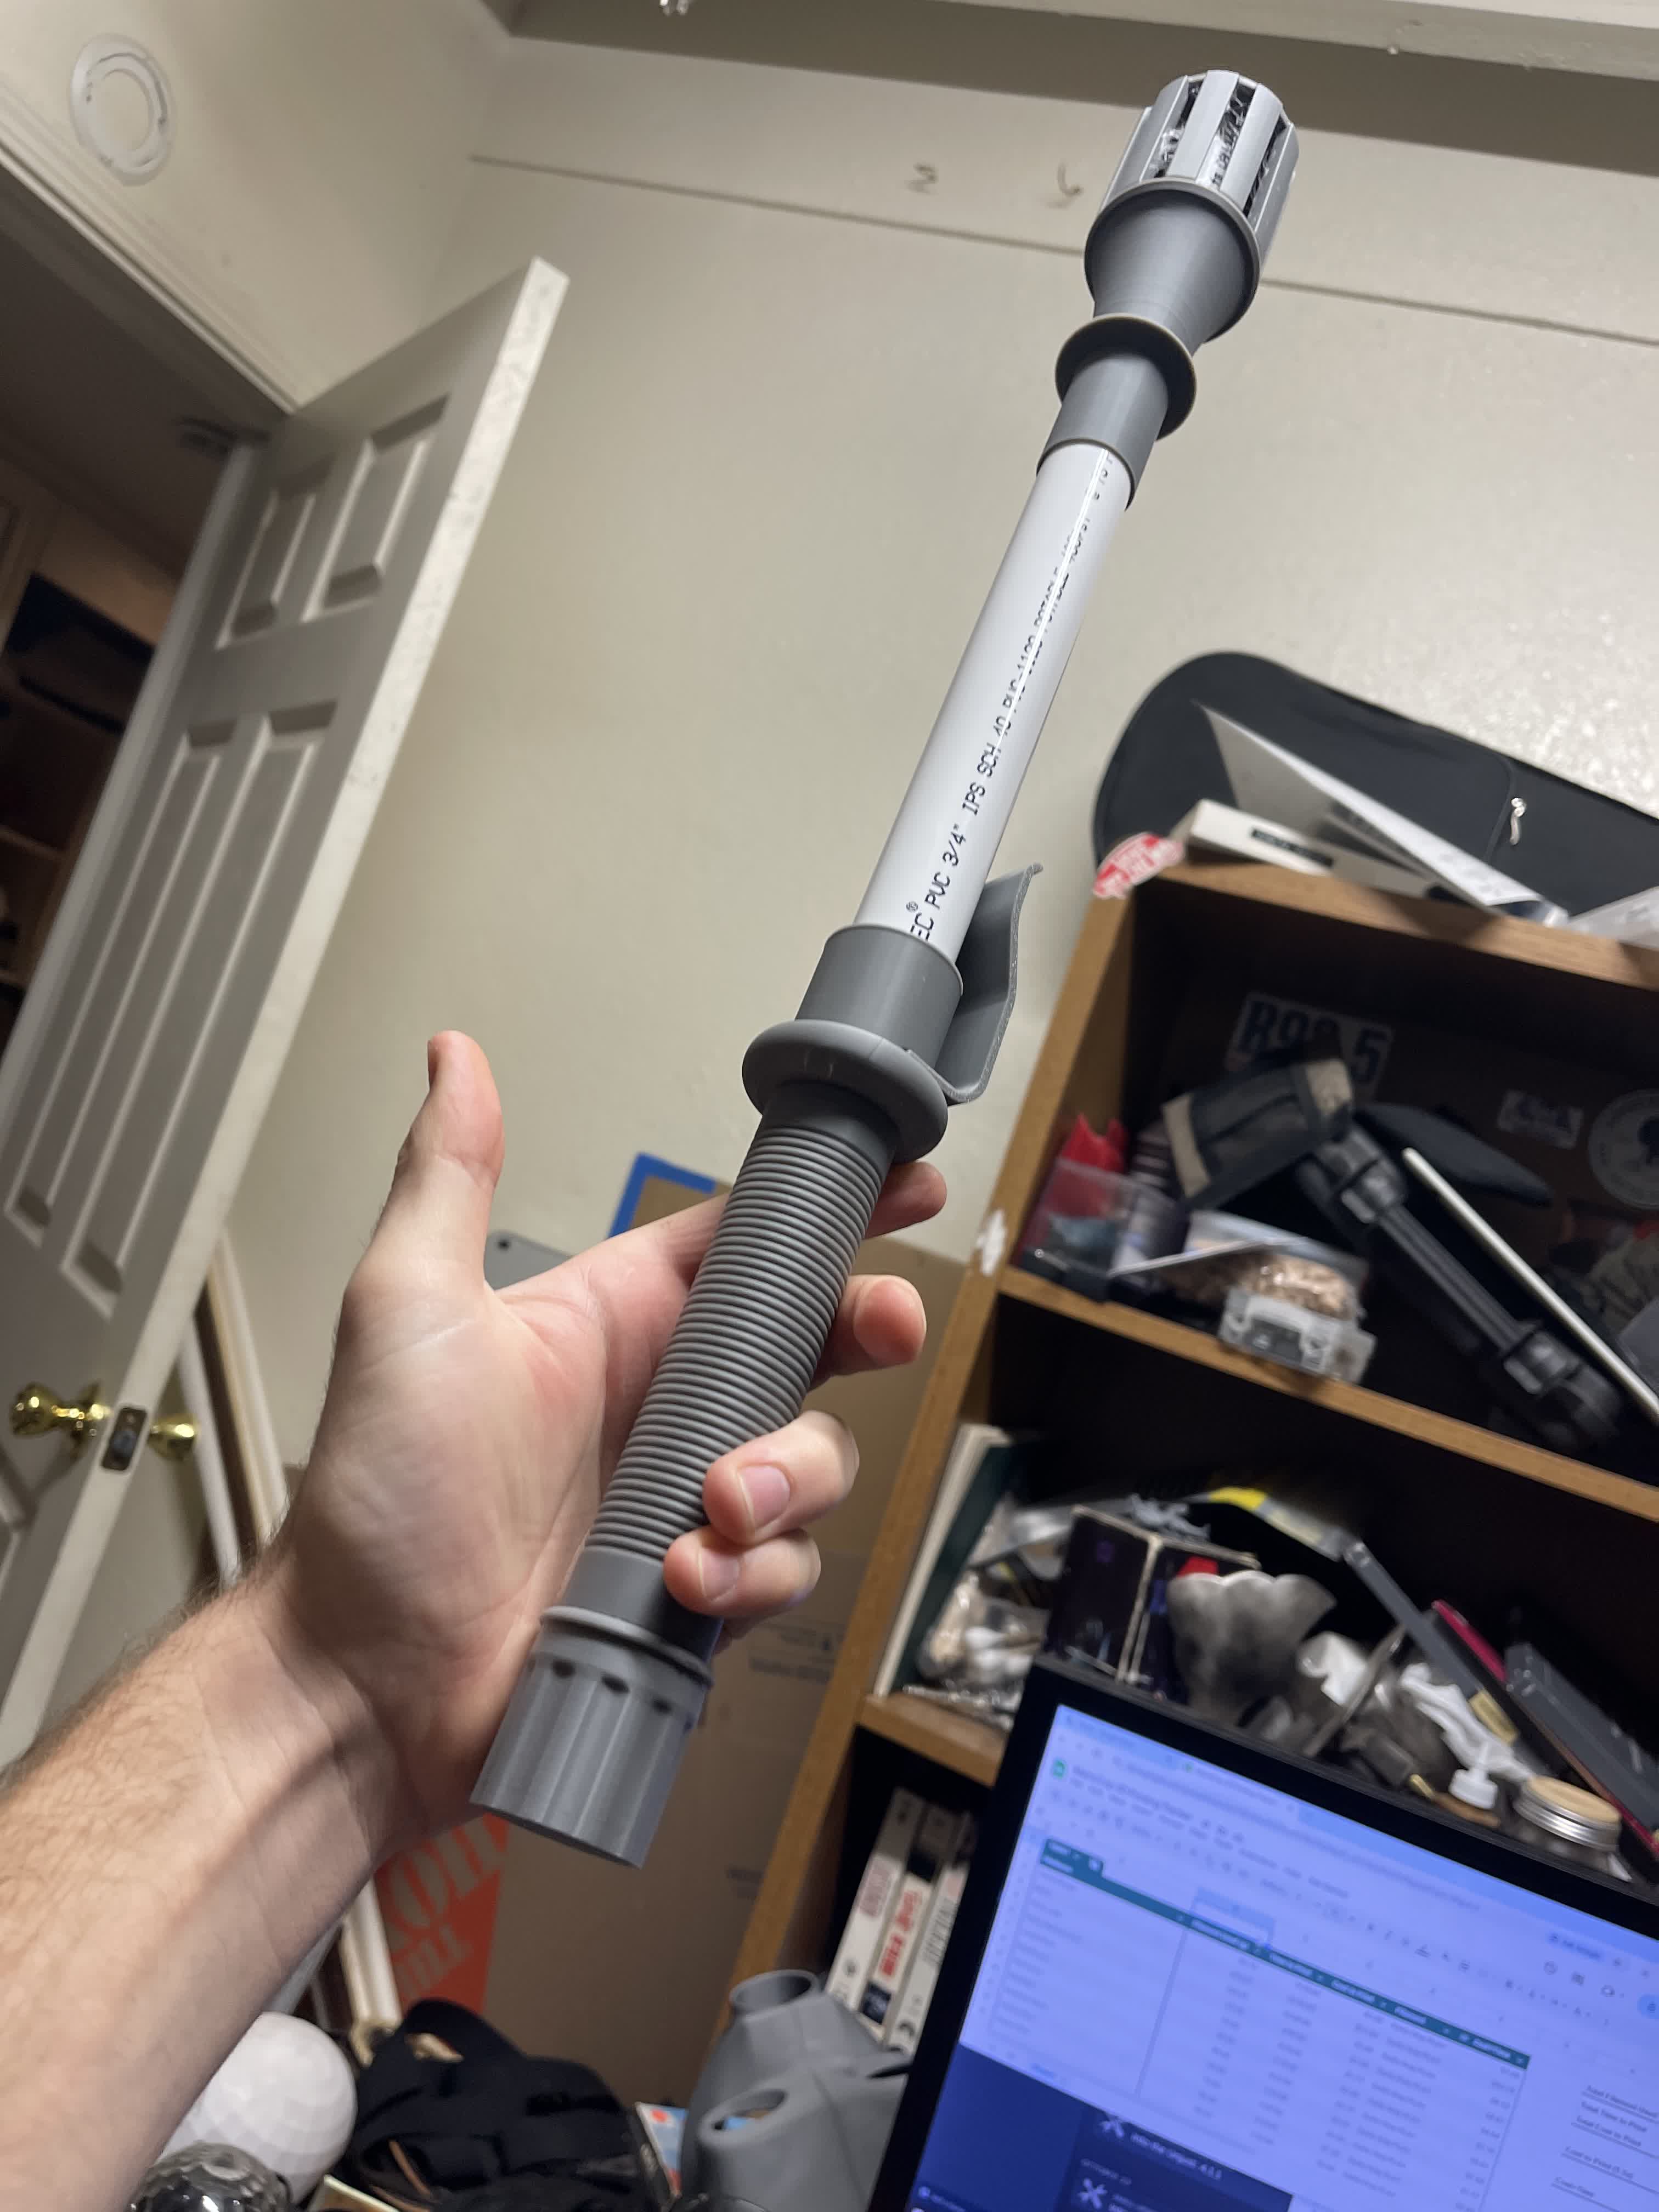
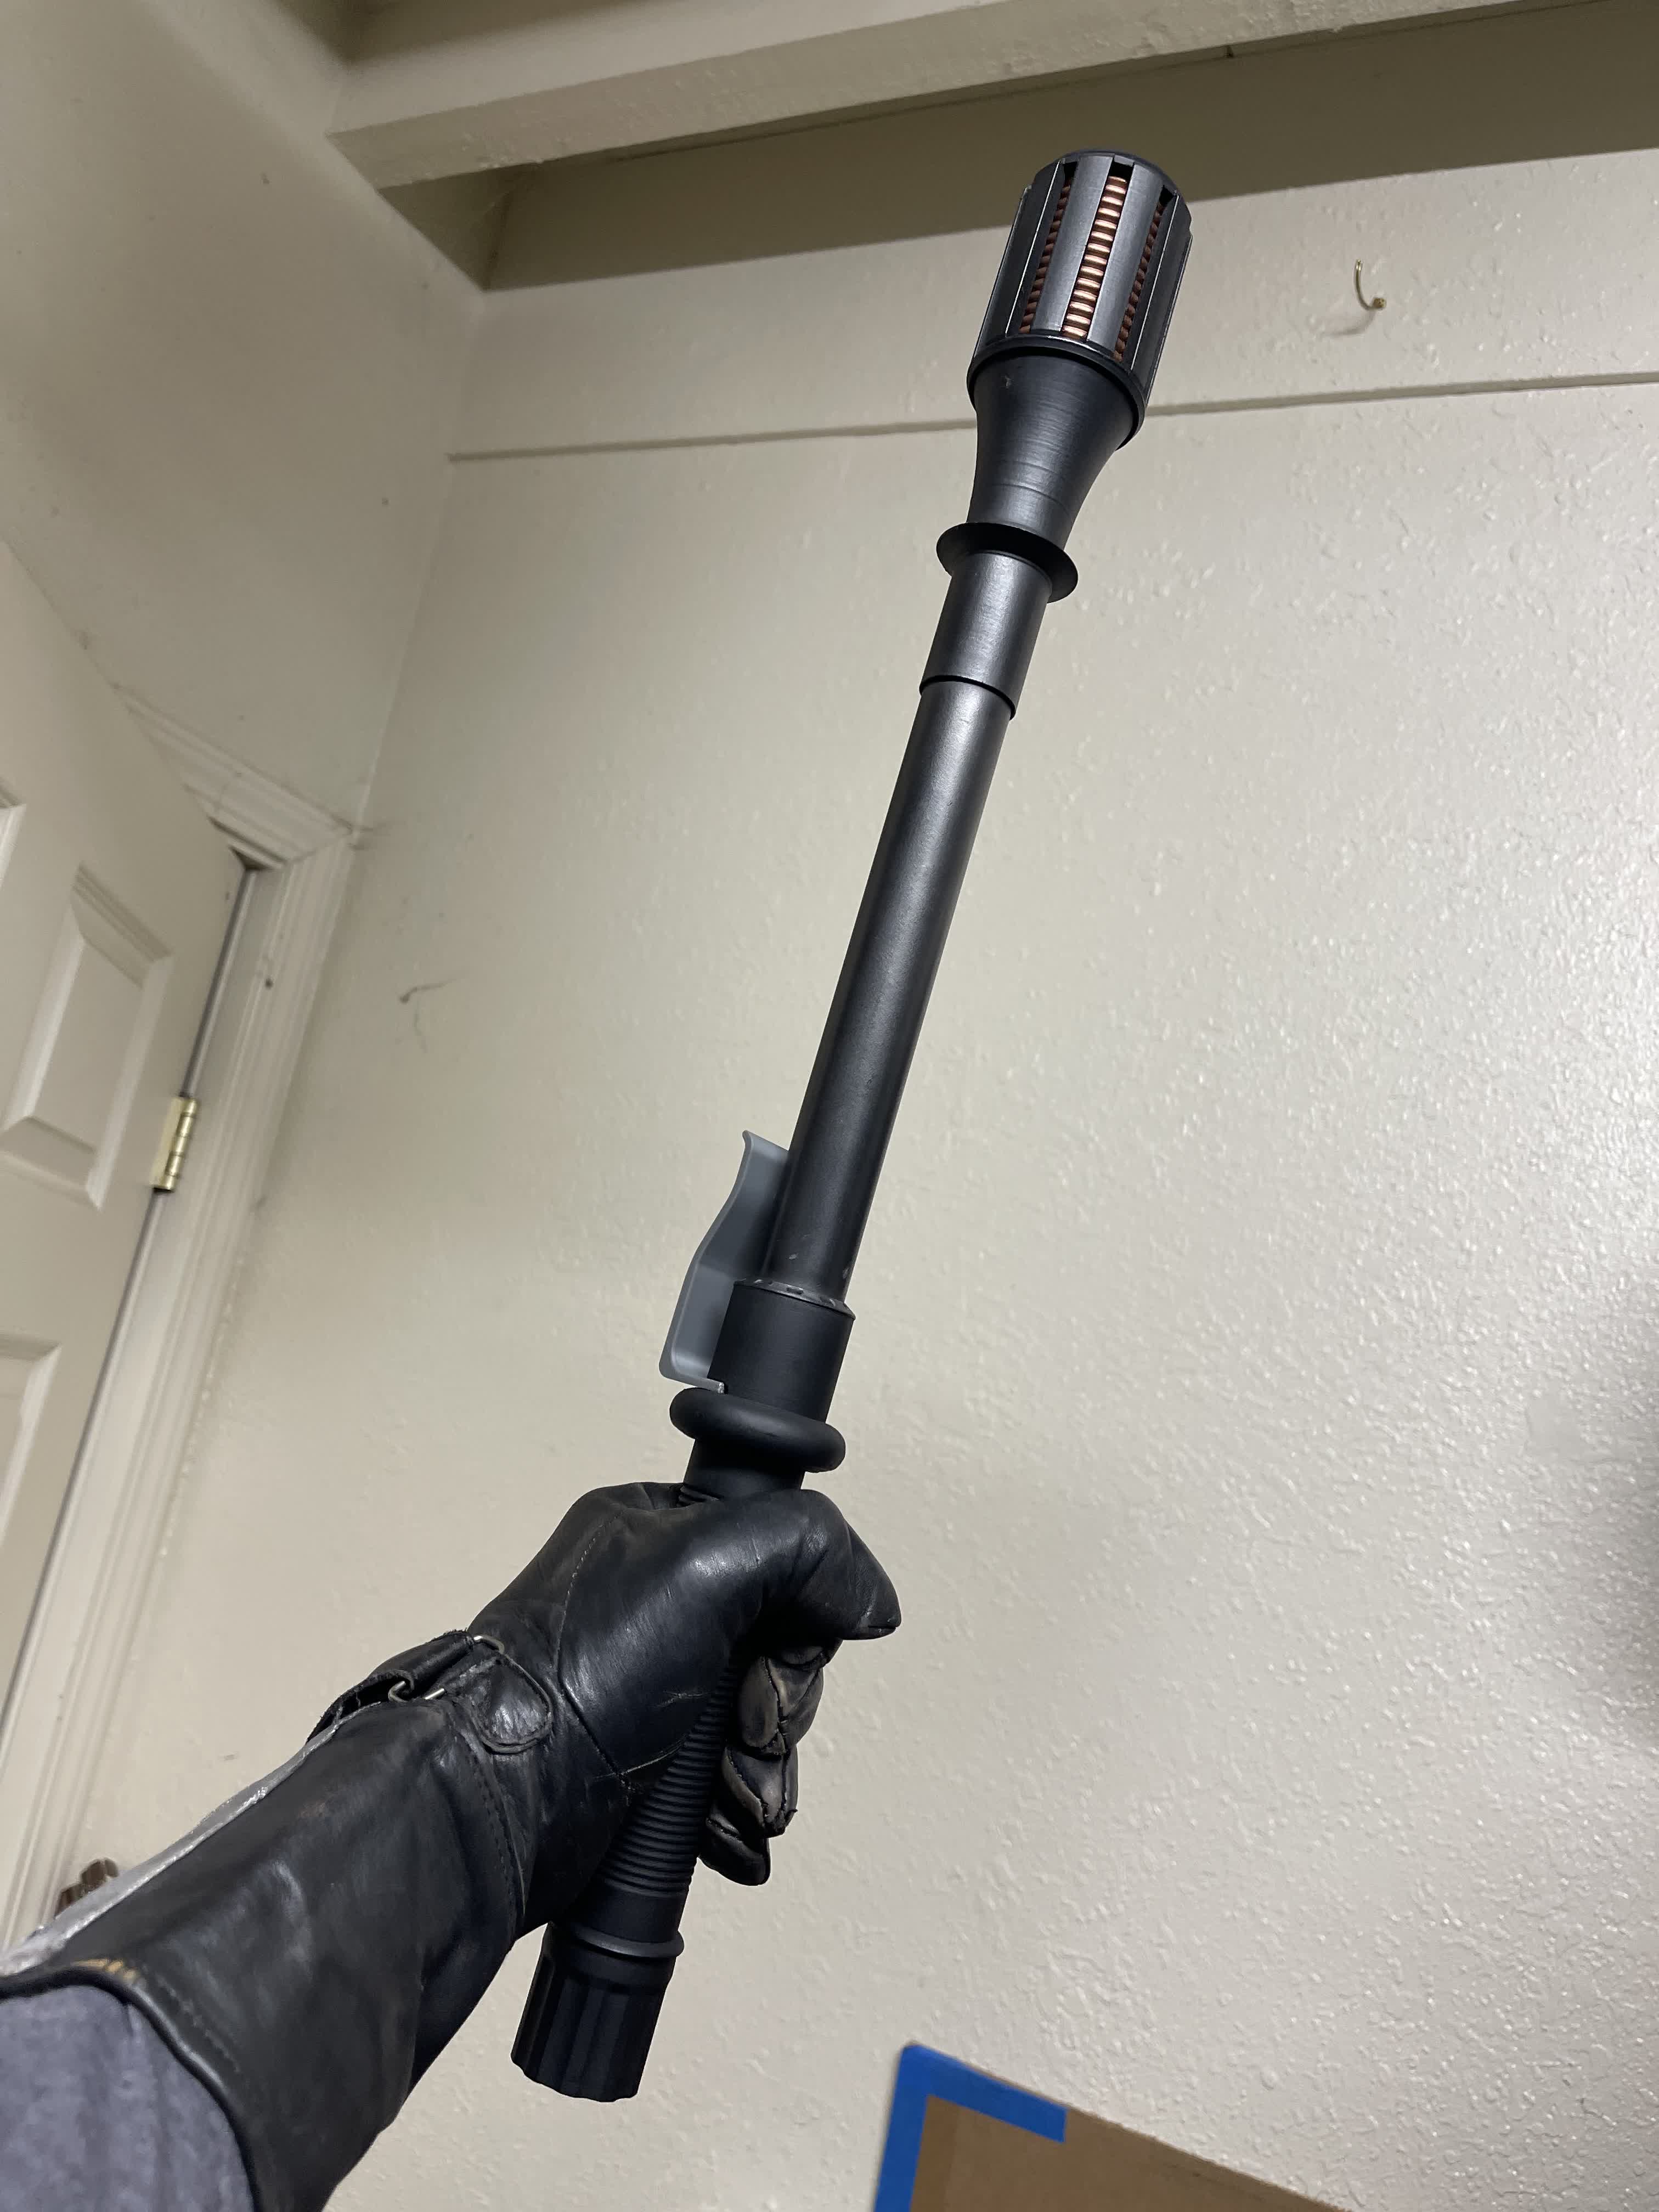
Built around a PVC pipe core with 3D-printed components, the stunstick became a good test of low-cost construction and high-finish presentation. The goal was something sturdy enough to handle, but polished enough to read as a convincing in-universe prop.
The stunstick started as a PVC core and a handful of printed fittings, then got sanded, painted, and tuned until it felt like one convincing object instead of stacked parts.Dialing in surface finish and color contrast did a lot of the heavy lifting here. It is a simple build structurally, but the presentation matters.
Sheet 1 of 10Sheet 2 of 10Sheet 3 of 10Sheet 4 of 10Sheet 5 of 10Sheet 6 of 10Sheet 7 of 10Sheet 8 of 10Sheet 9 of 10Sheet 10 of 10
1 / 10
Belt Boxes
The belt boxes were reverse engineered with printability, serviceability, and lighting where appropriate in mind. I designed the lit boxes around readily available puck-light components, while the switch box stayed focused on silhouette, assembly, and practical belt mounting.
The radio box was one of the more recognizable pieces, so getting the silhouette and front-face details right mattered more than adding unnecessary complexity.The pager box had a simpler face, which meant proportion and panel breaks had to carry more of the visual identity.The switch box sits in the same family as the others, but the vented face and blockier construction give it its own personality on the belt.
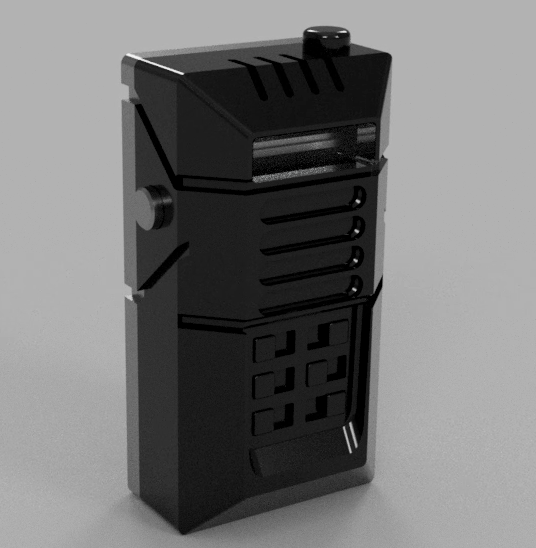
Radio Box
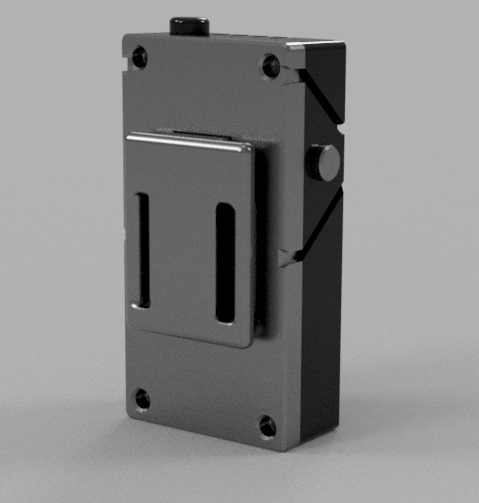
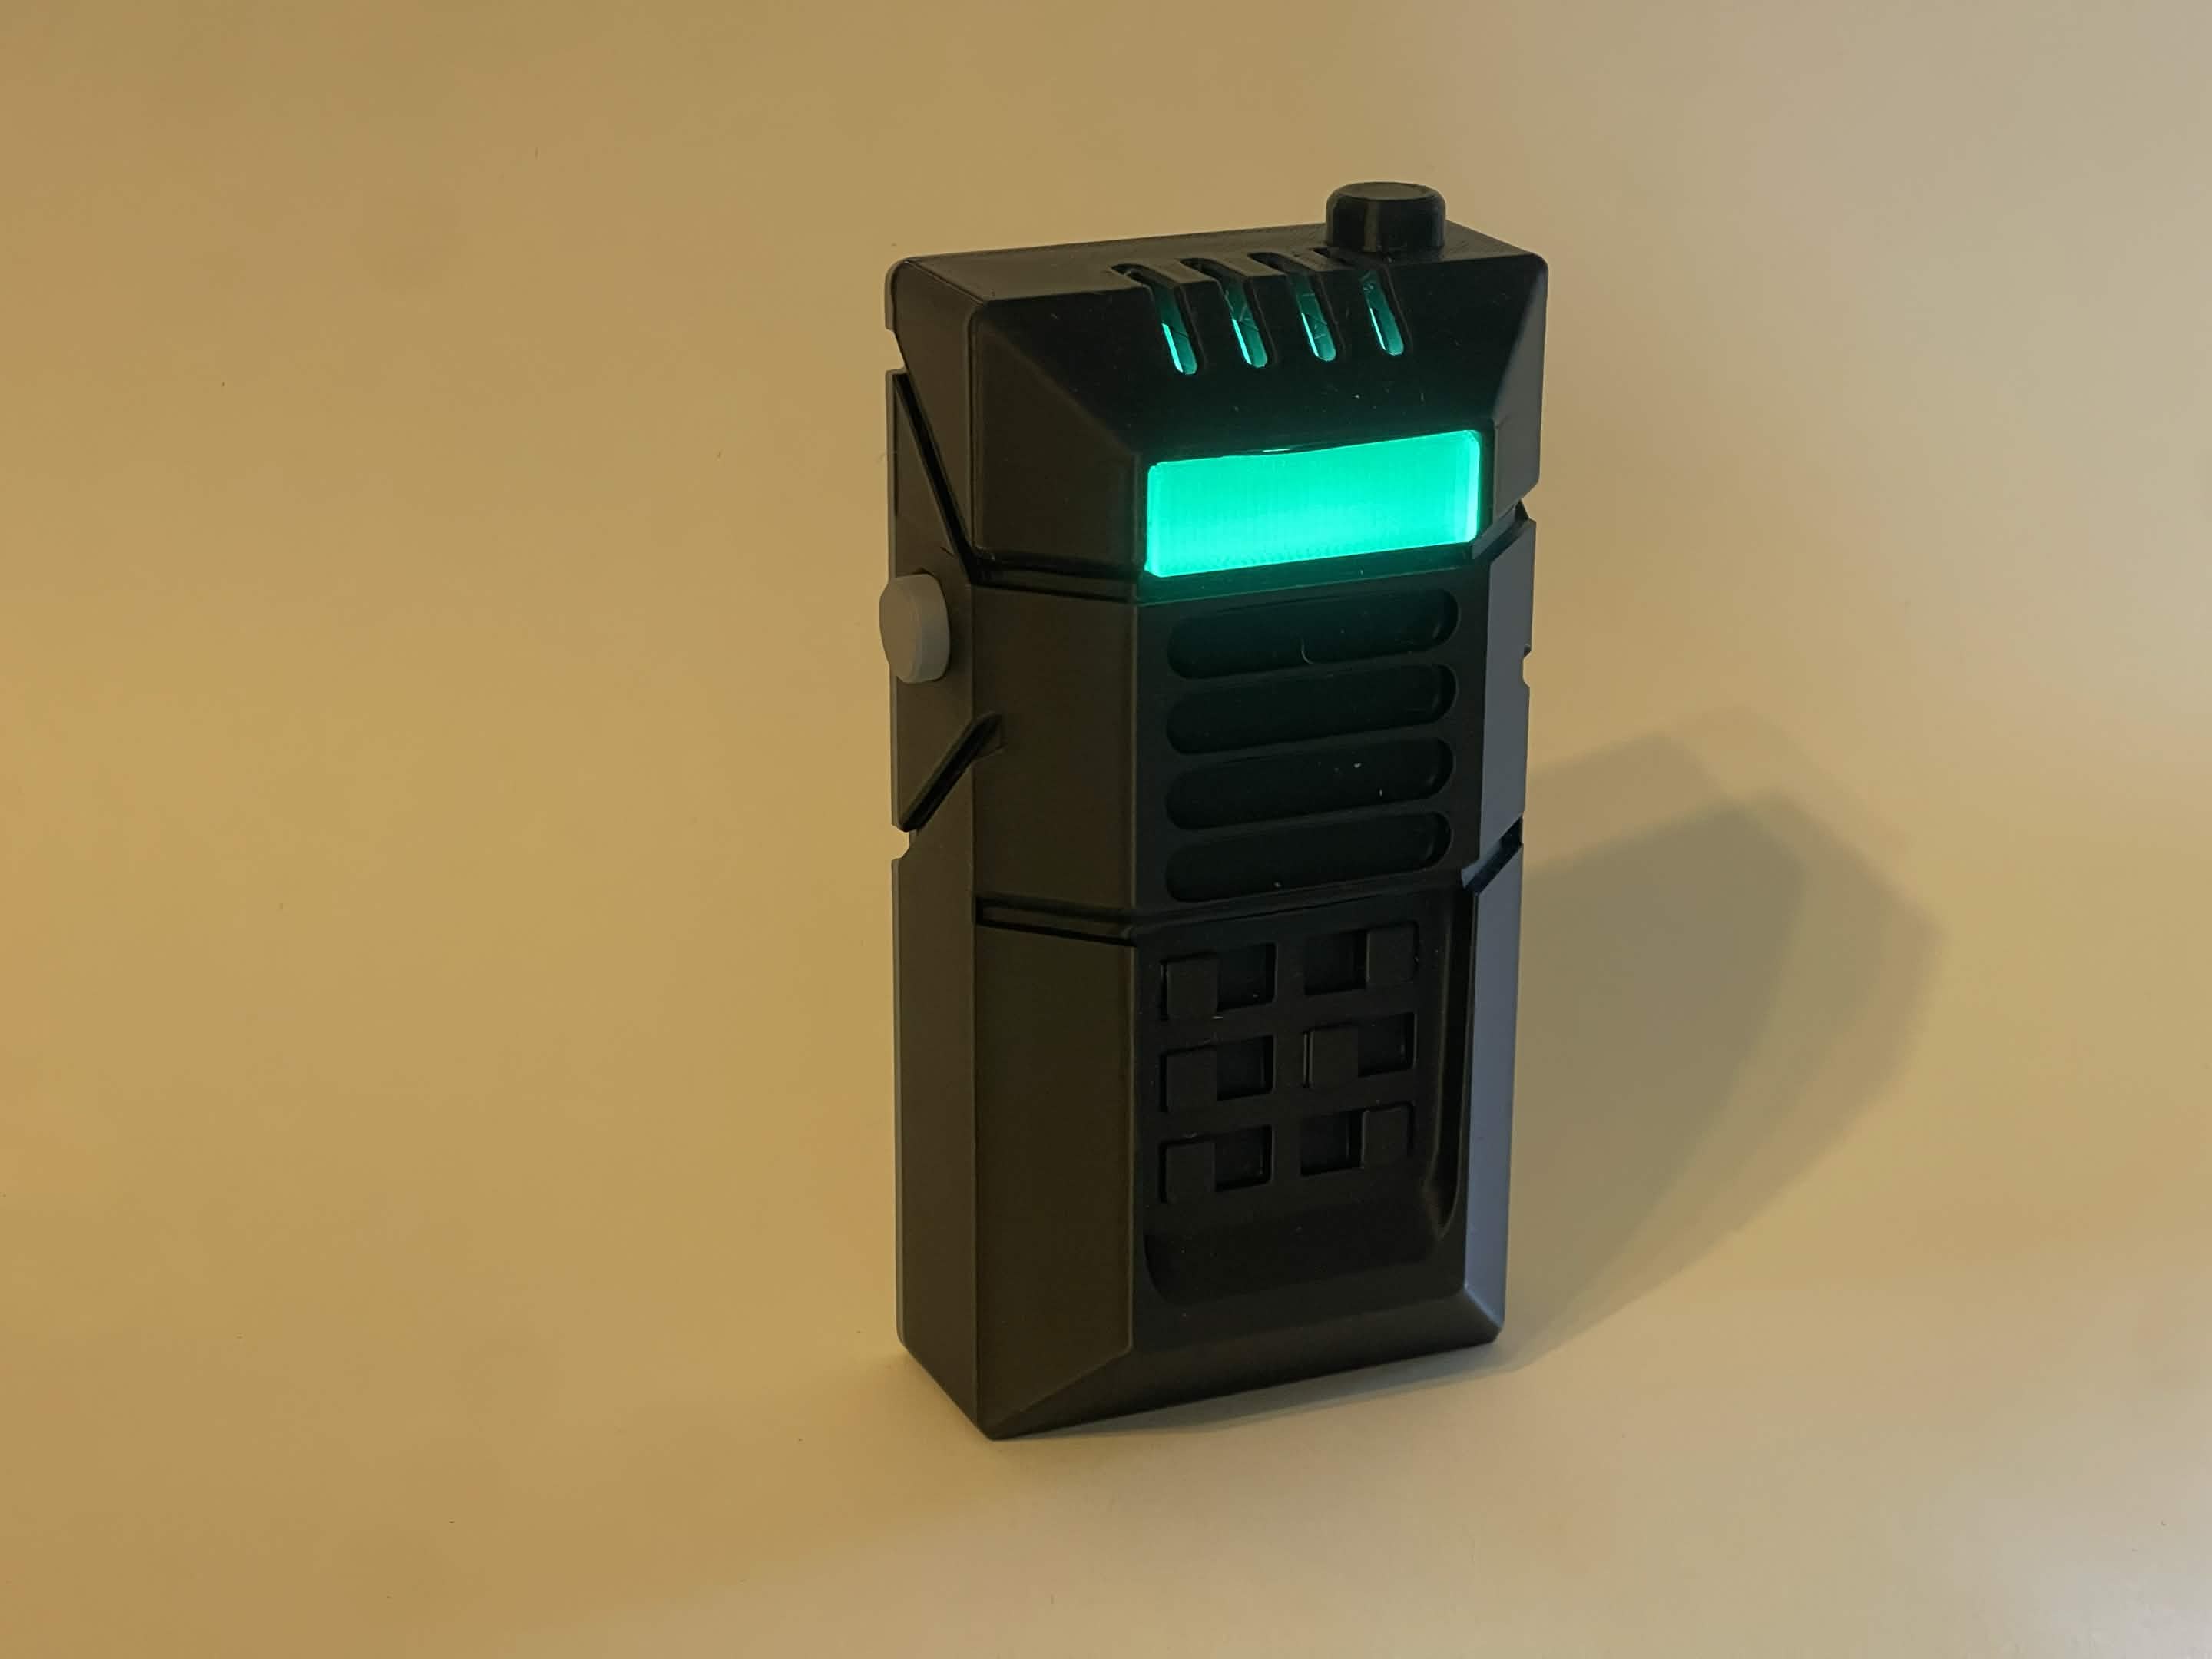
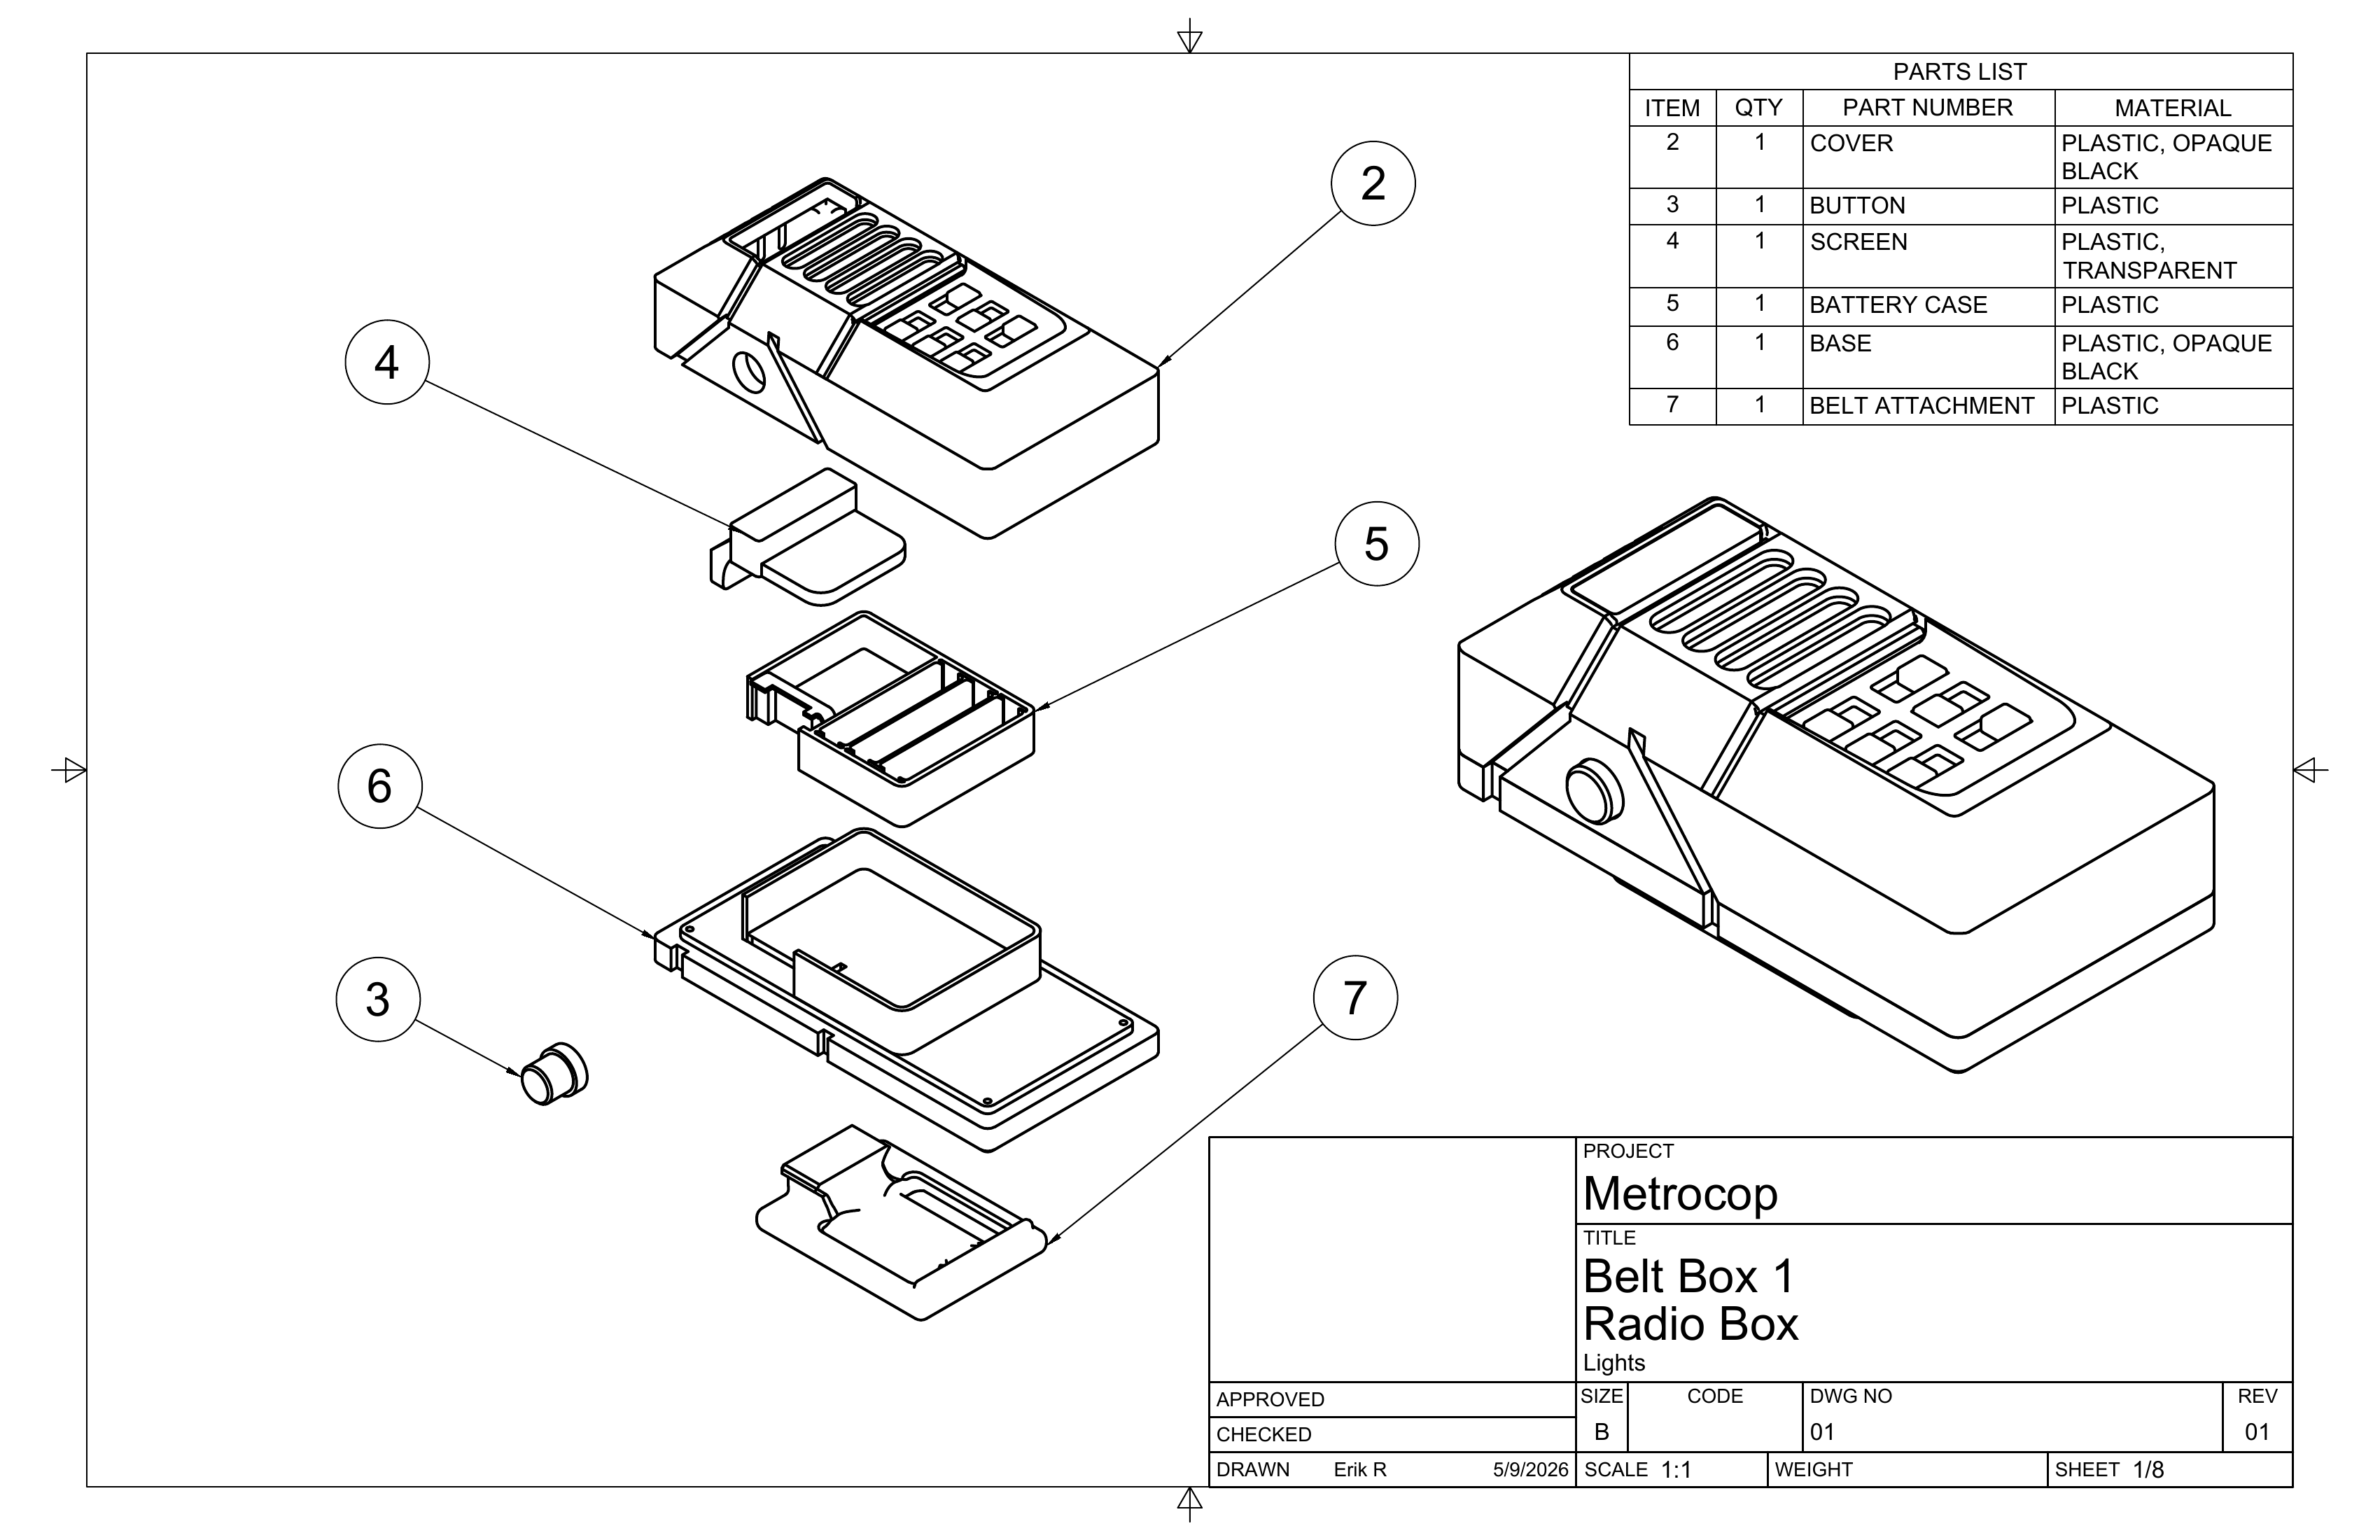
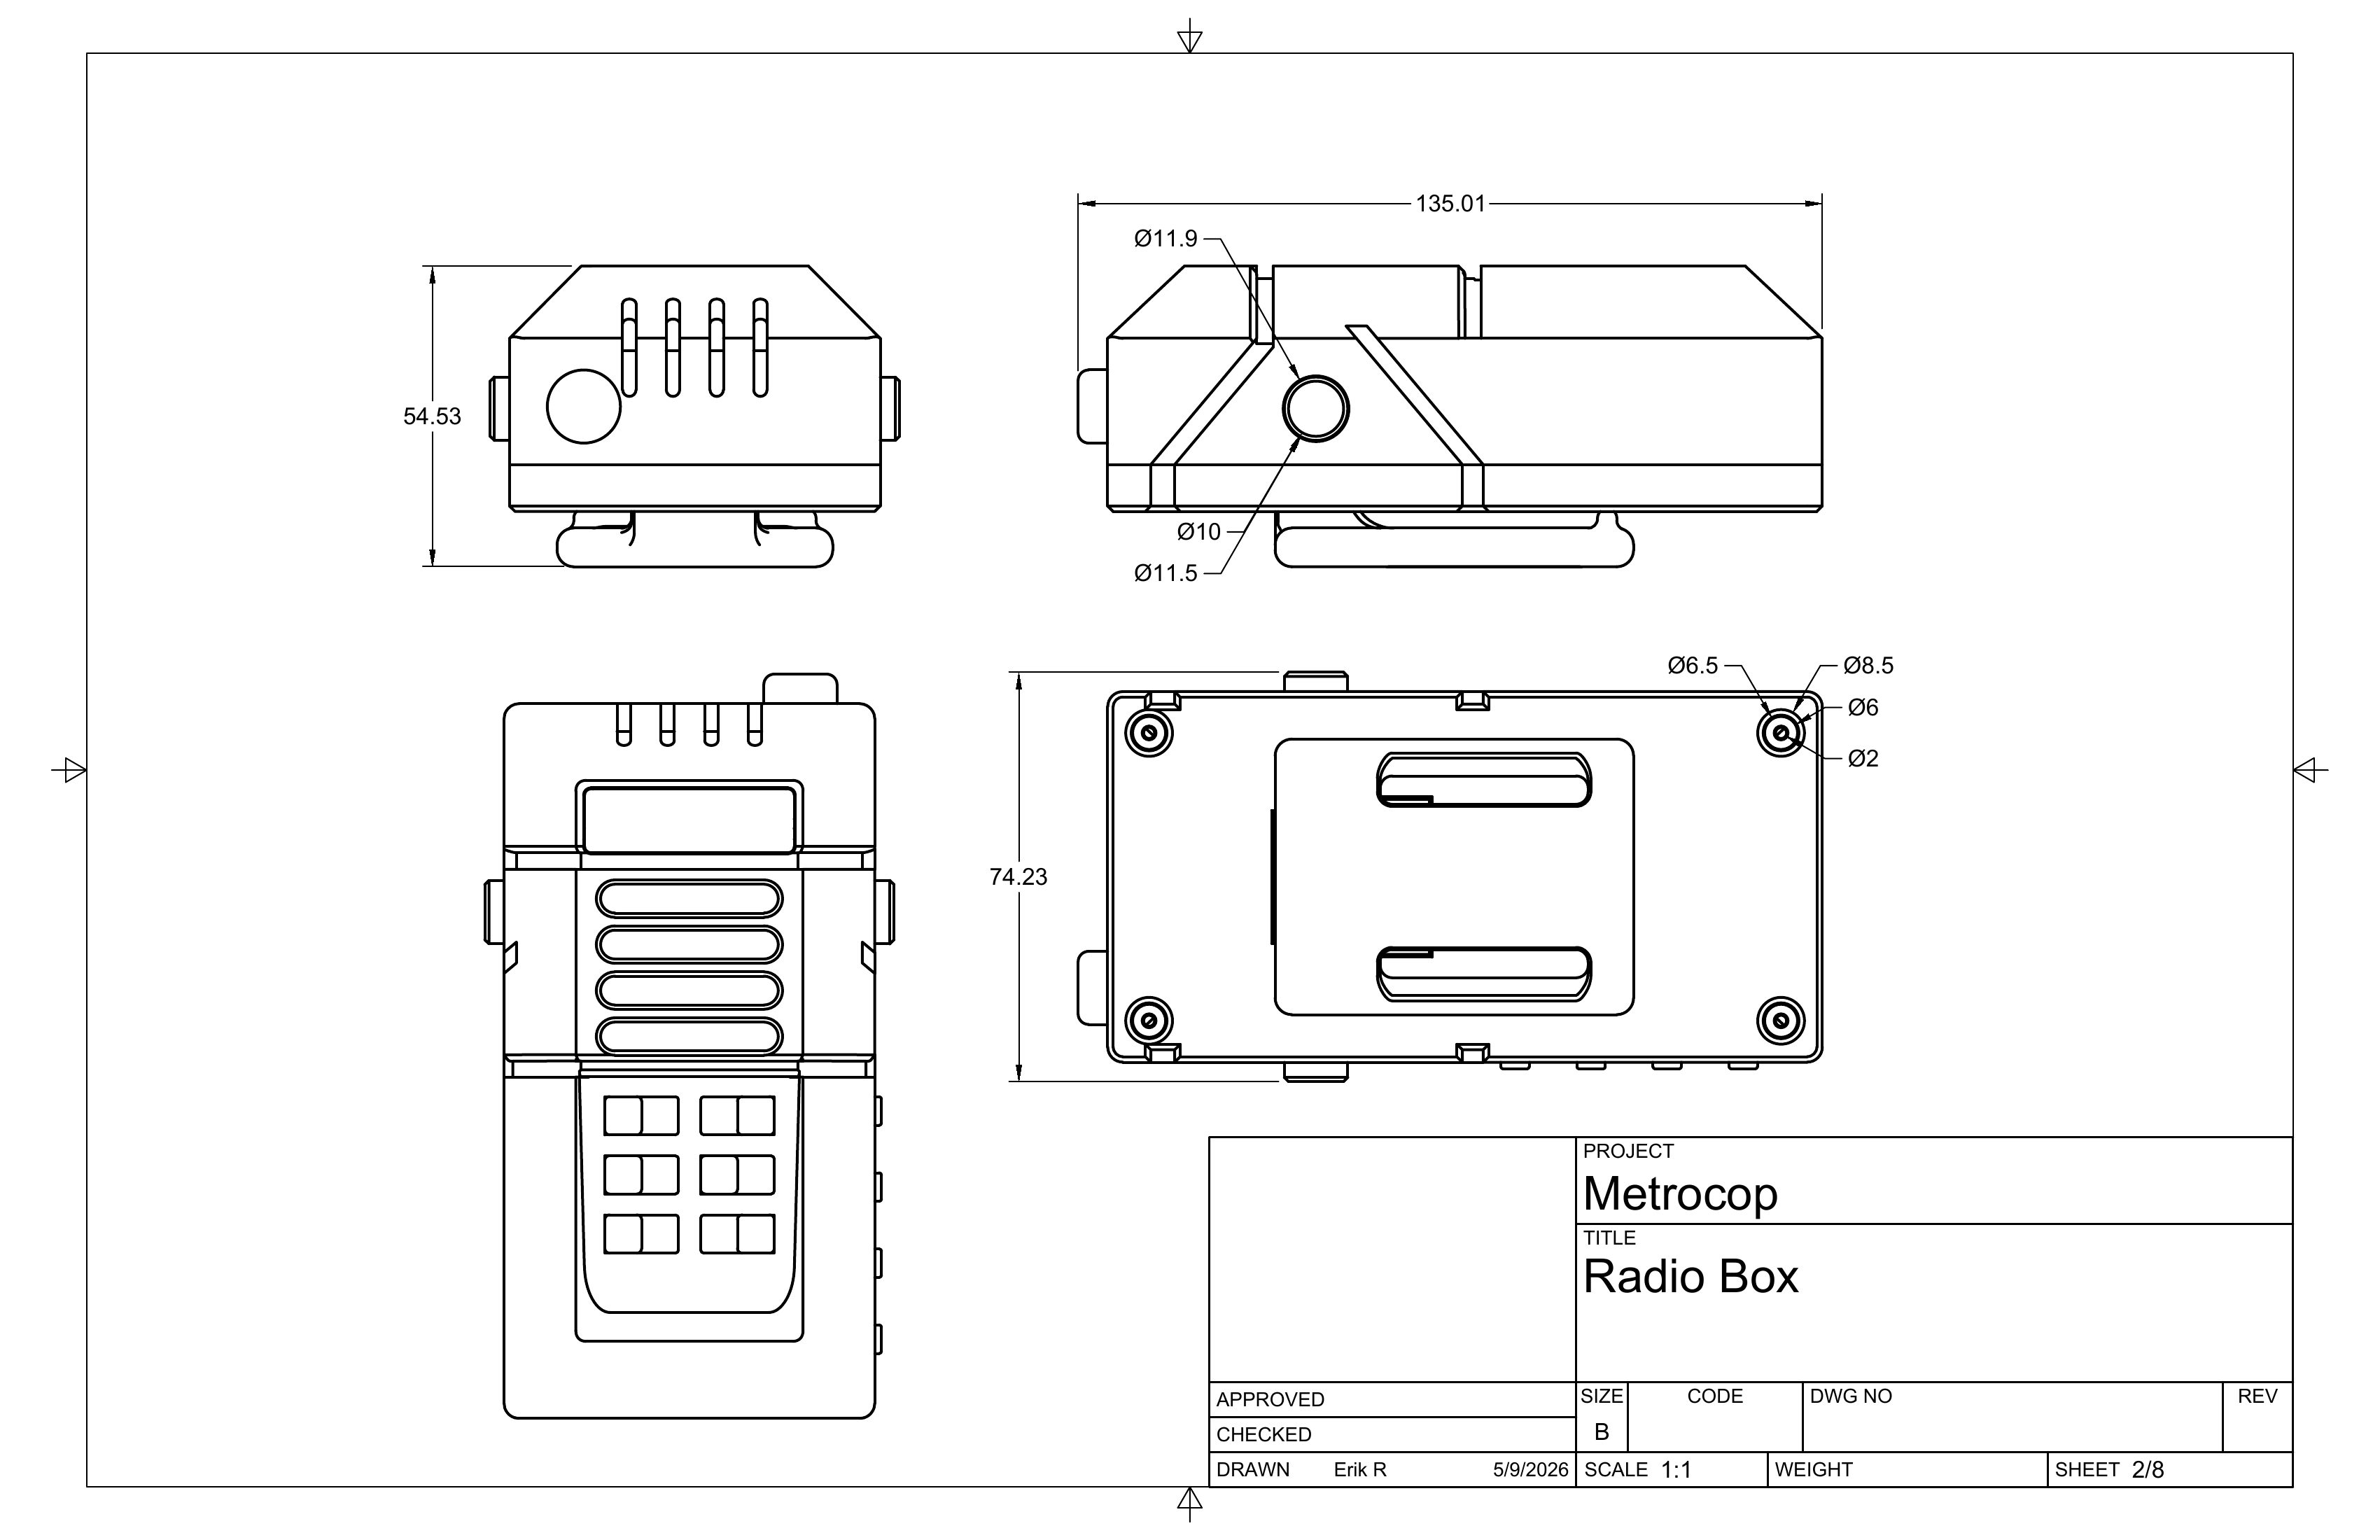
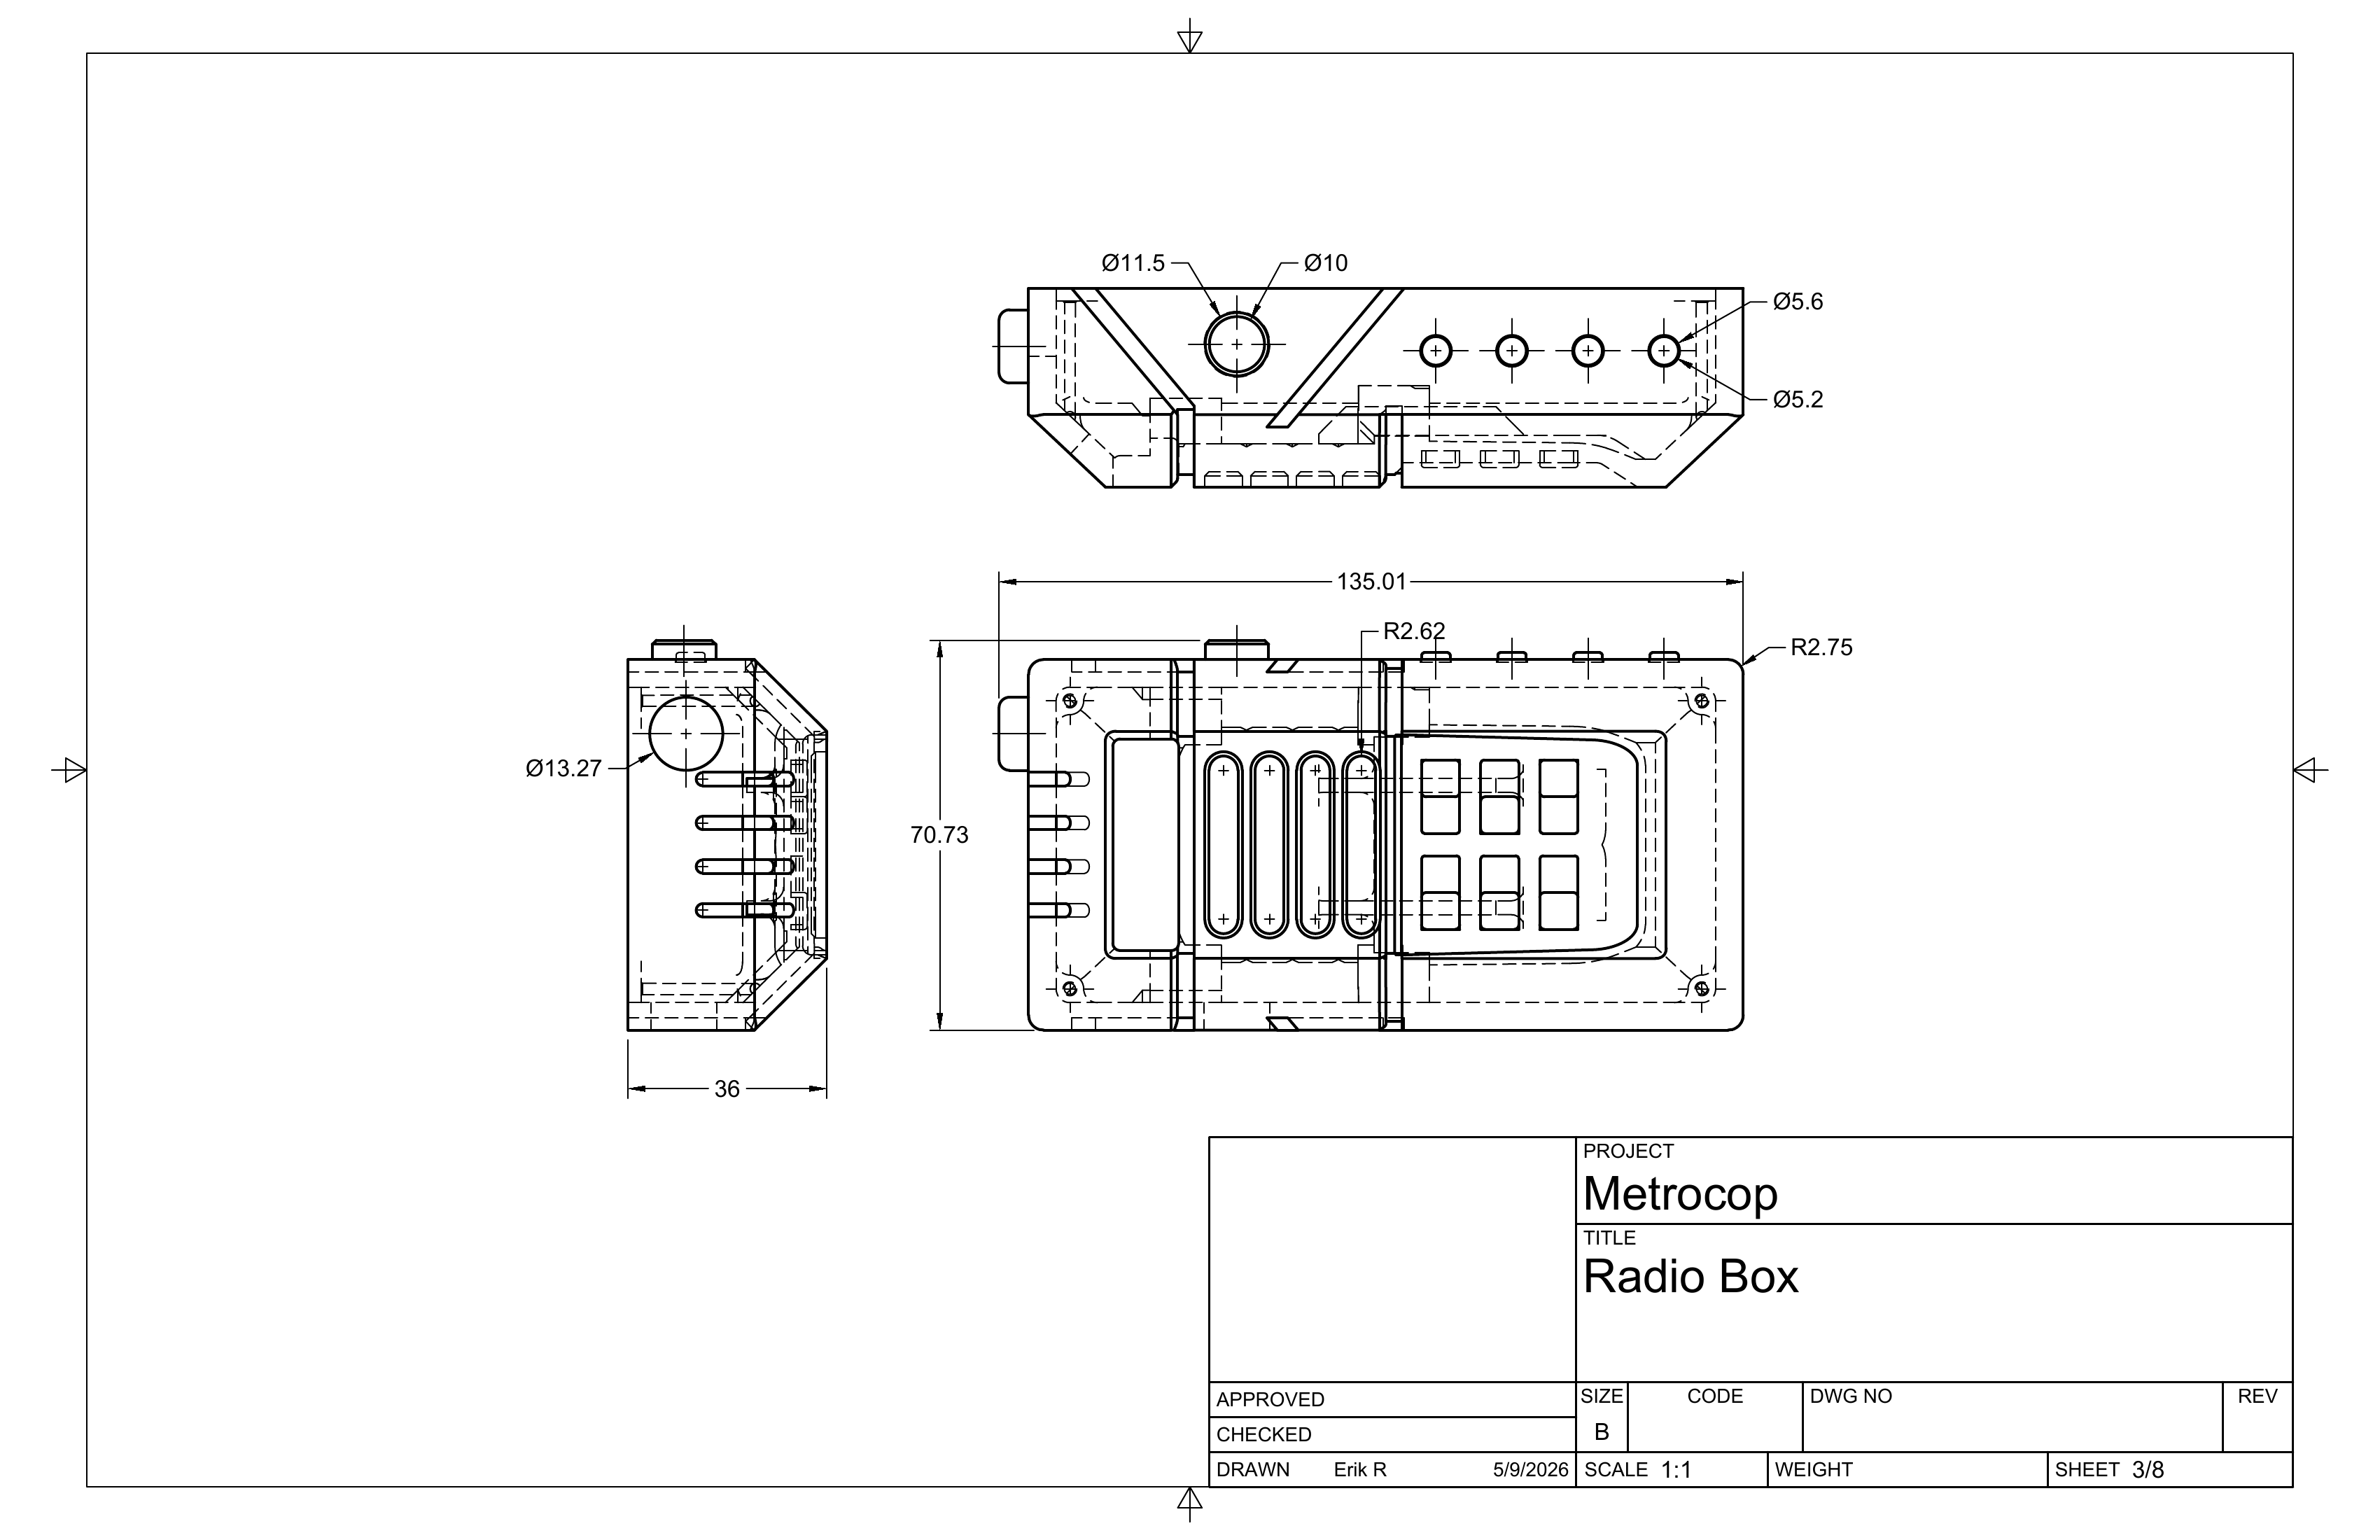
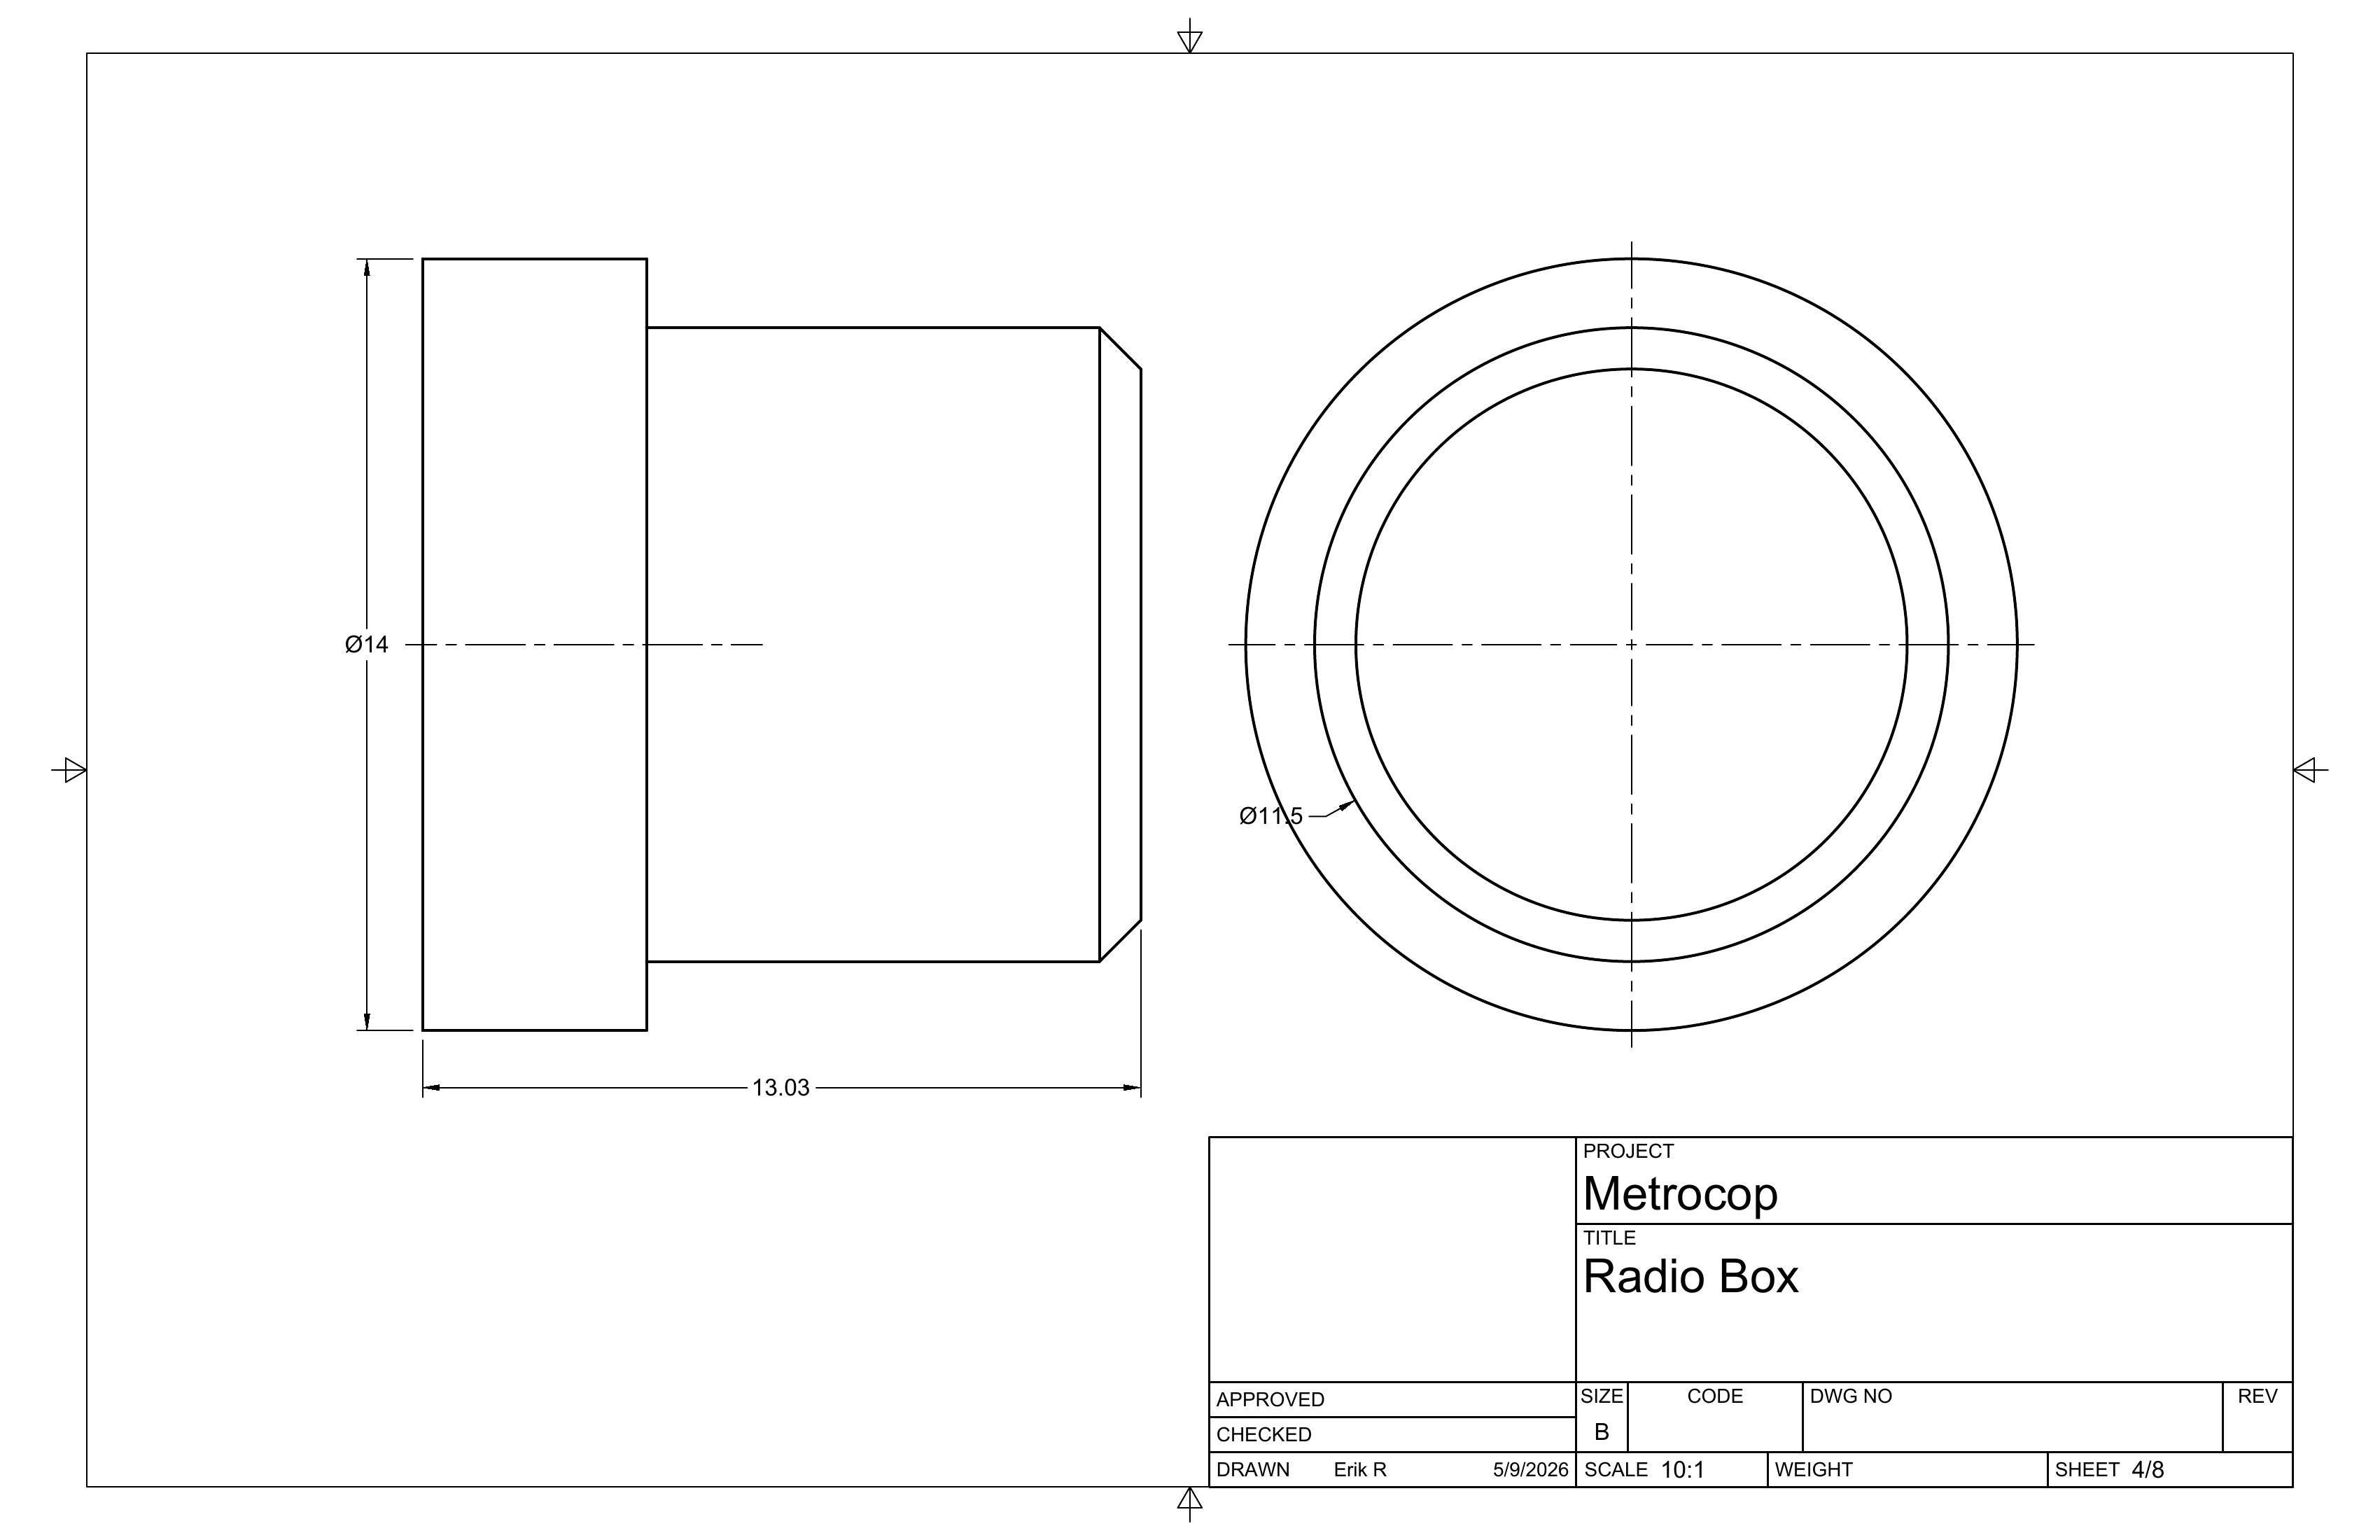
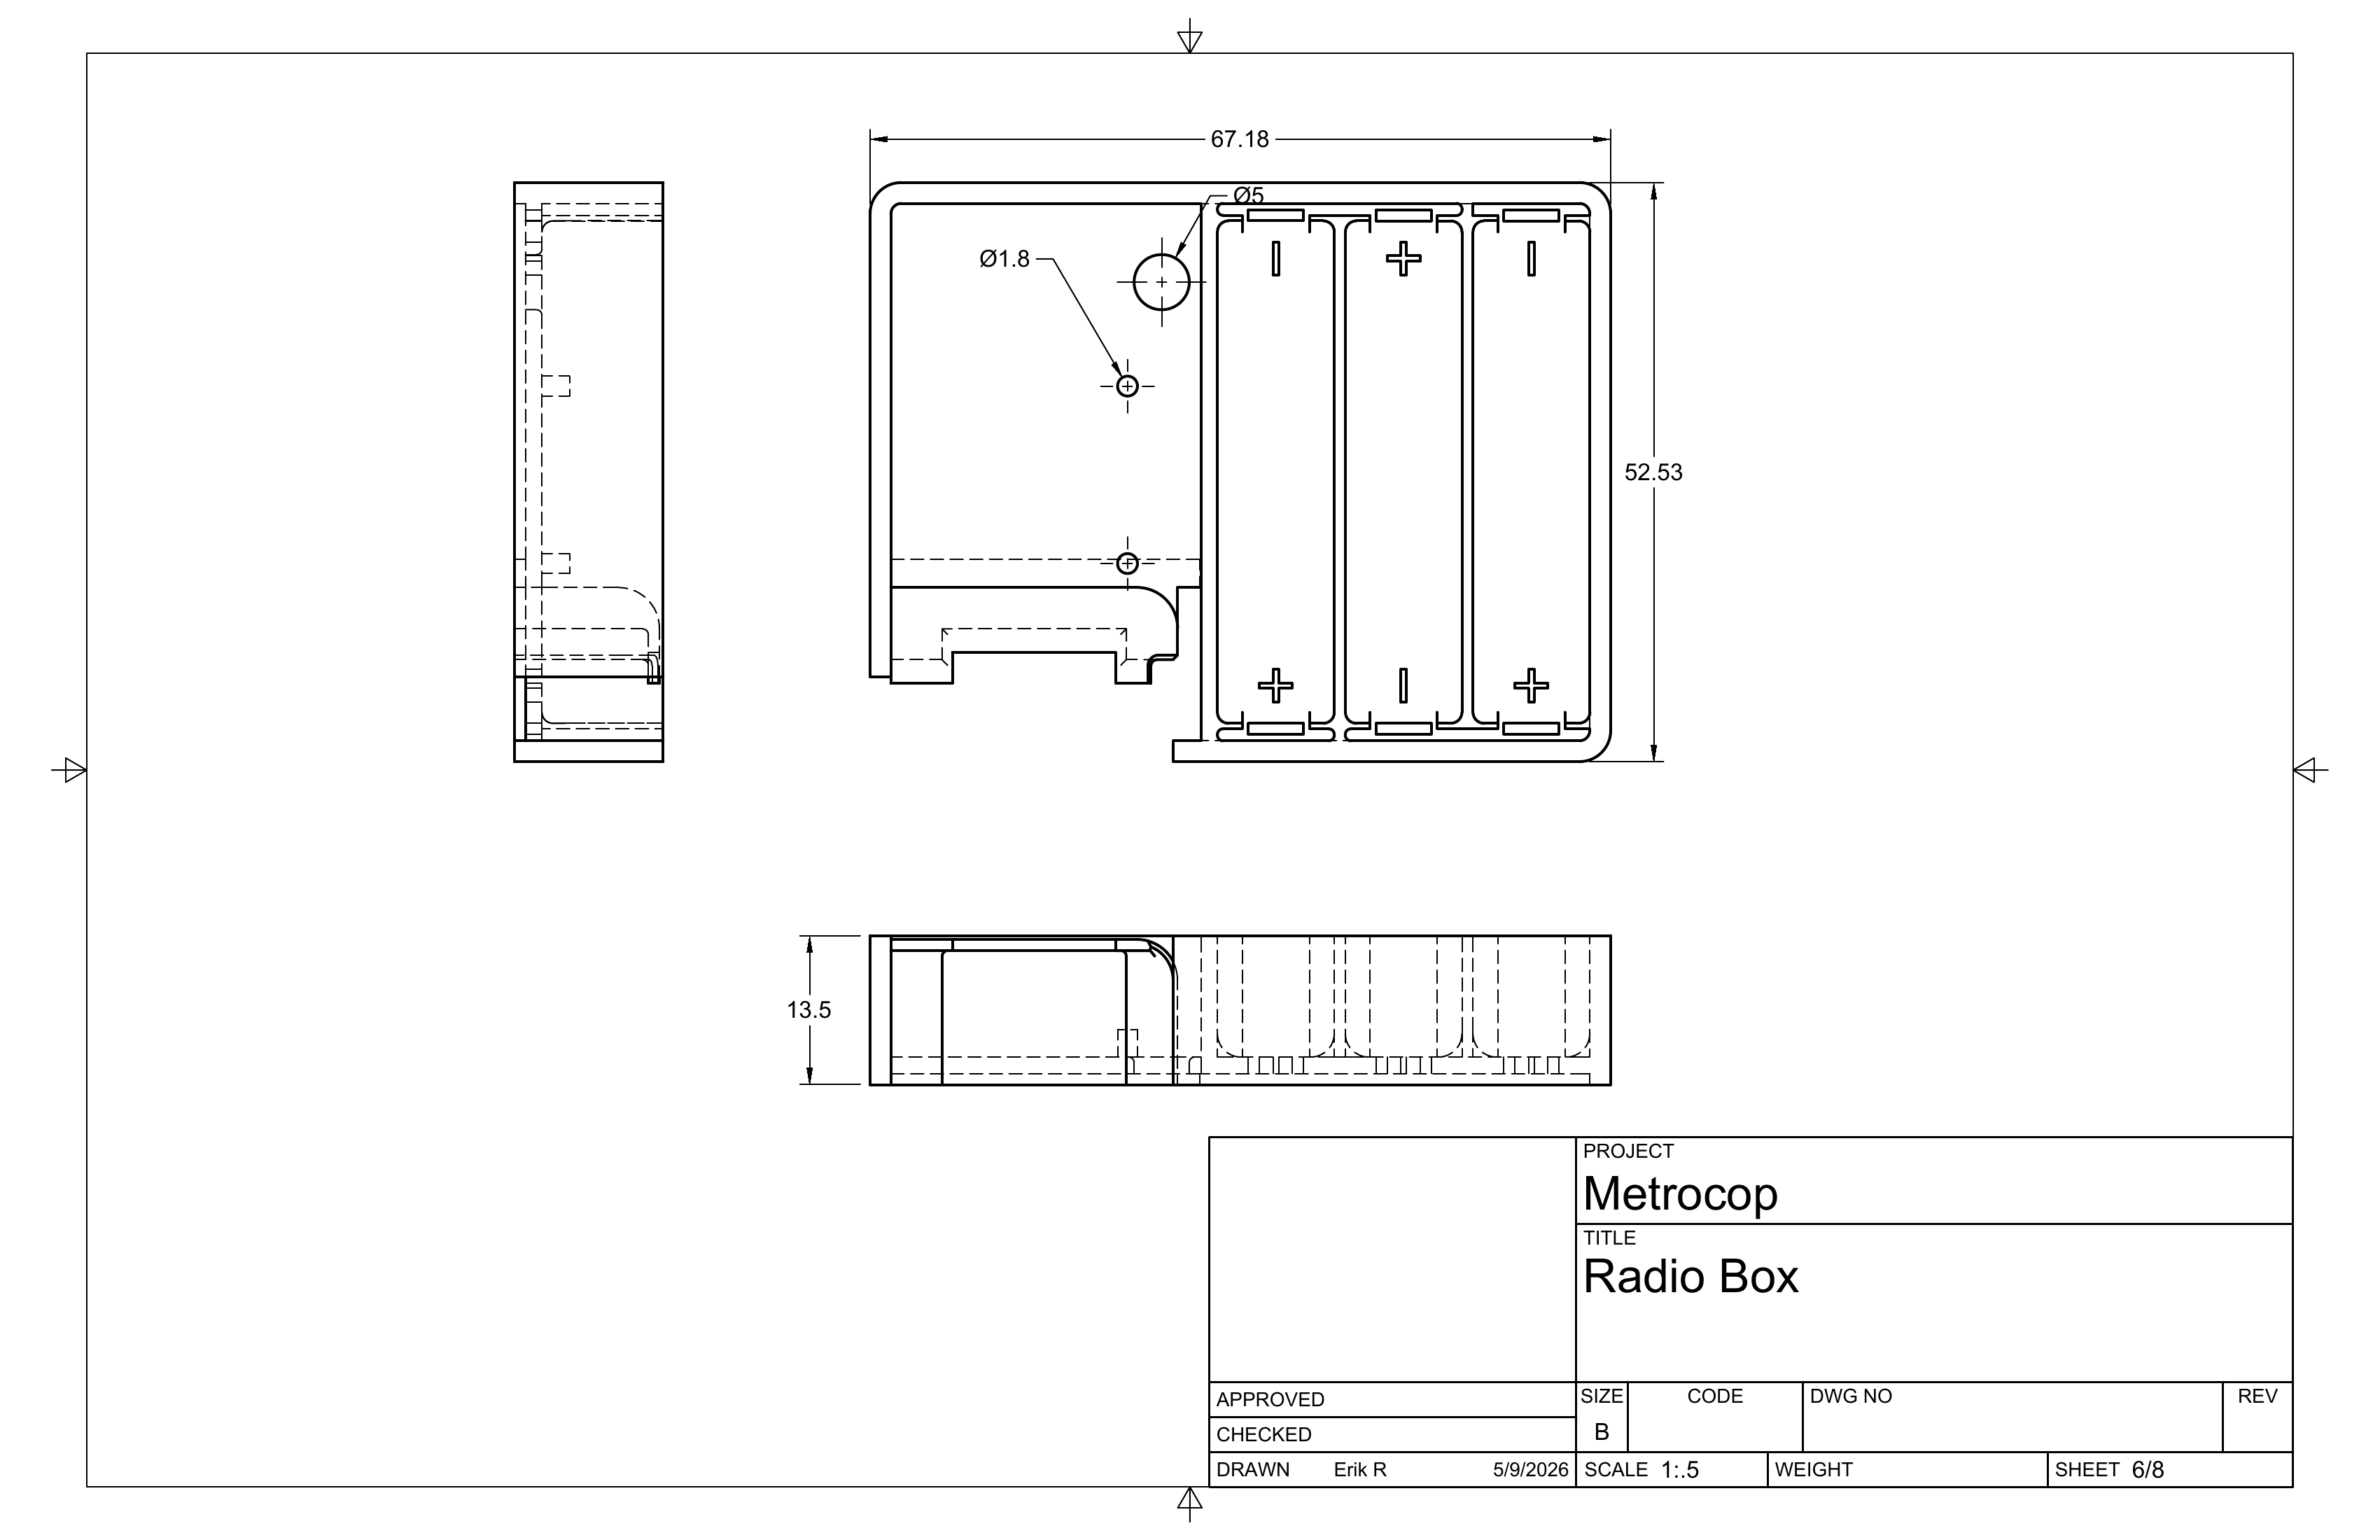
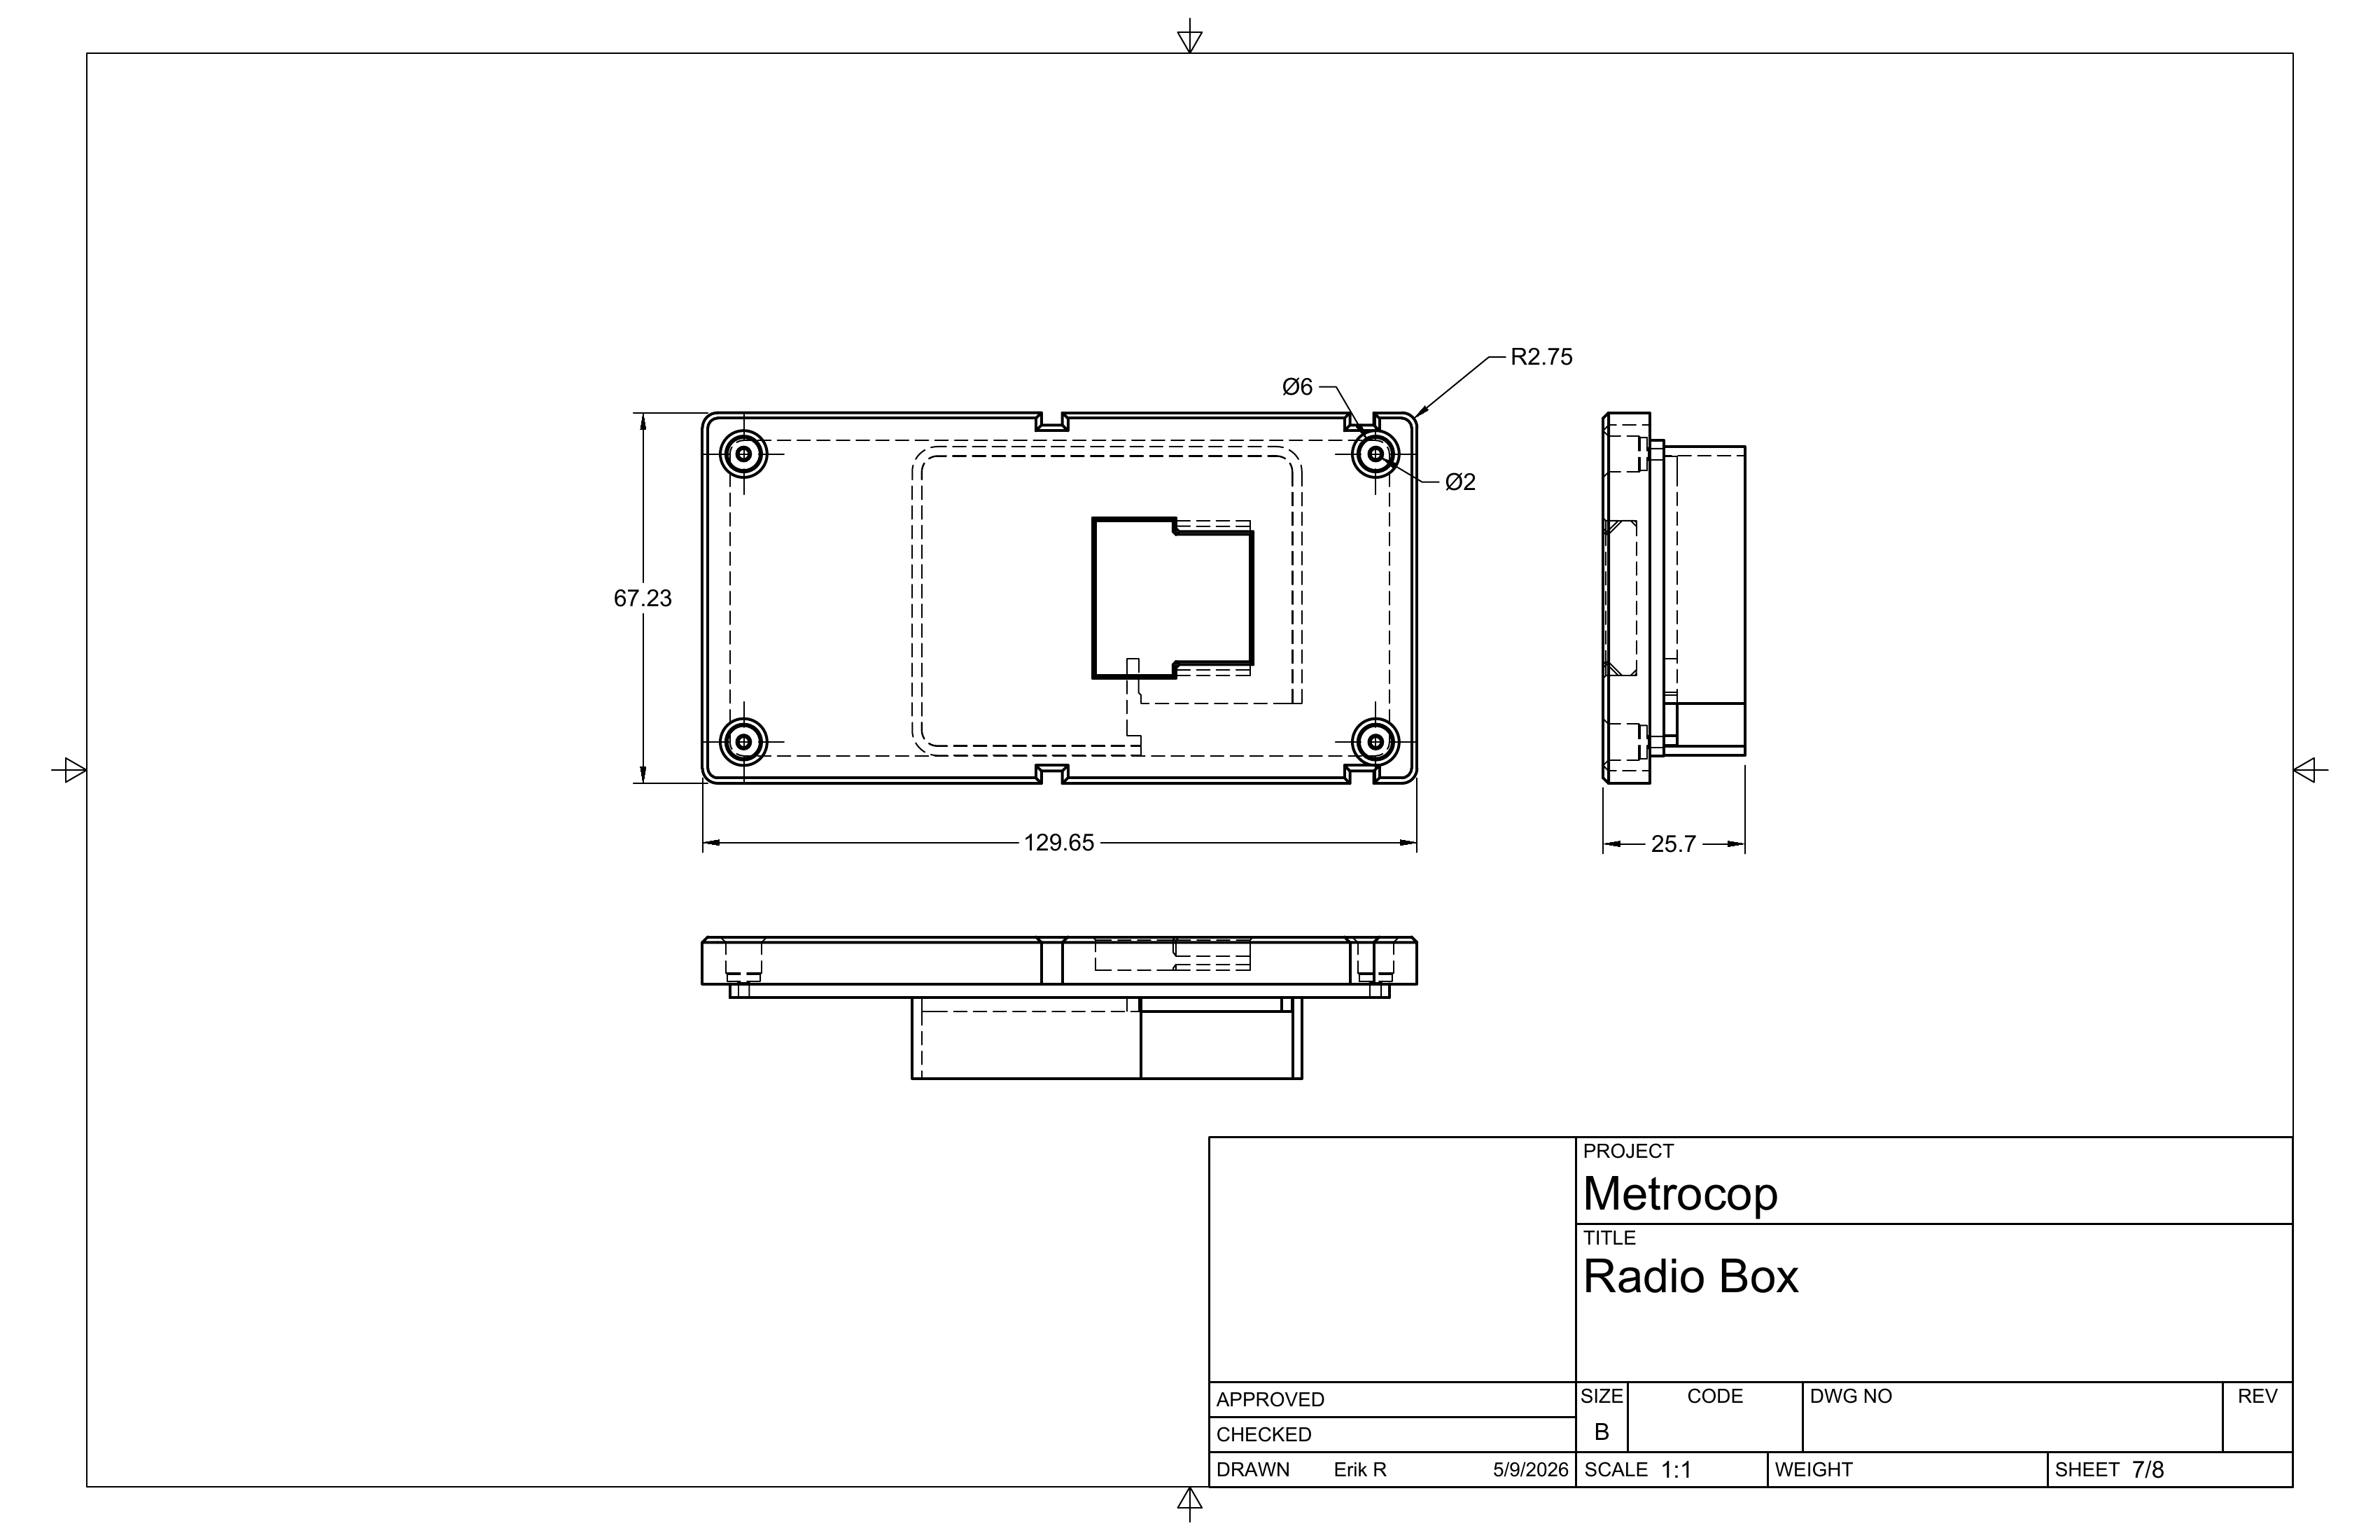
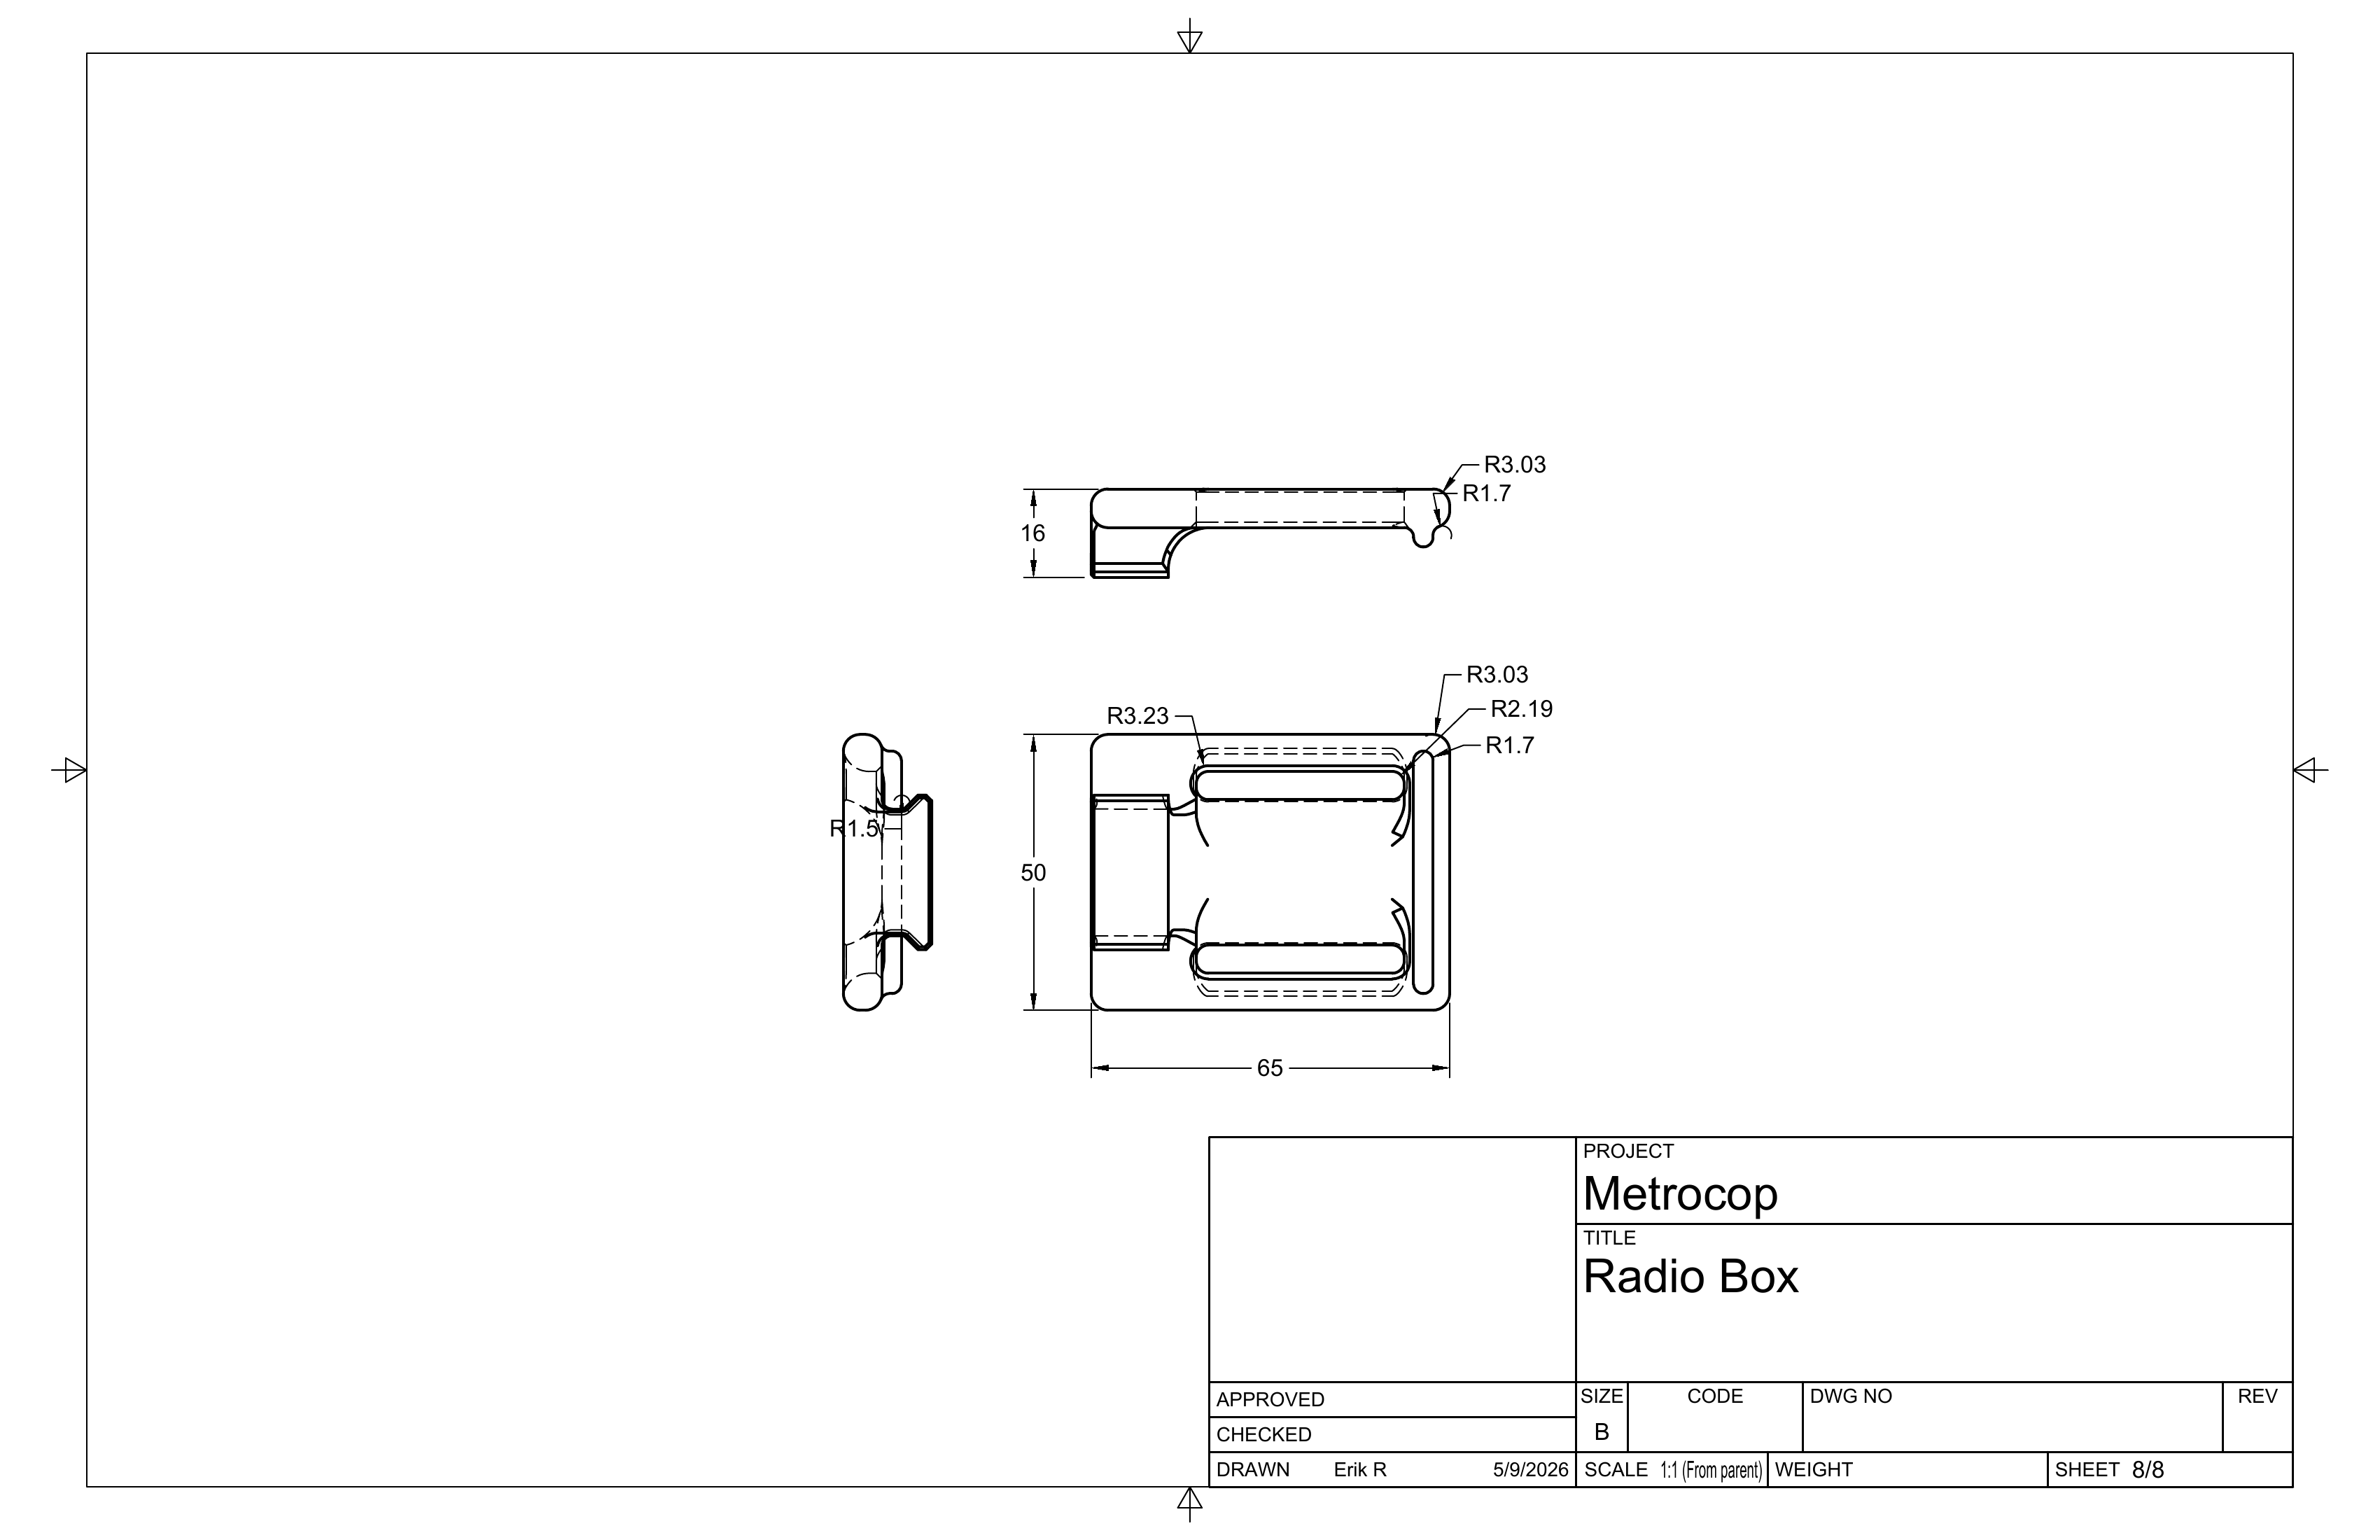
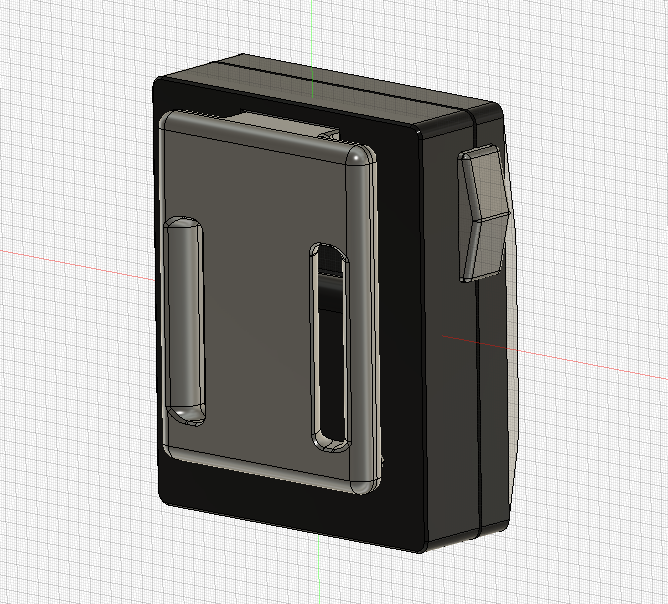
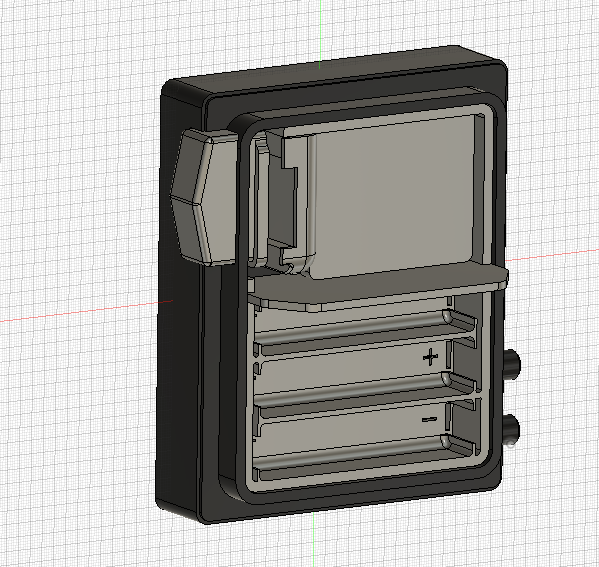
The radio box was a good example of how I approached the whole belt-box set: reverse engineer the outer shape, make smart decisions about printability, and leave room for the lighting and battery access to work without ruining the silhouette.
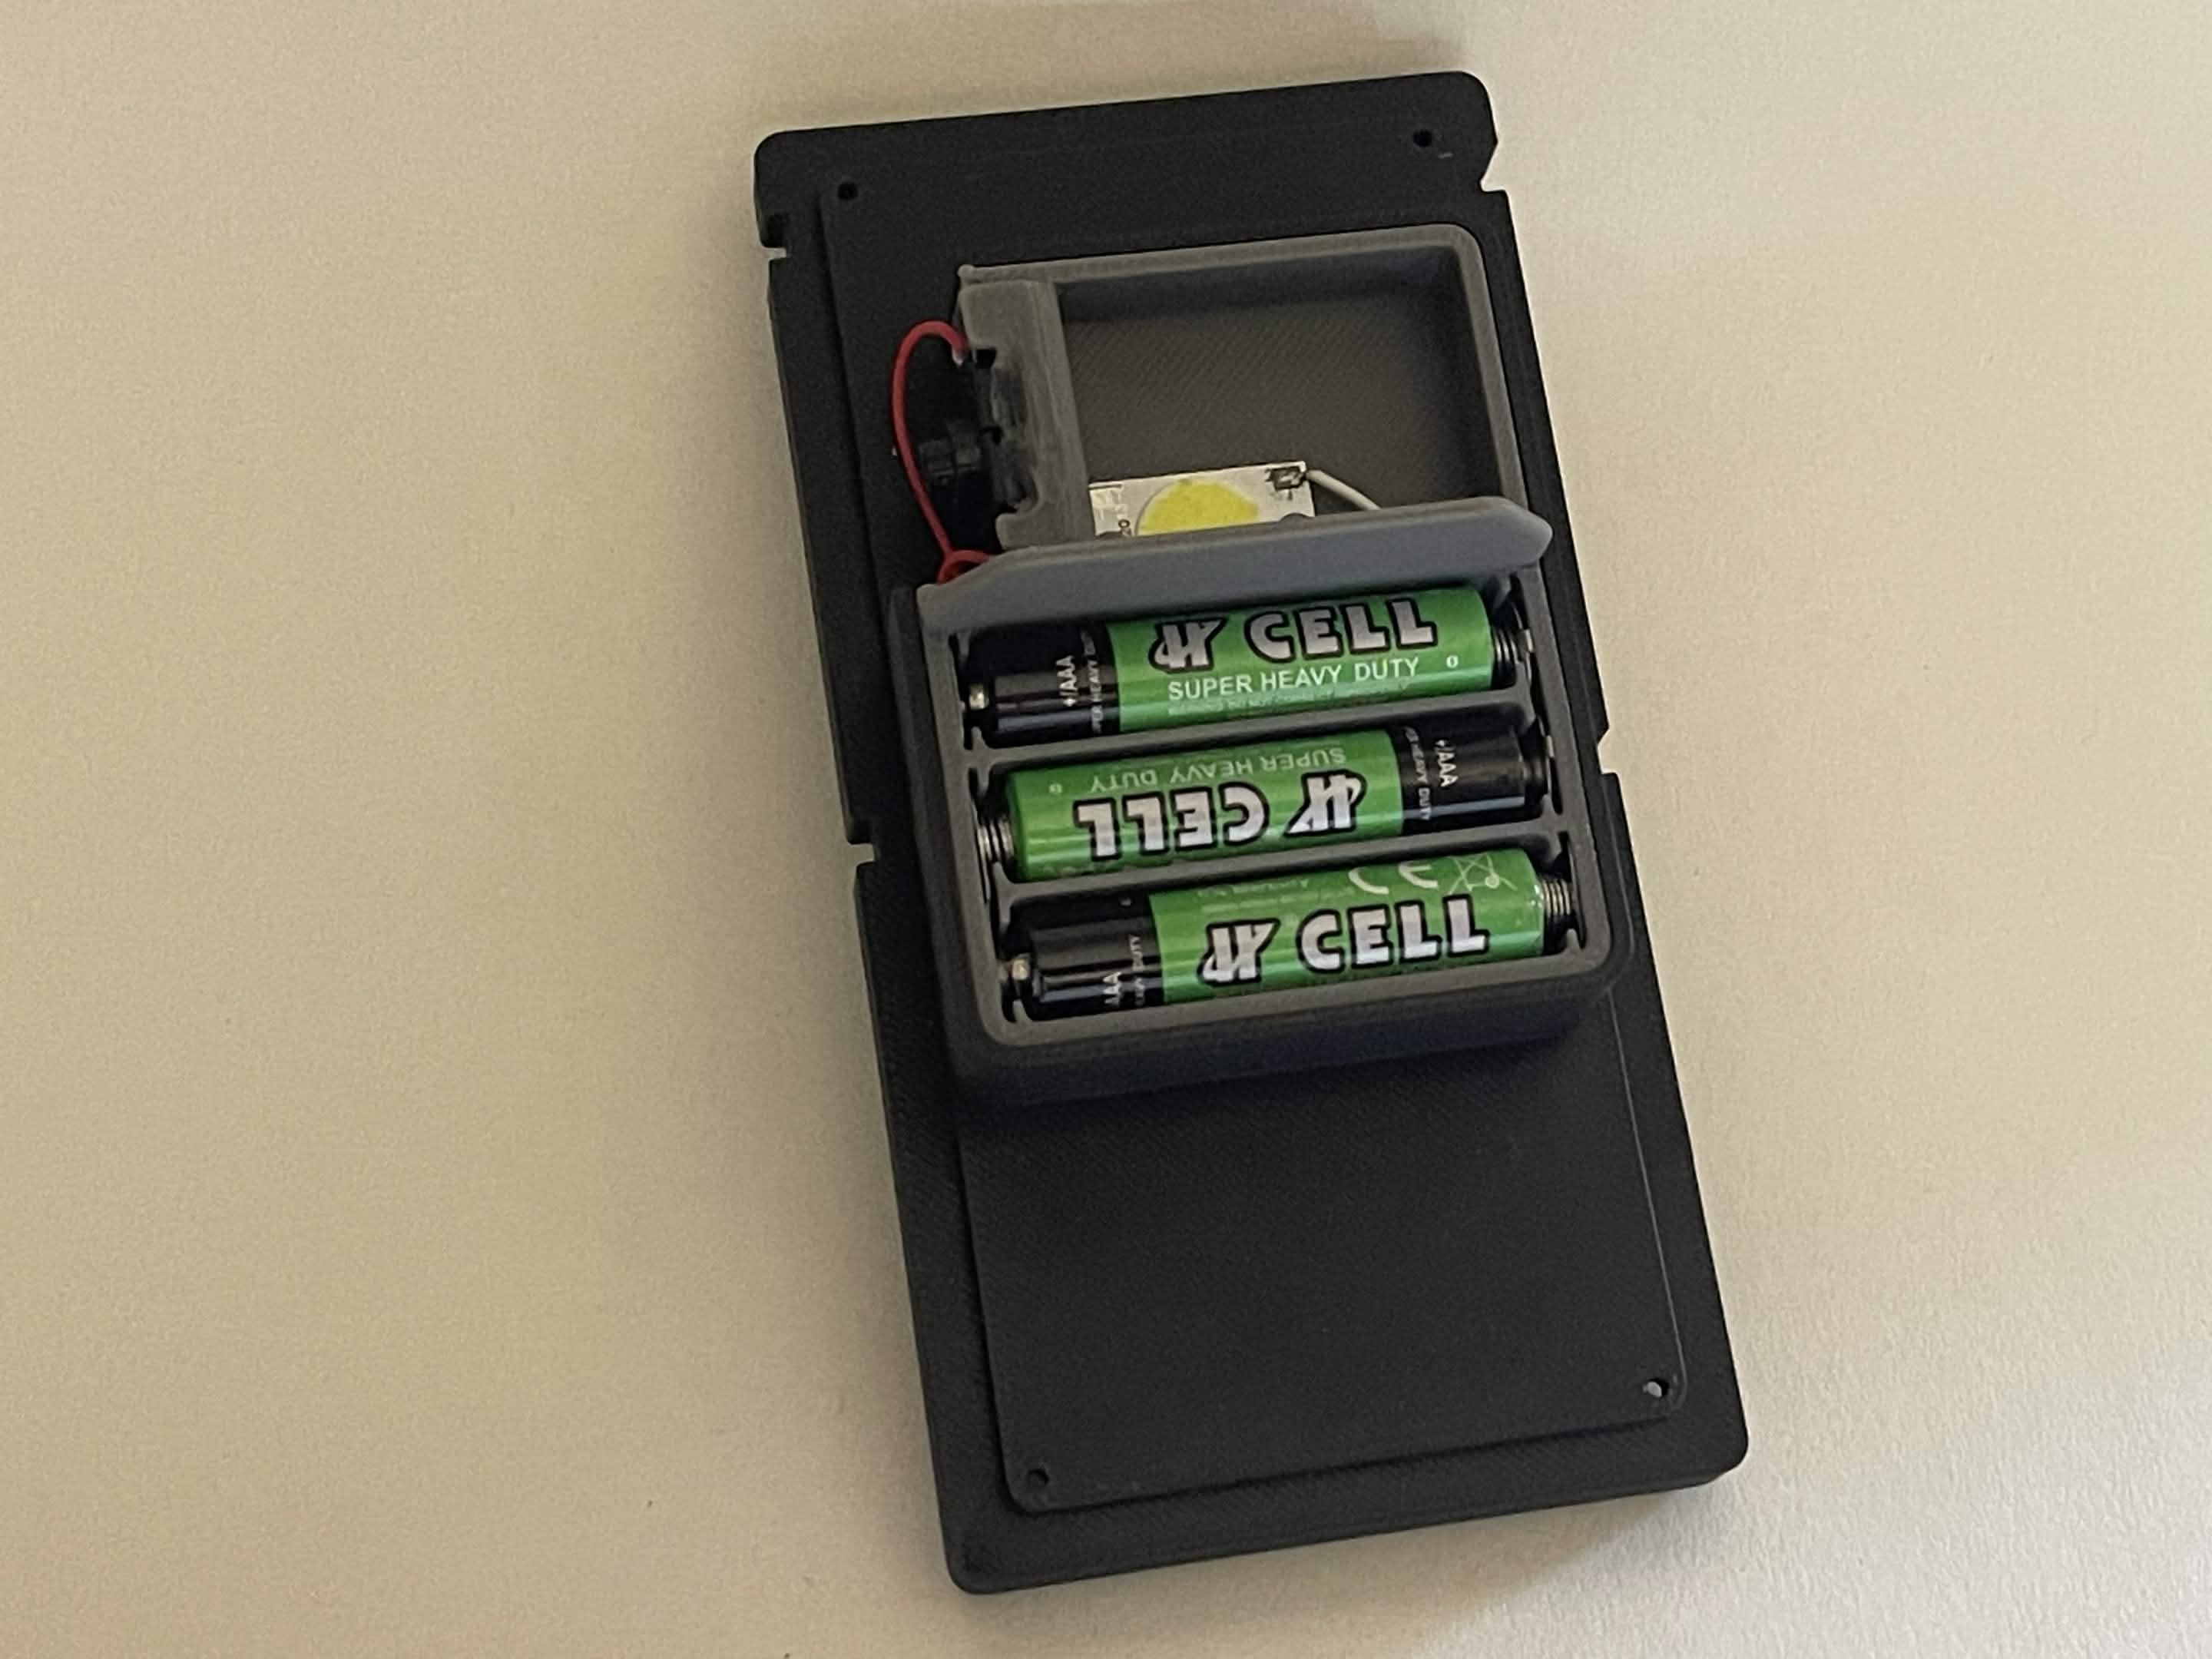
A rear angle that shows the mounting geometry and helps explain how the object needed to work as a wearable prop, not just a nice front render.Side views like this were useful because the depth and wedge shape do a lot of the work that makes the piece feel like it belongs in the Half-Life world.The finished shell proved out the main goal: keep the object feeling screen-accurate while still letting it function like a real illuminated prop on the costume.I built the internals around easy battery swaps and a simple lighting package, which made the prop much more practical to wear and troubleshoot.
Sheet 1 of 8Sheet 2 of 8Sheet 3 of 8Sheet 4 of 8Sheet 5 of 8Sheet 6 of 8Sheet 7 of 8Sheet 8 of 8
1 / 8
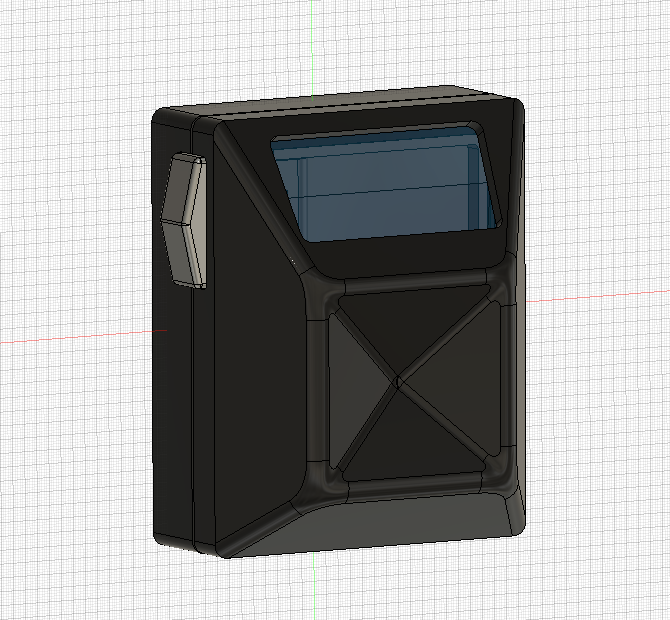
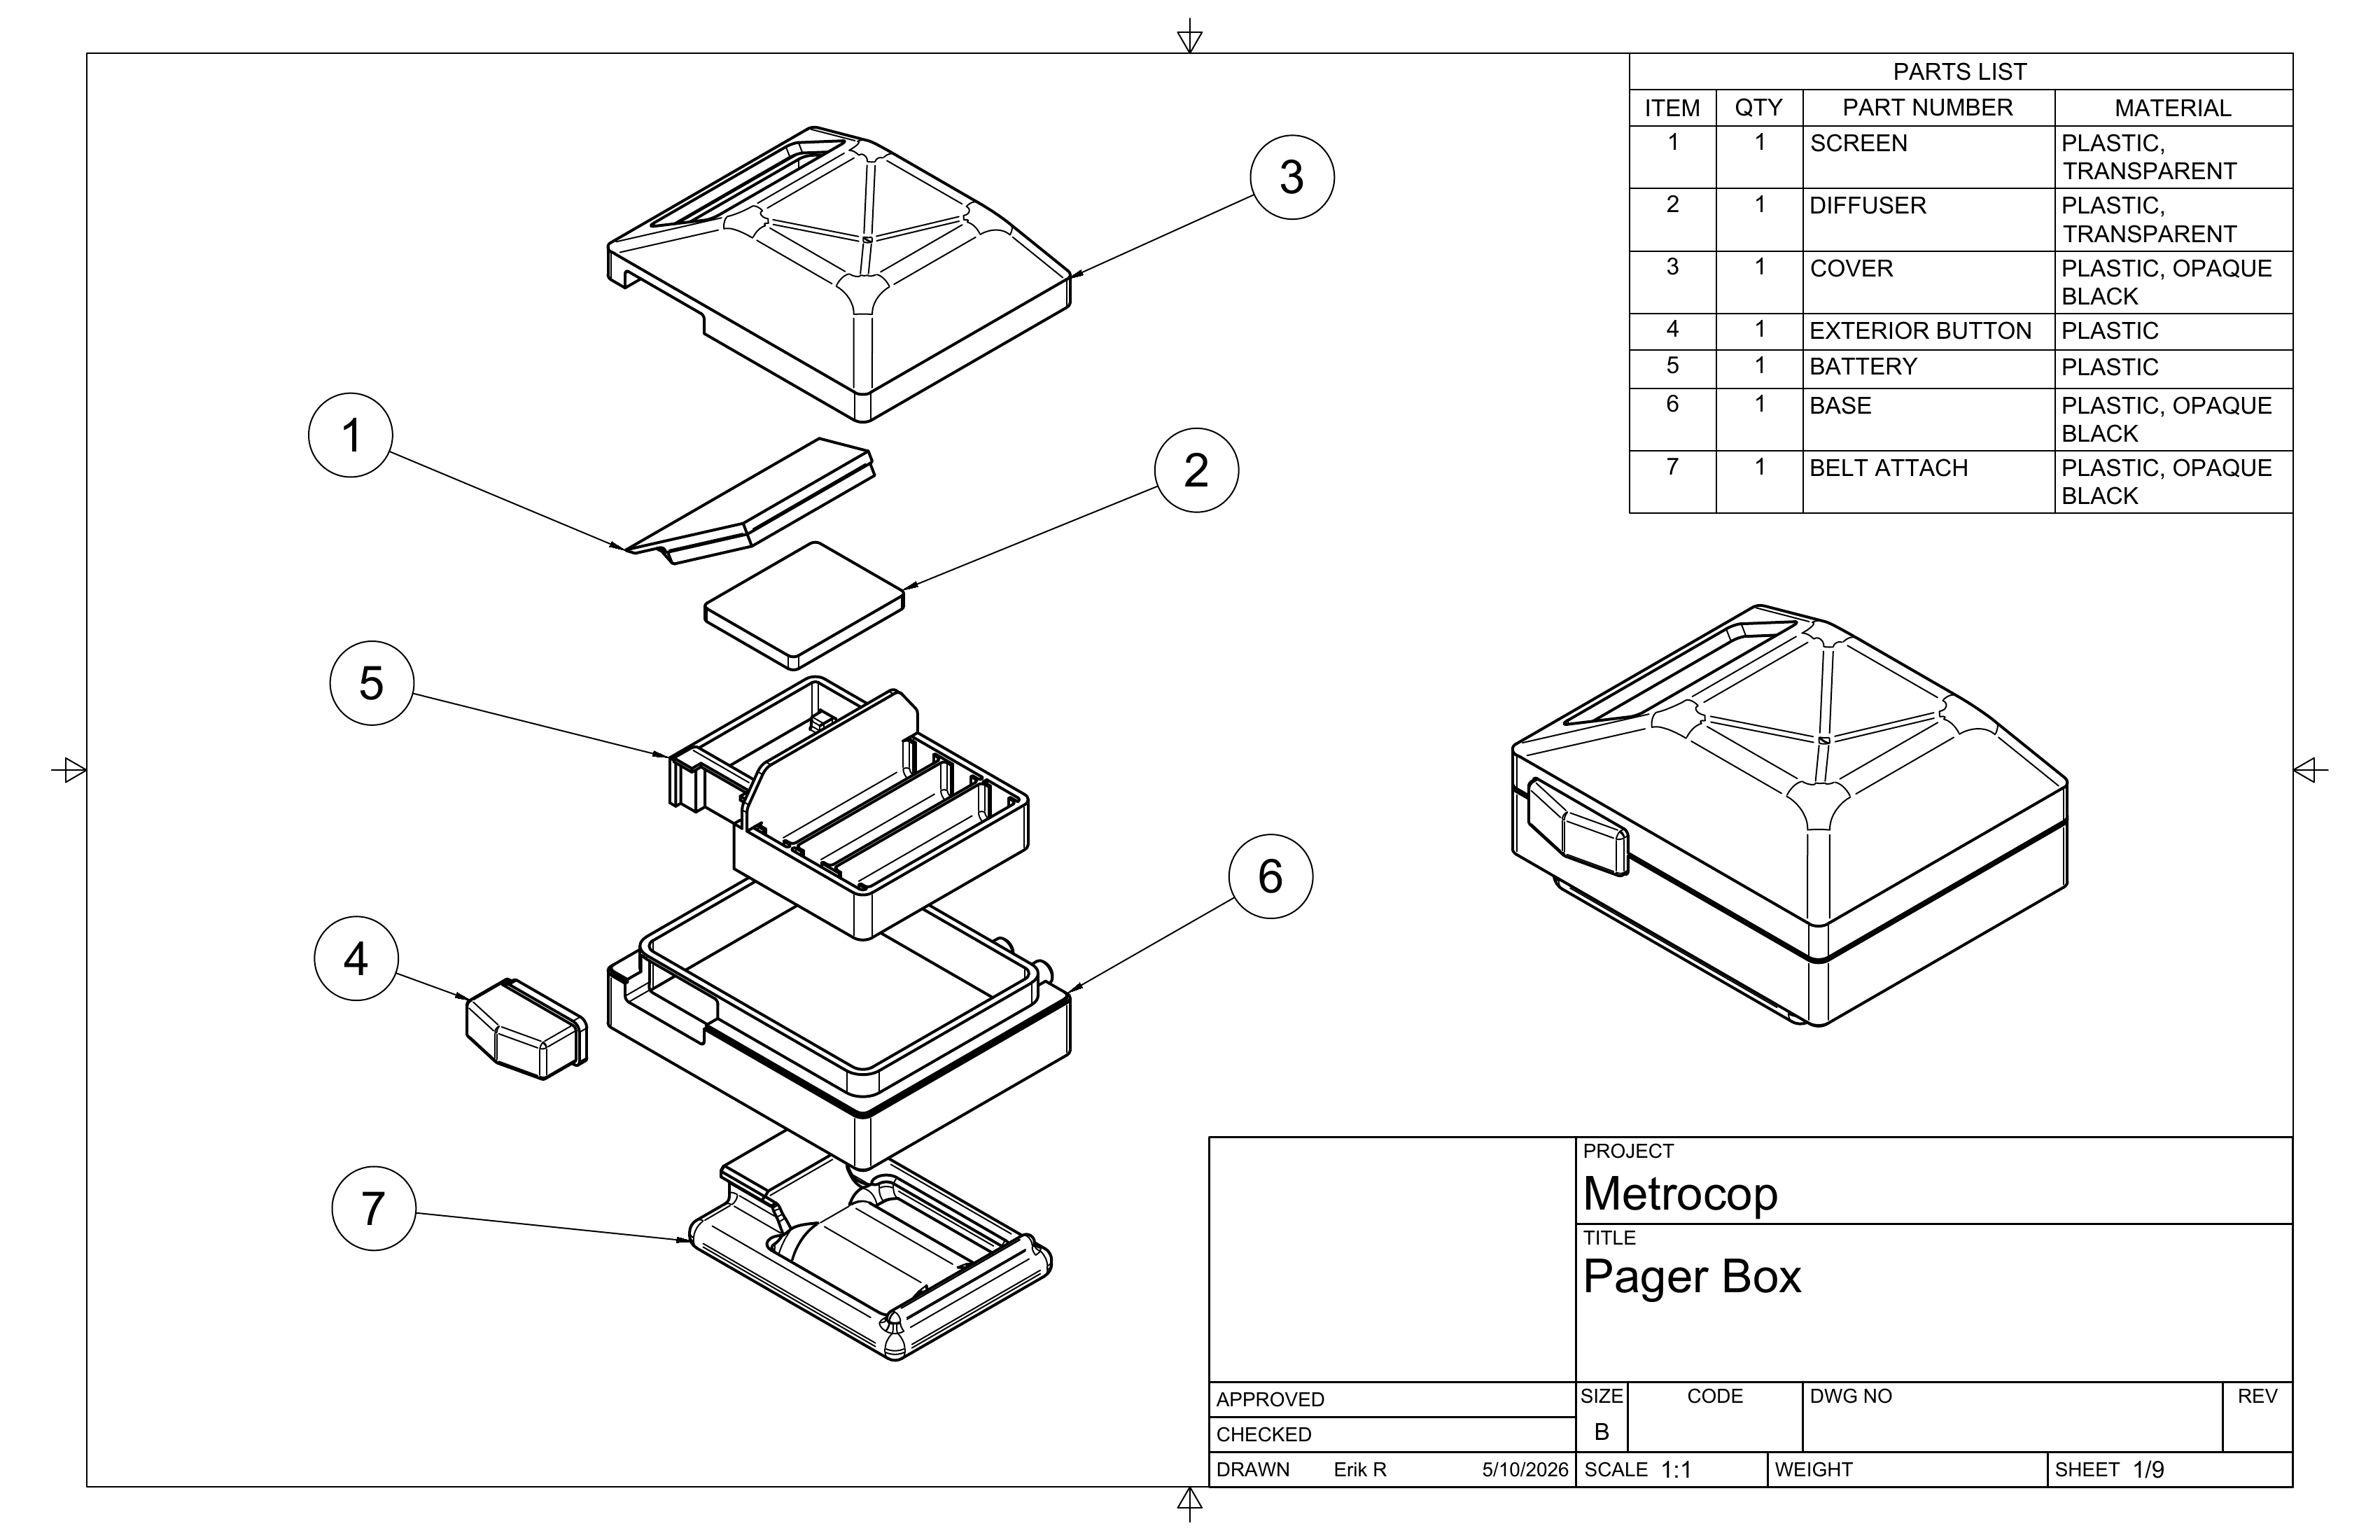
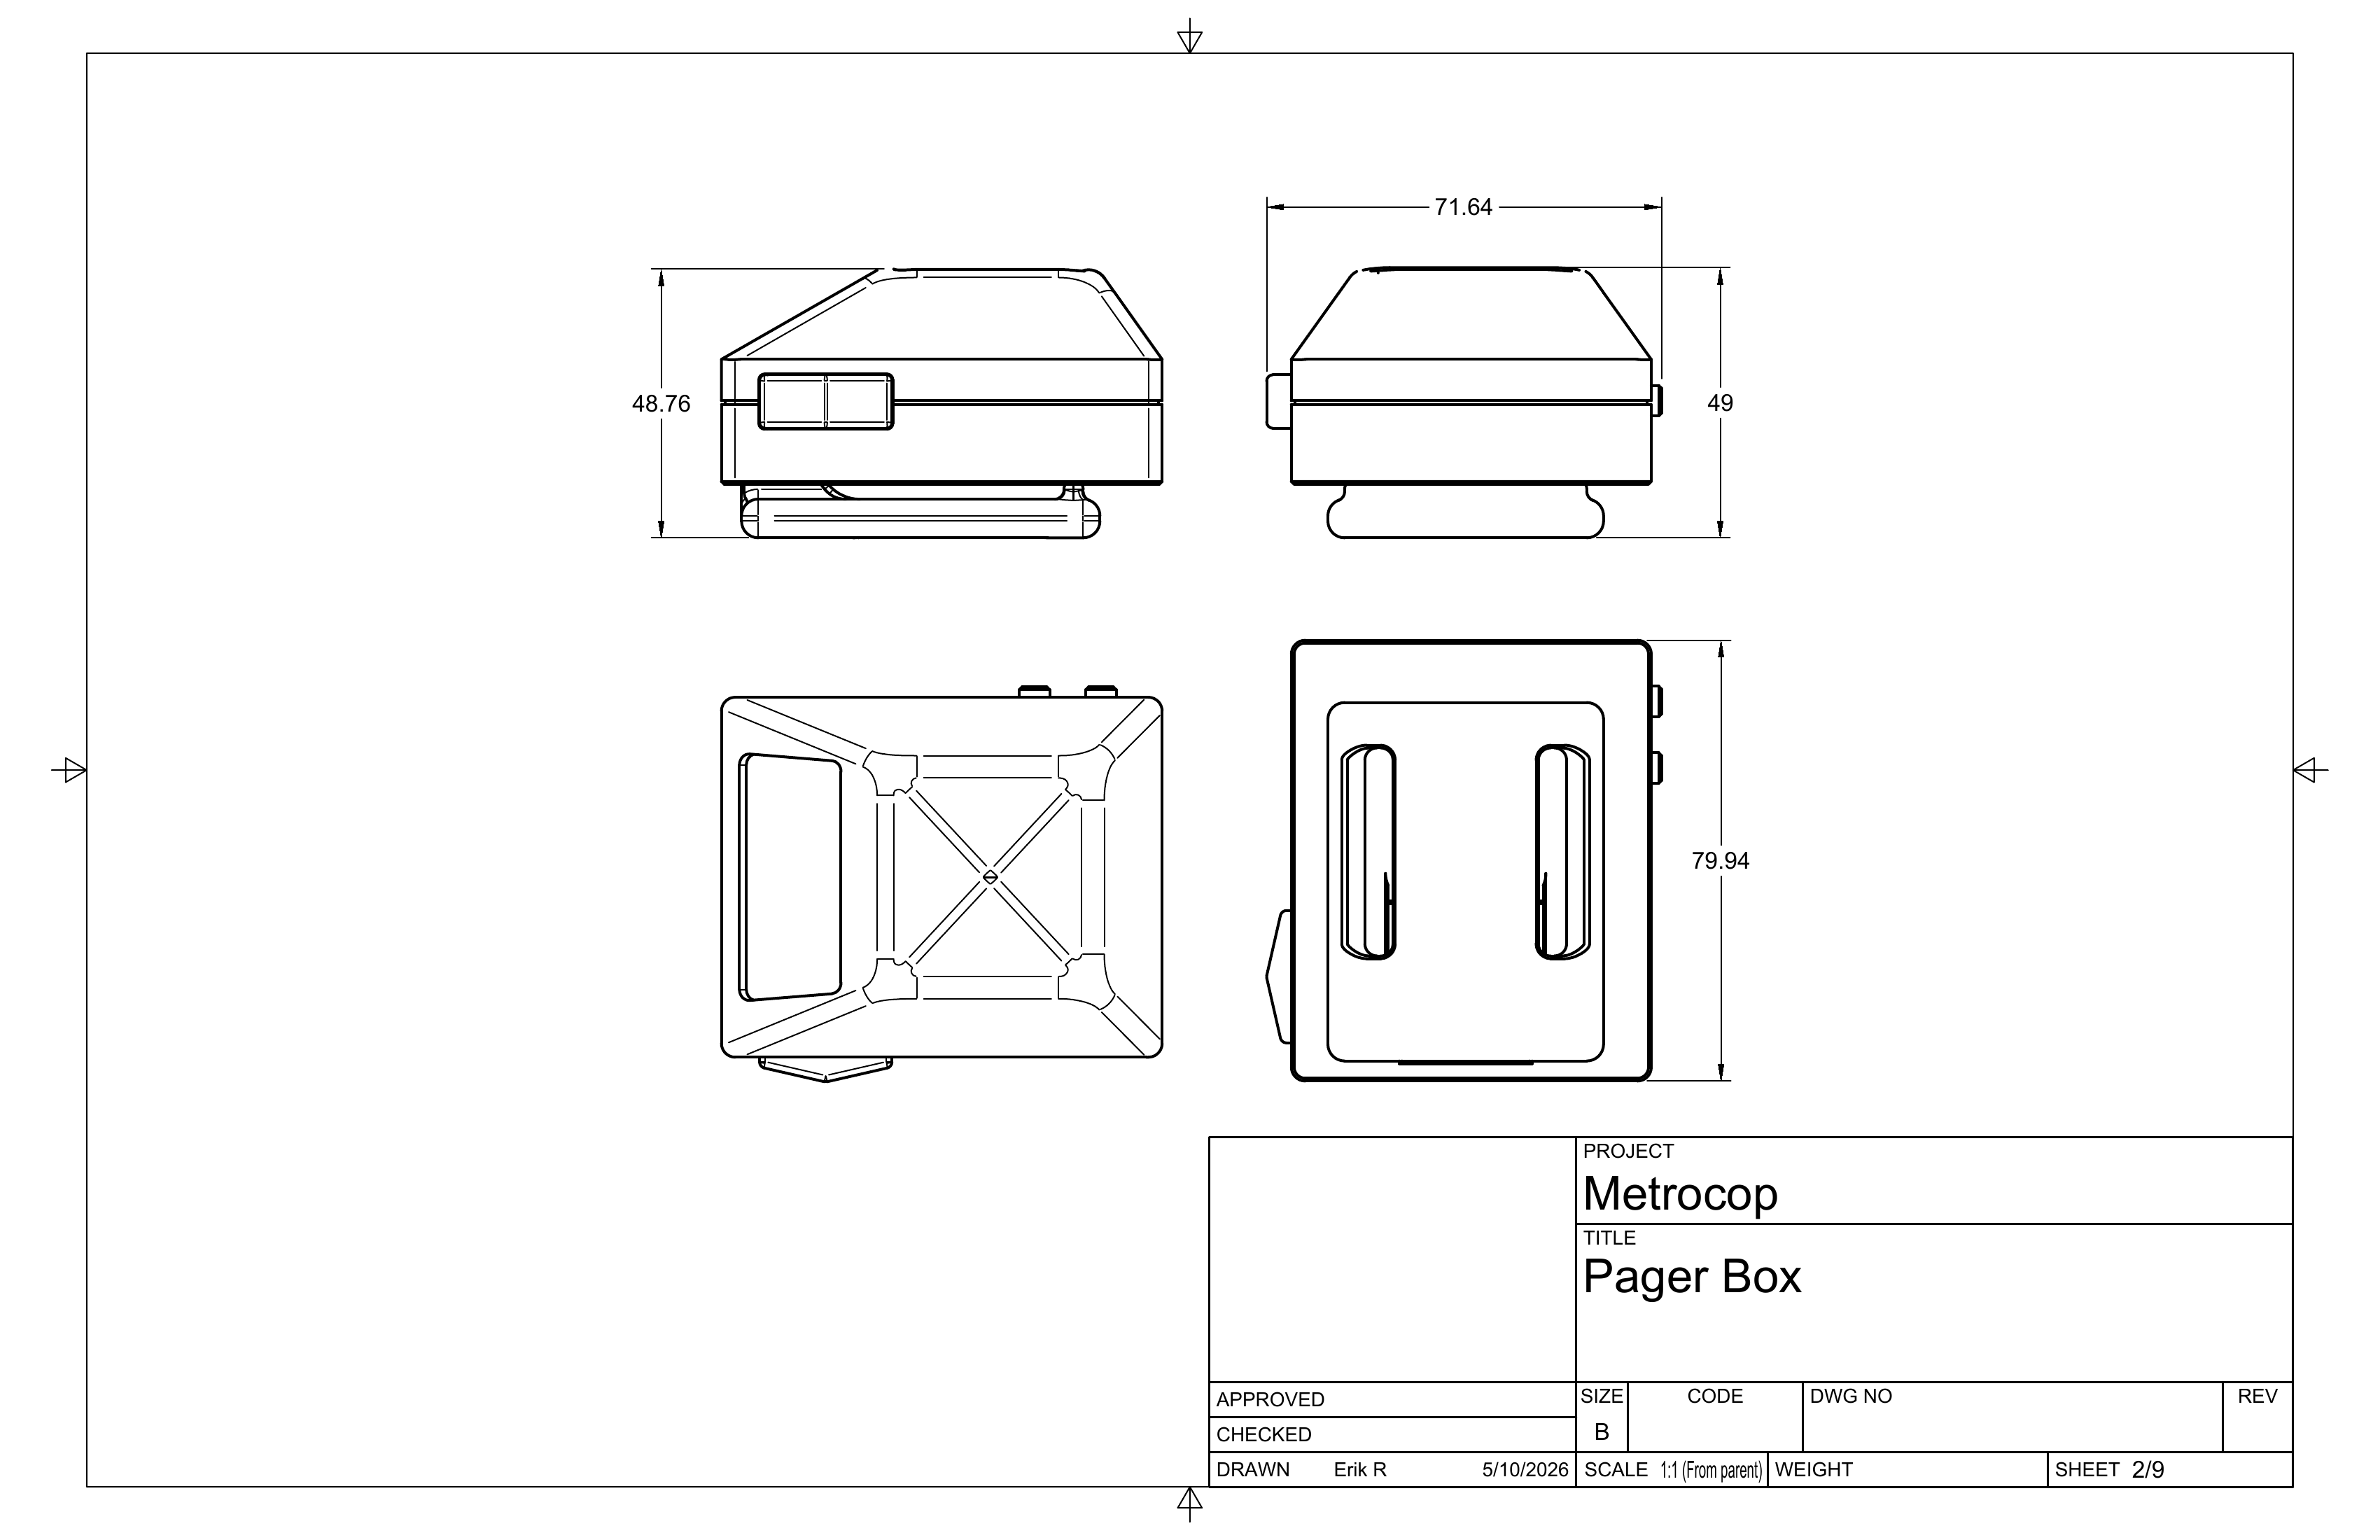
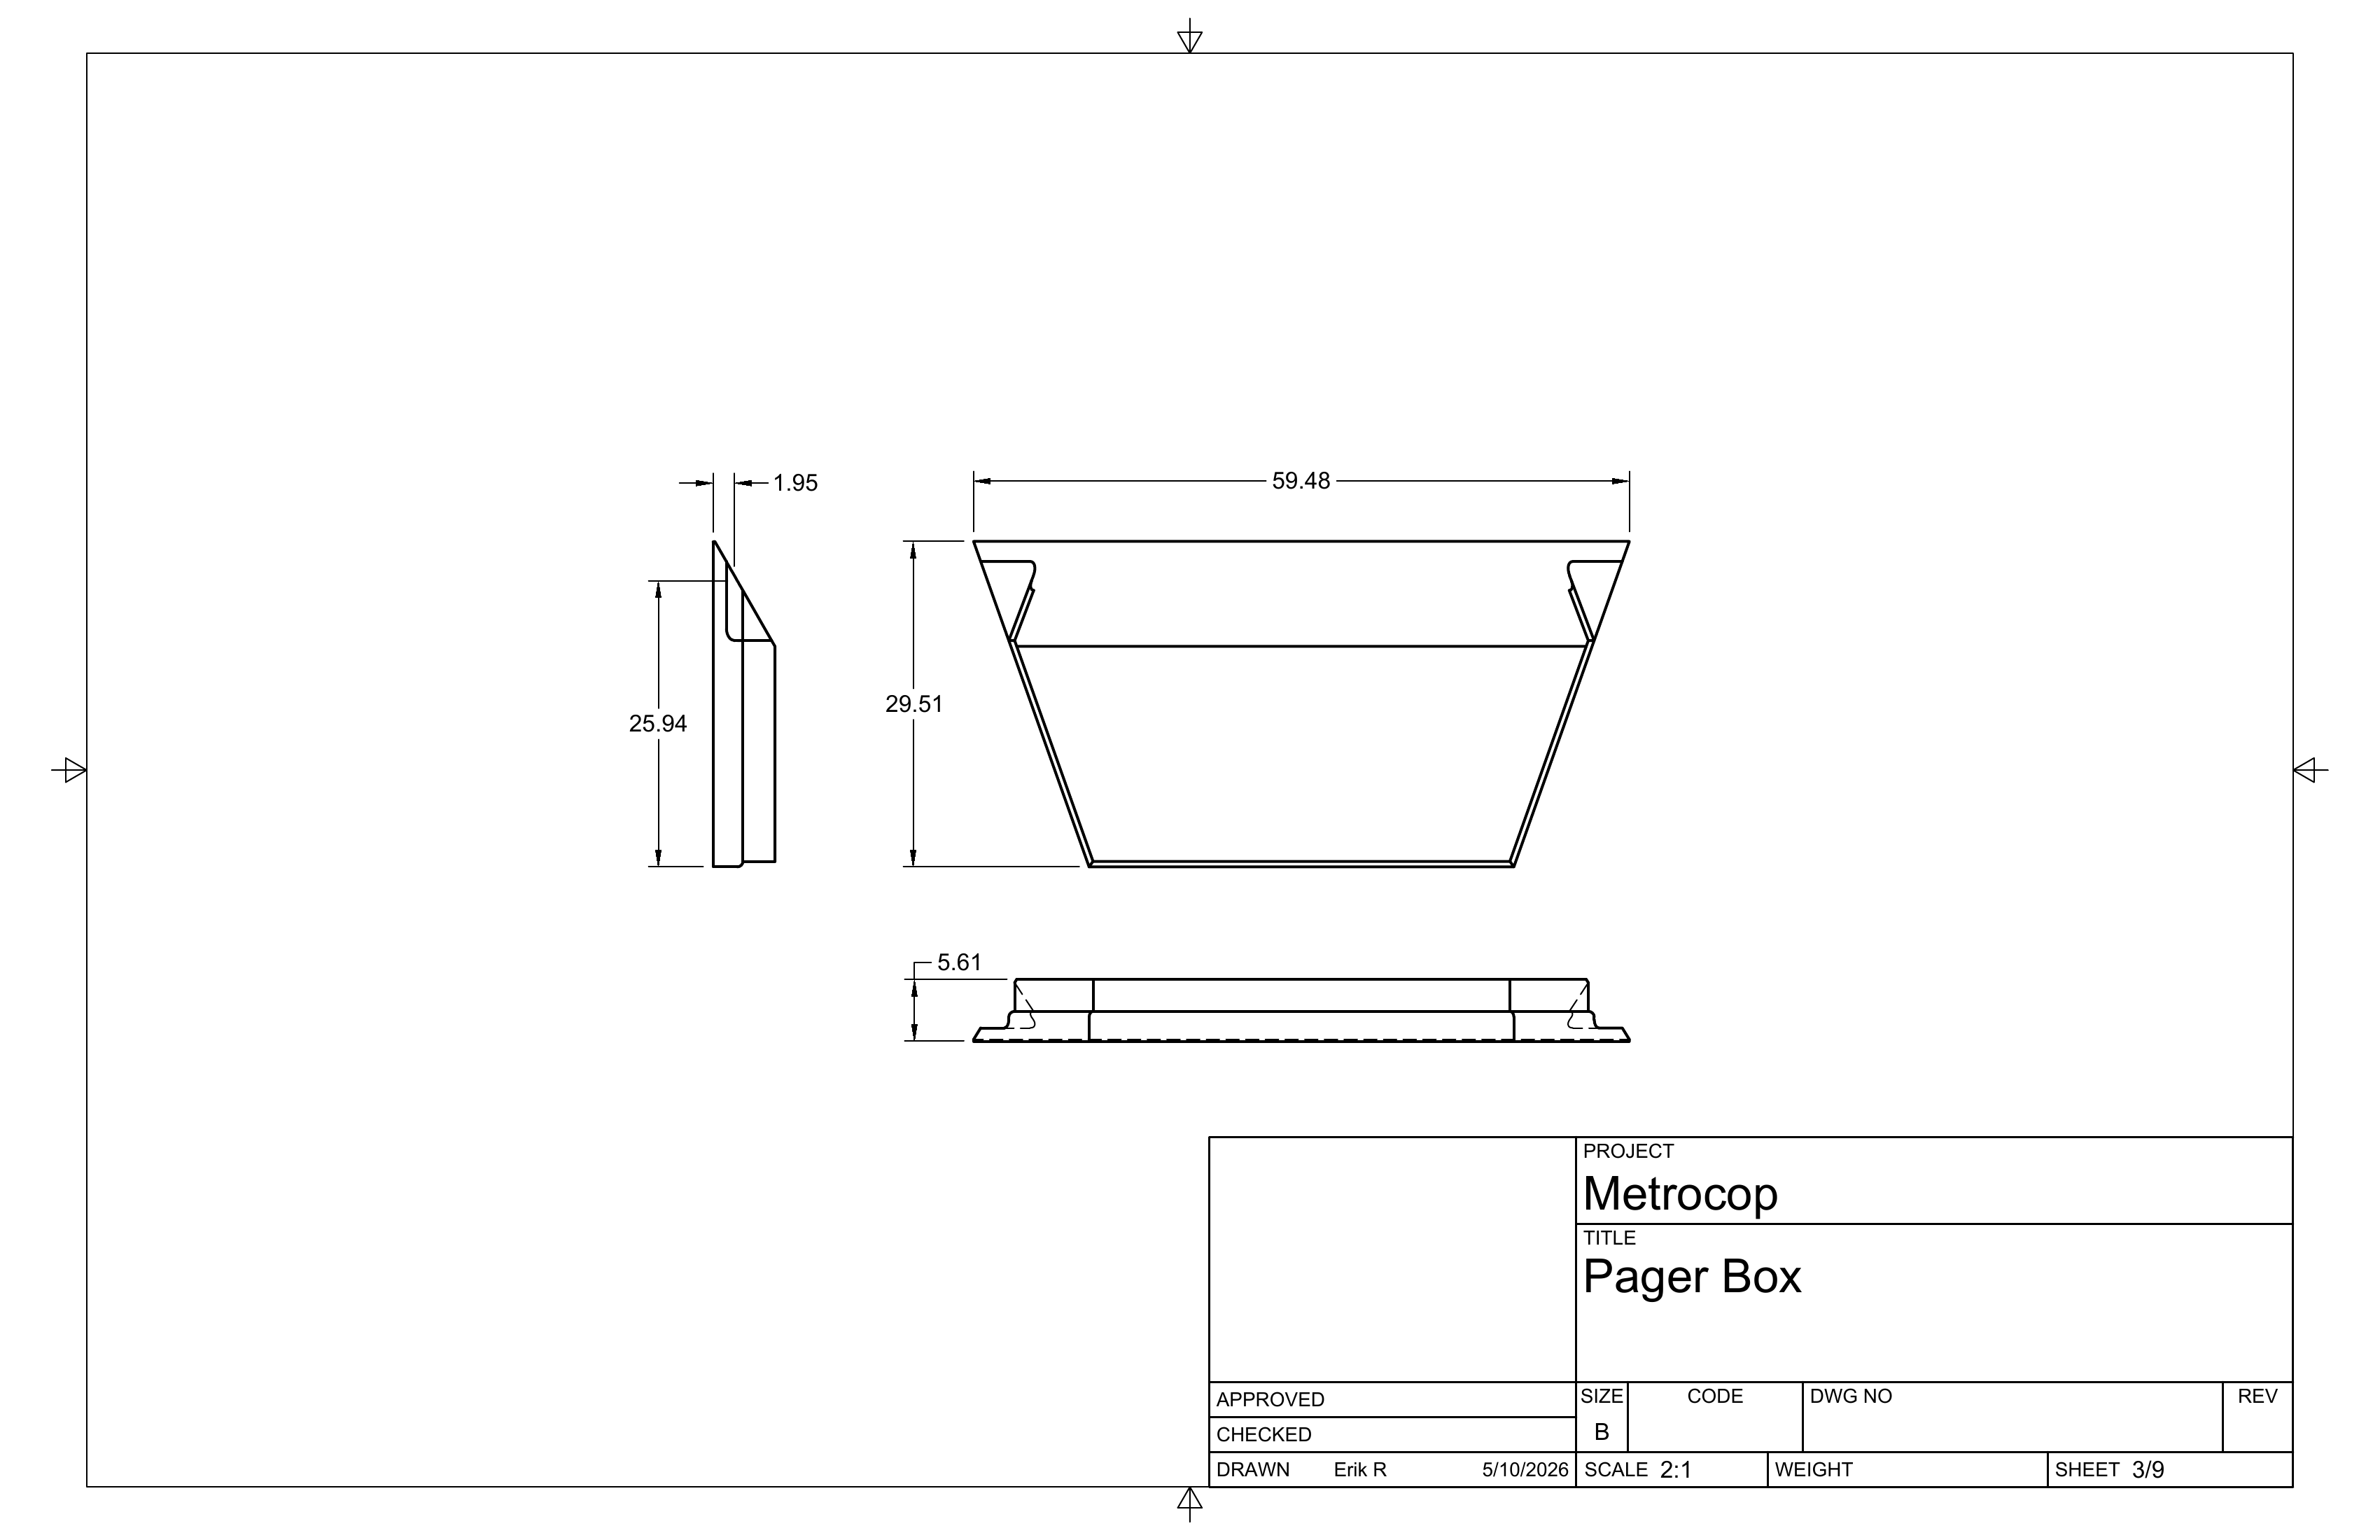
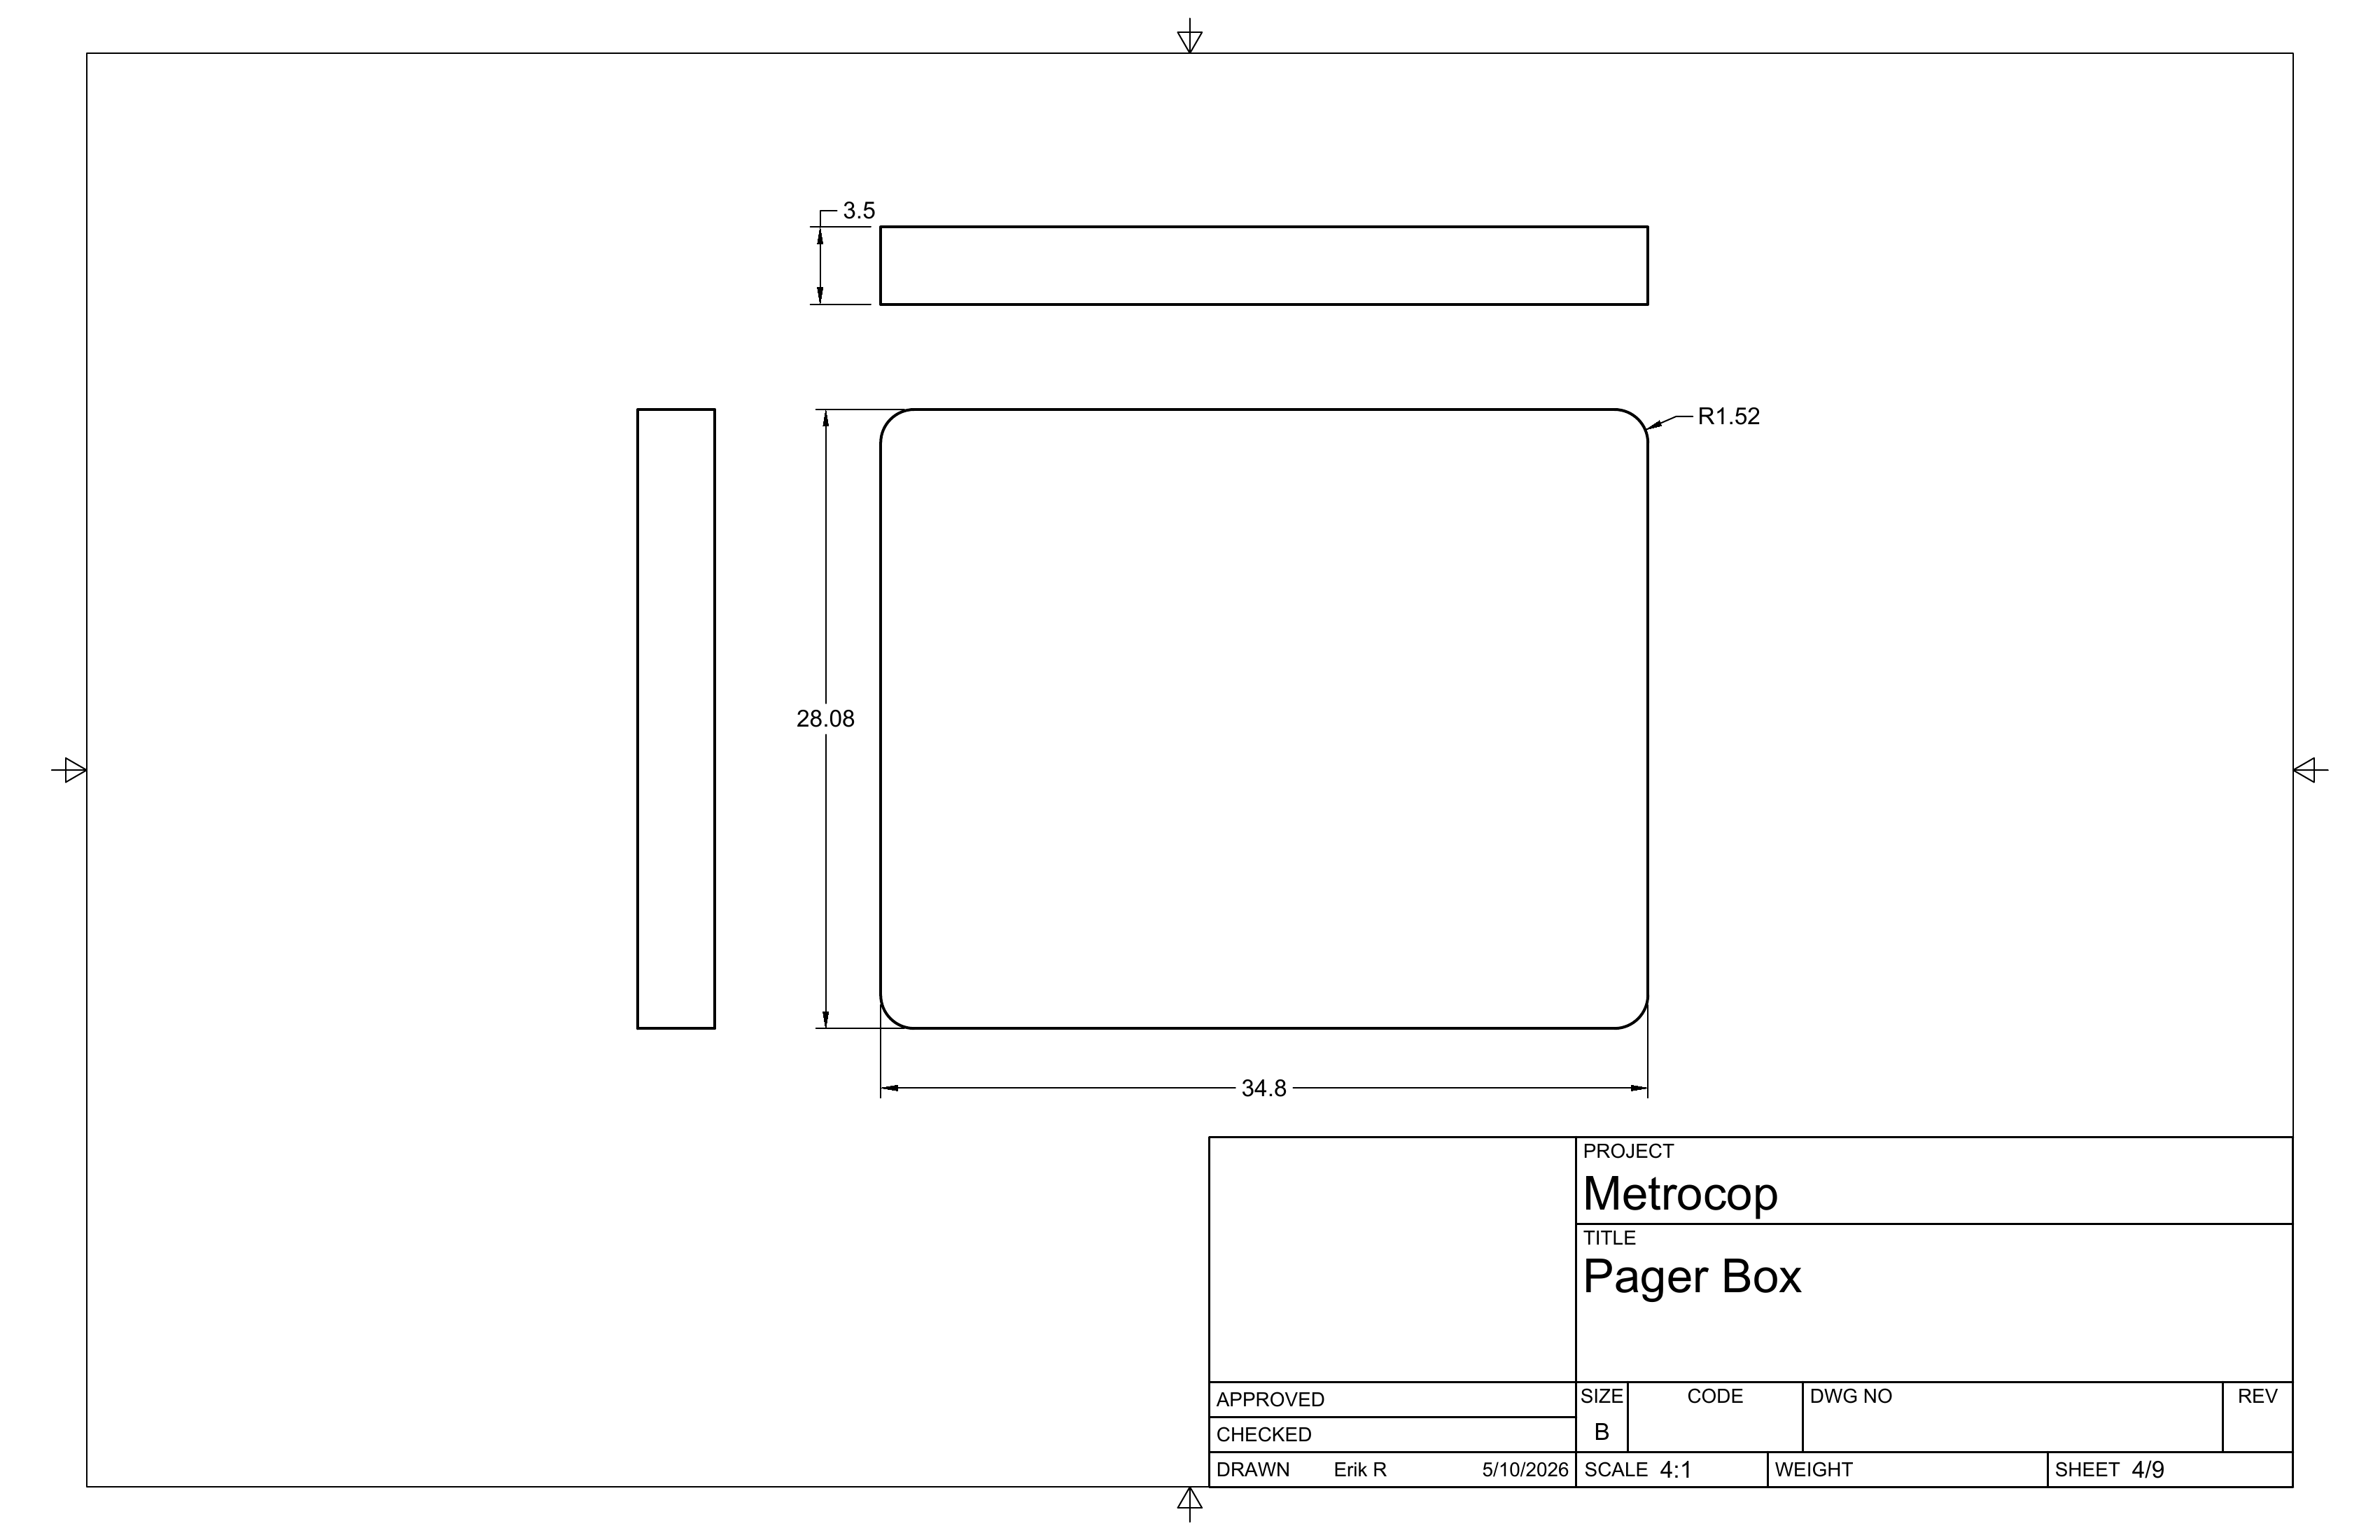
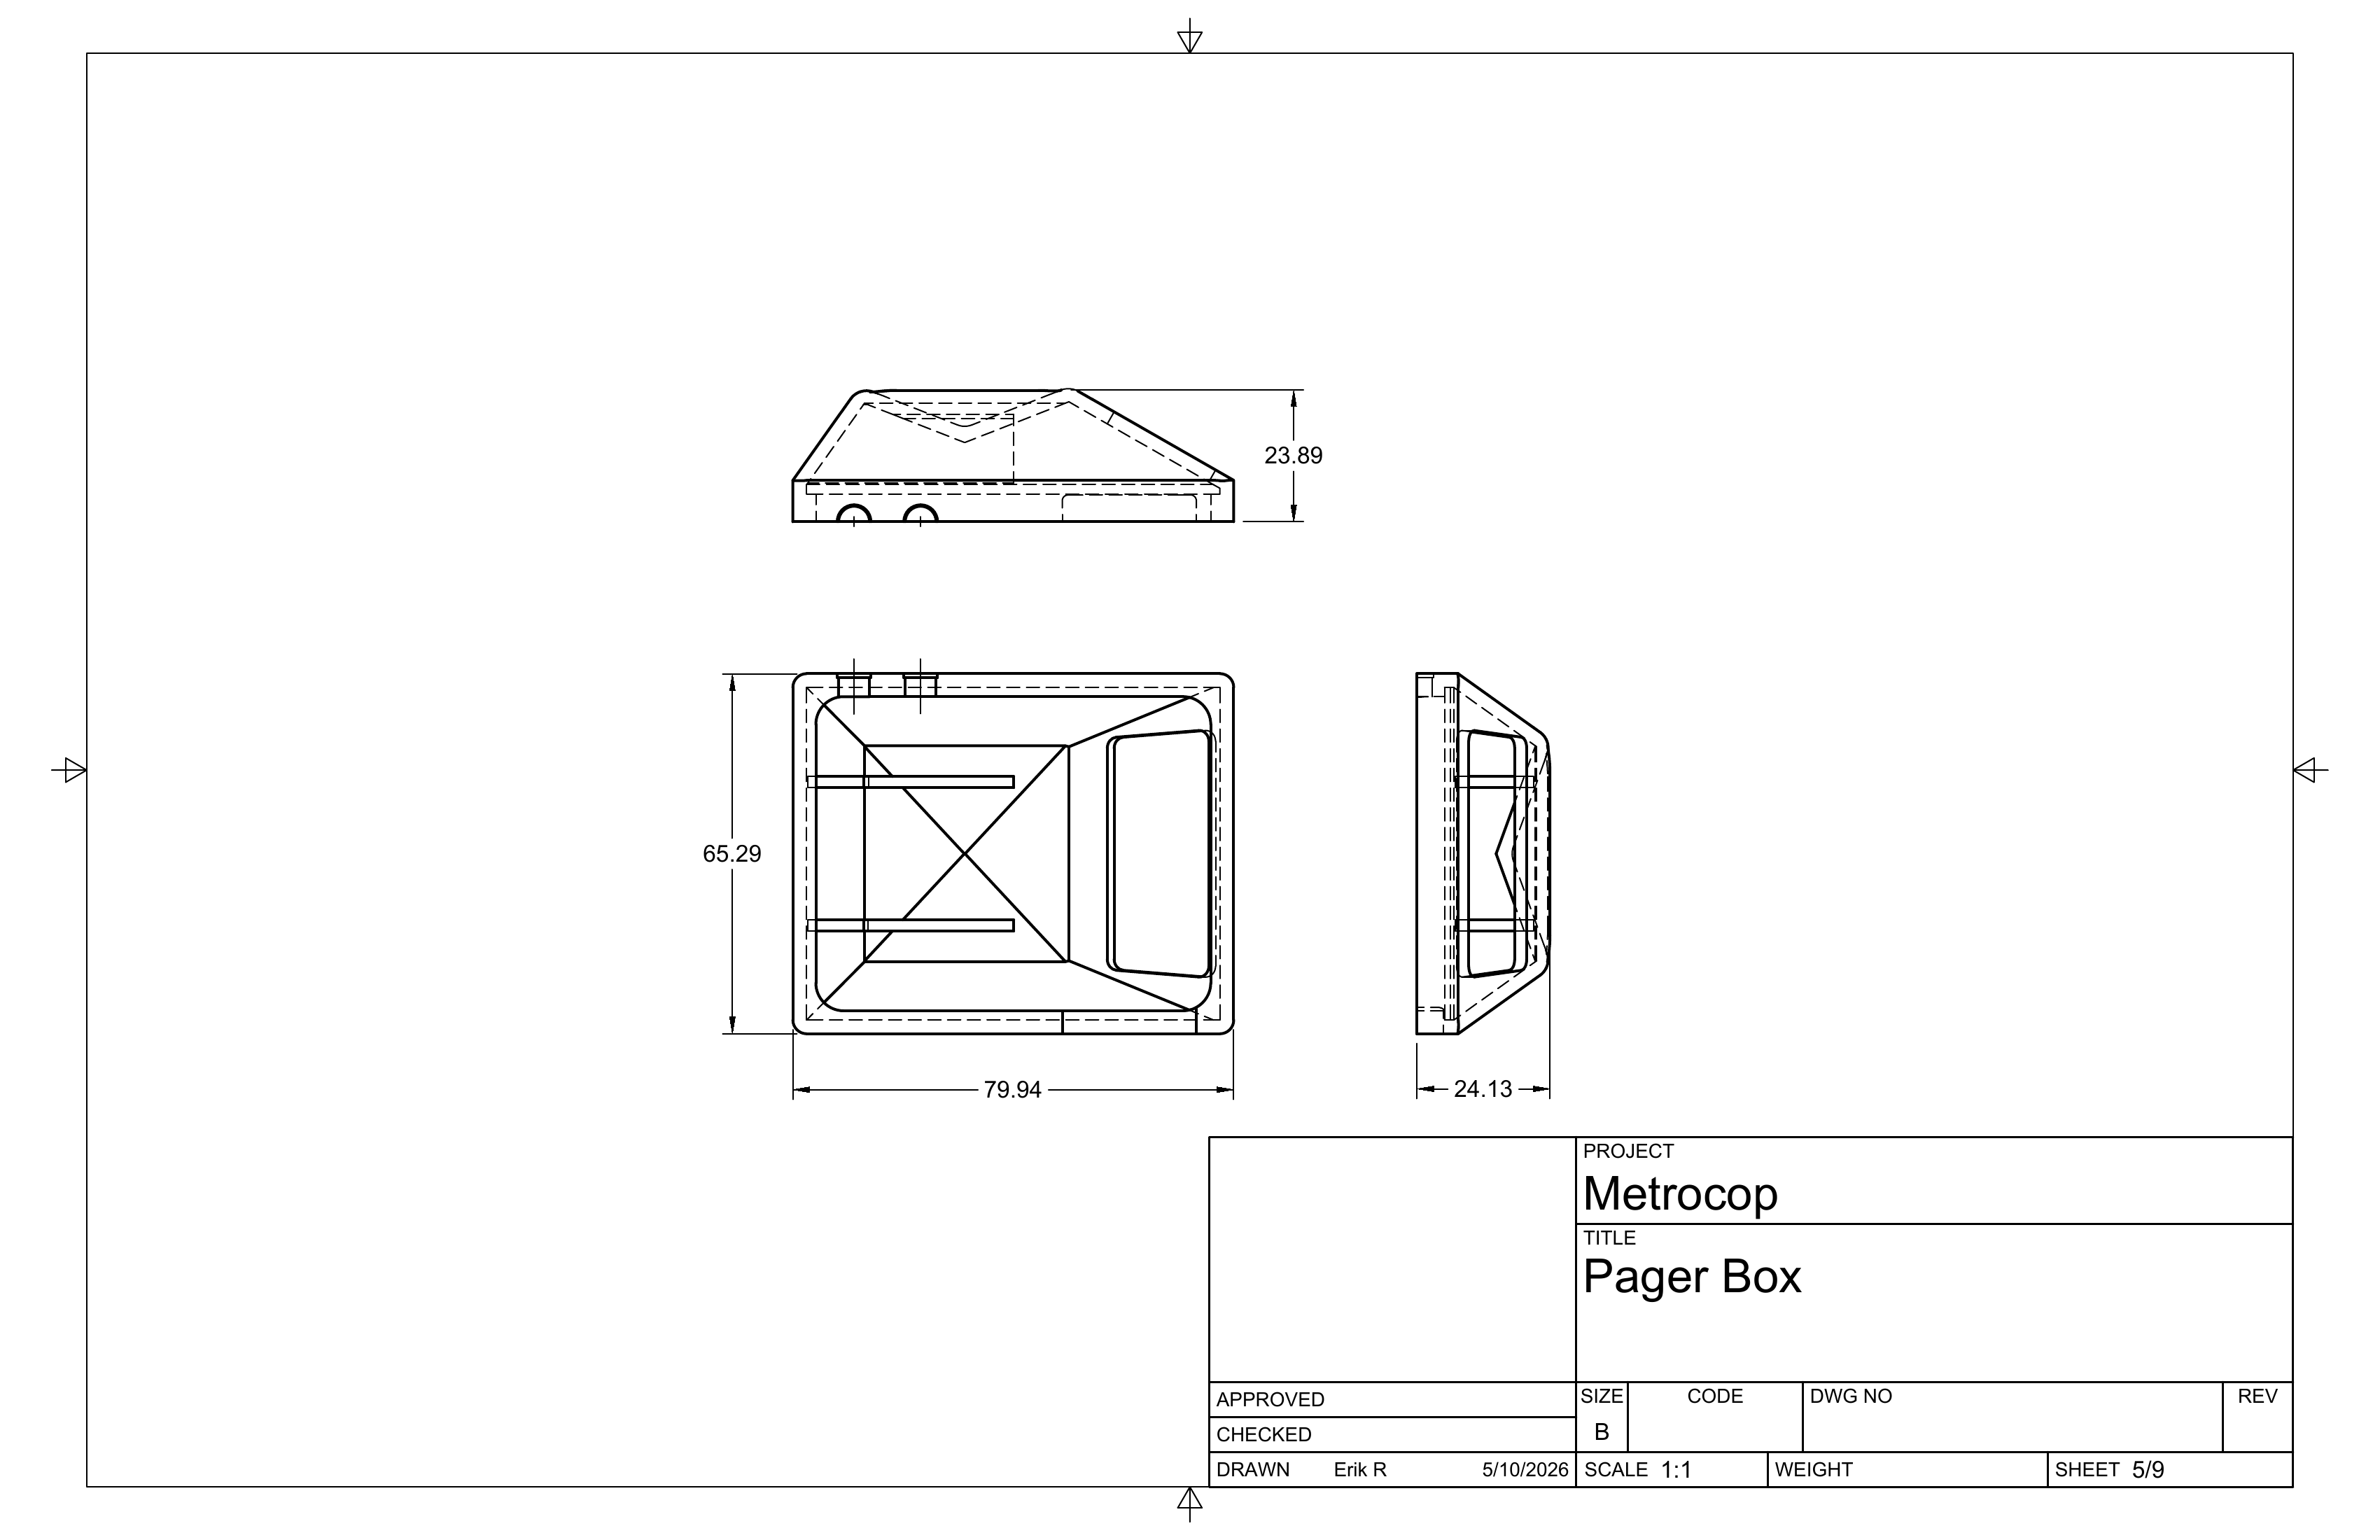
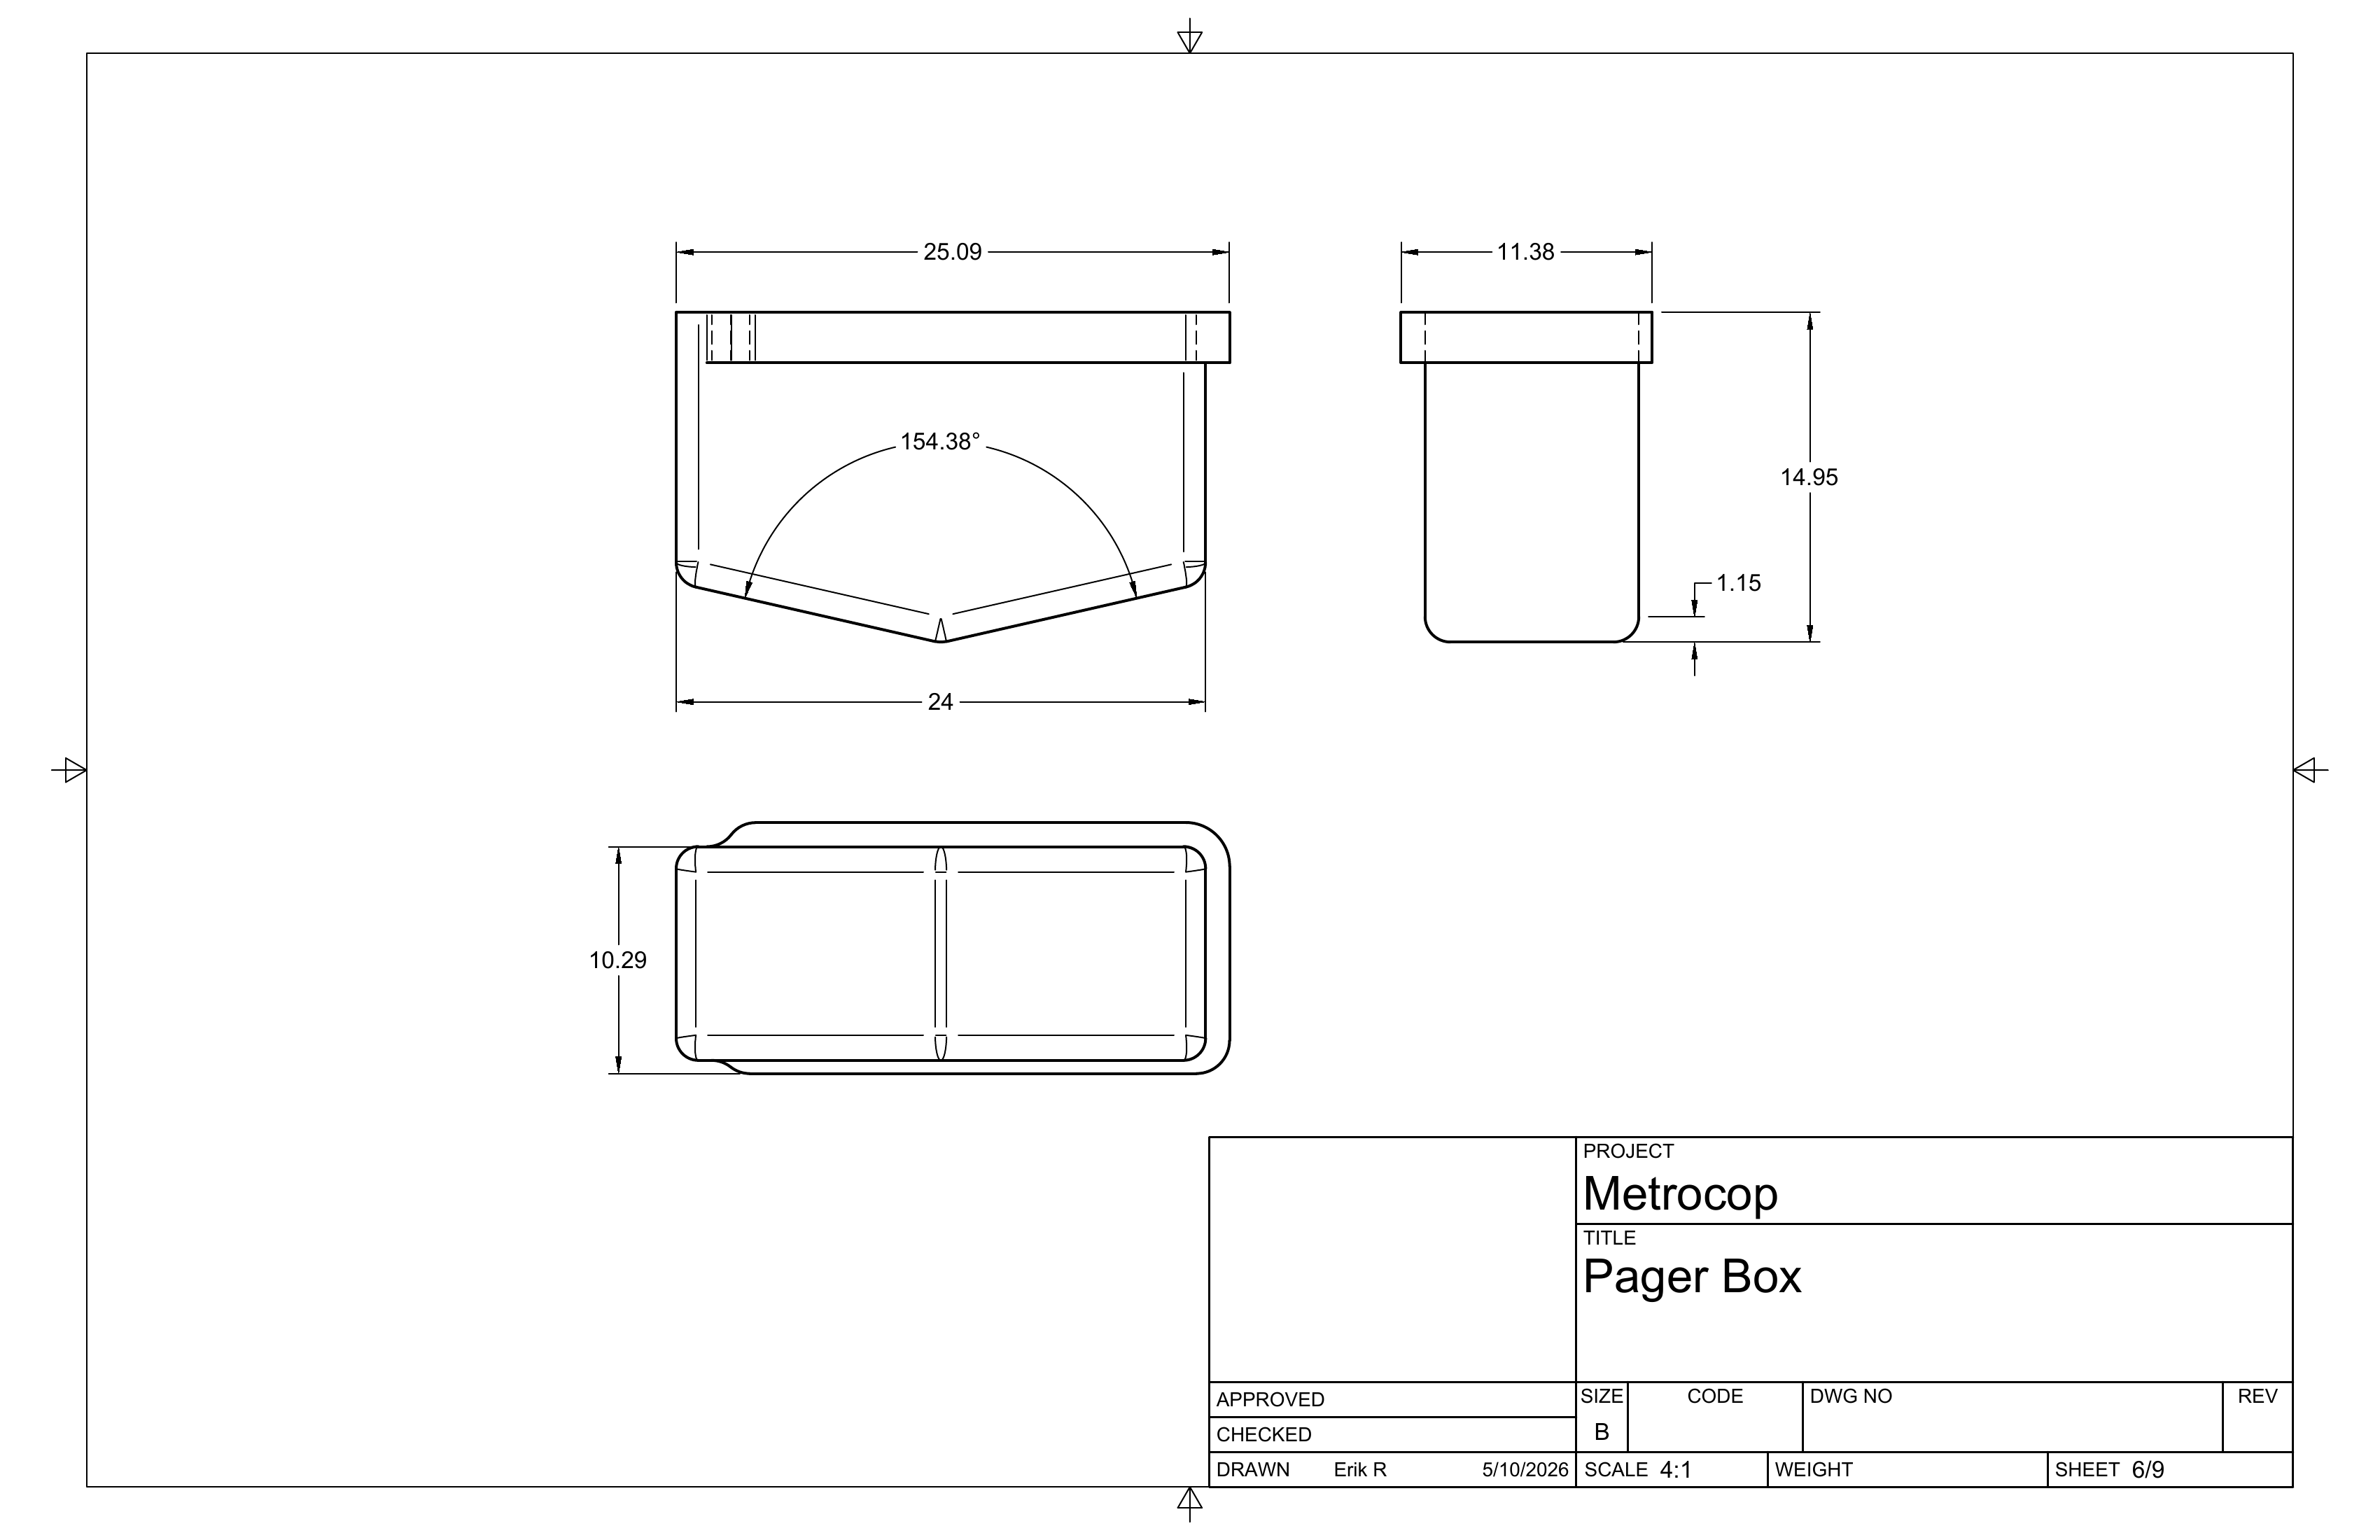
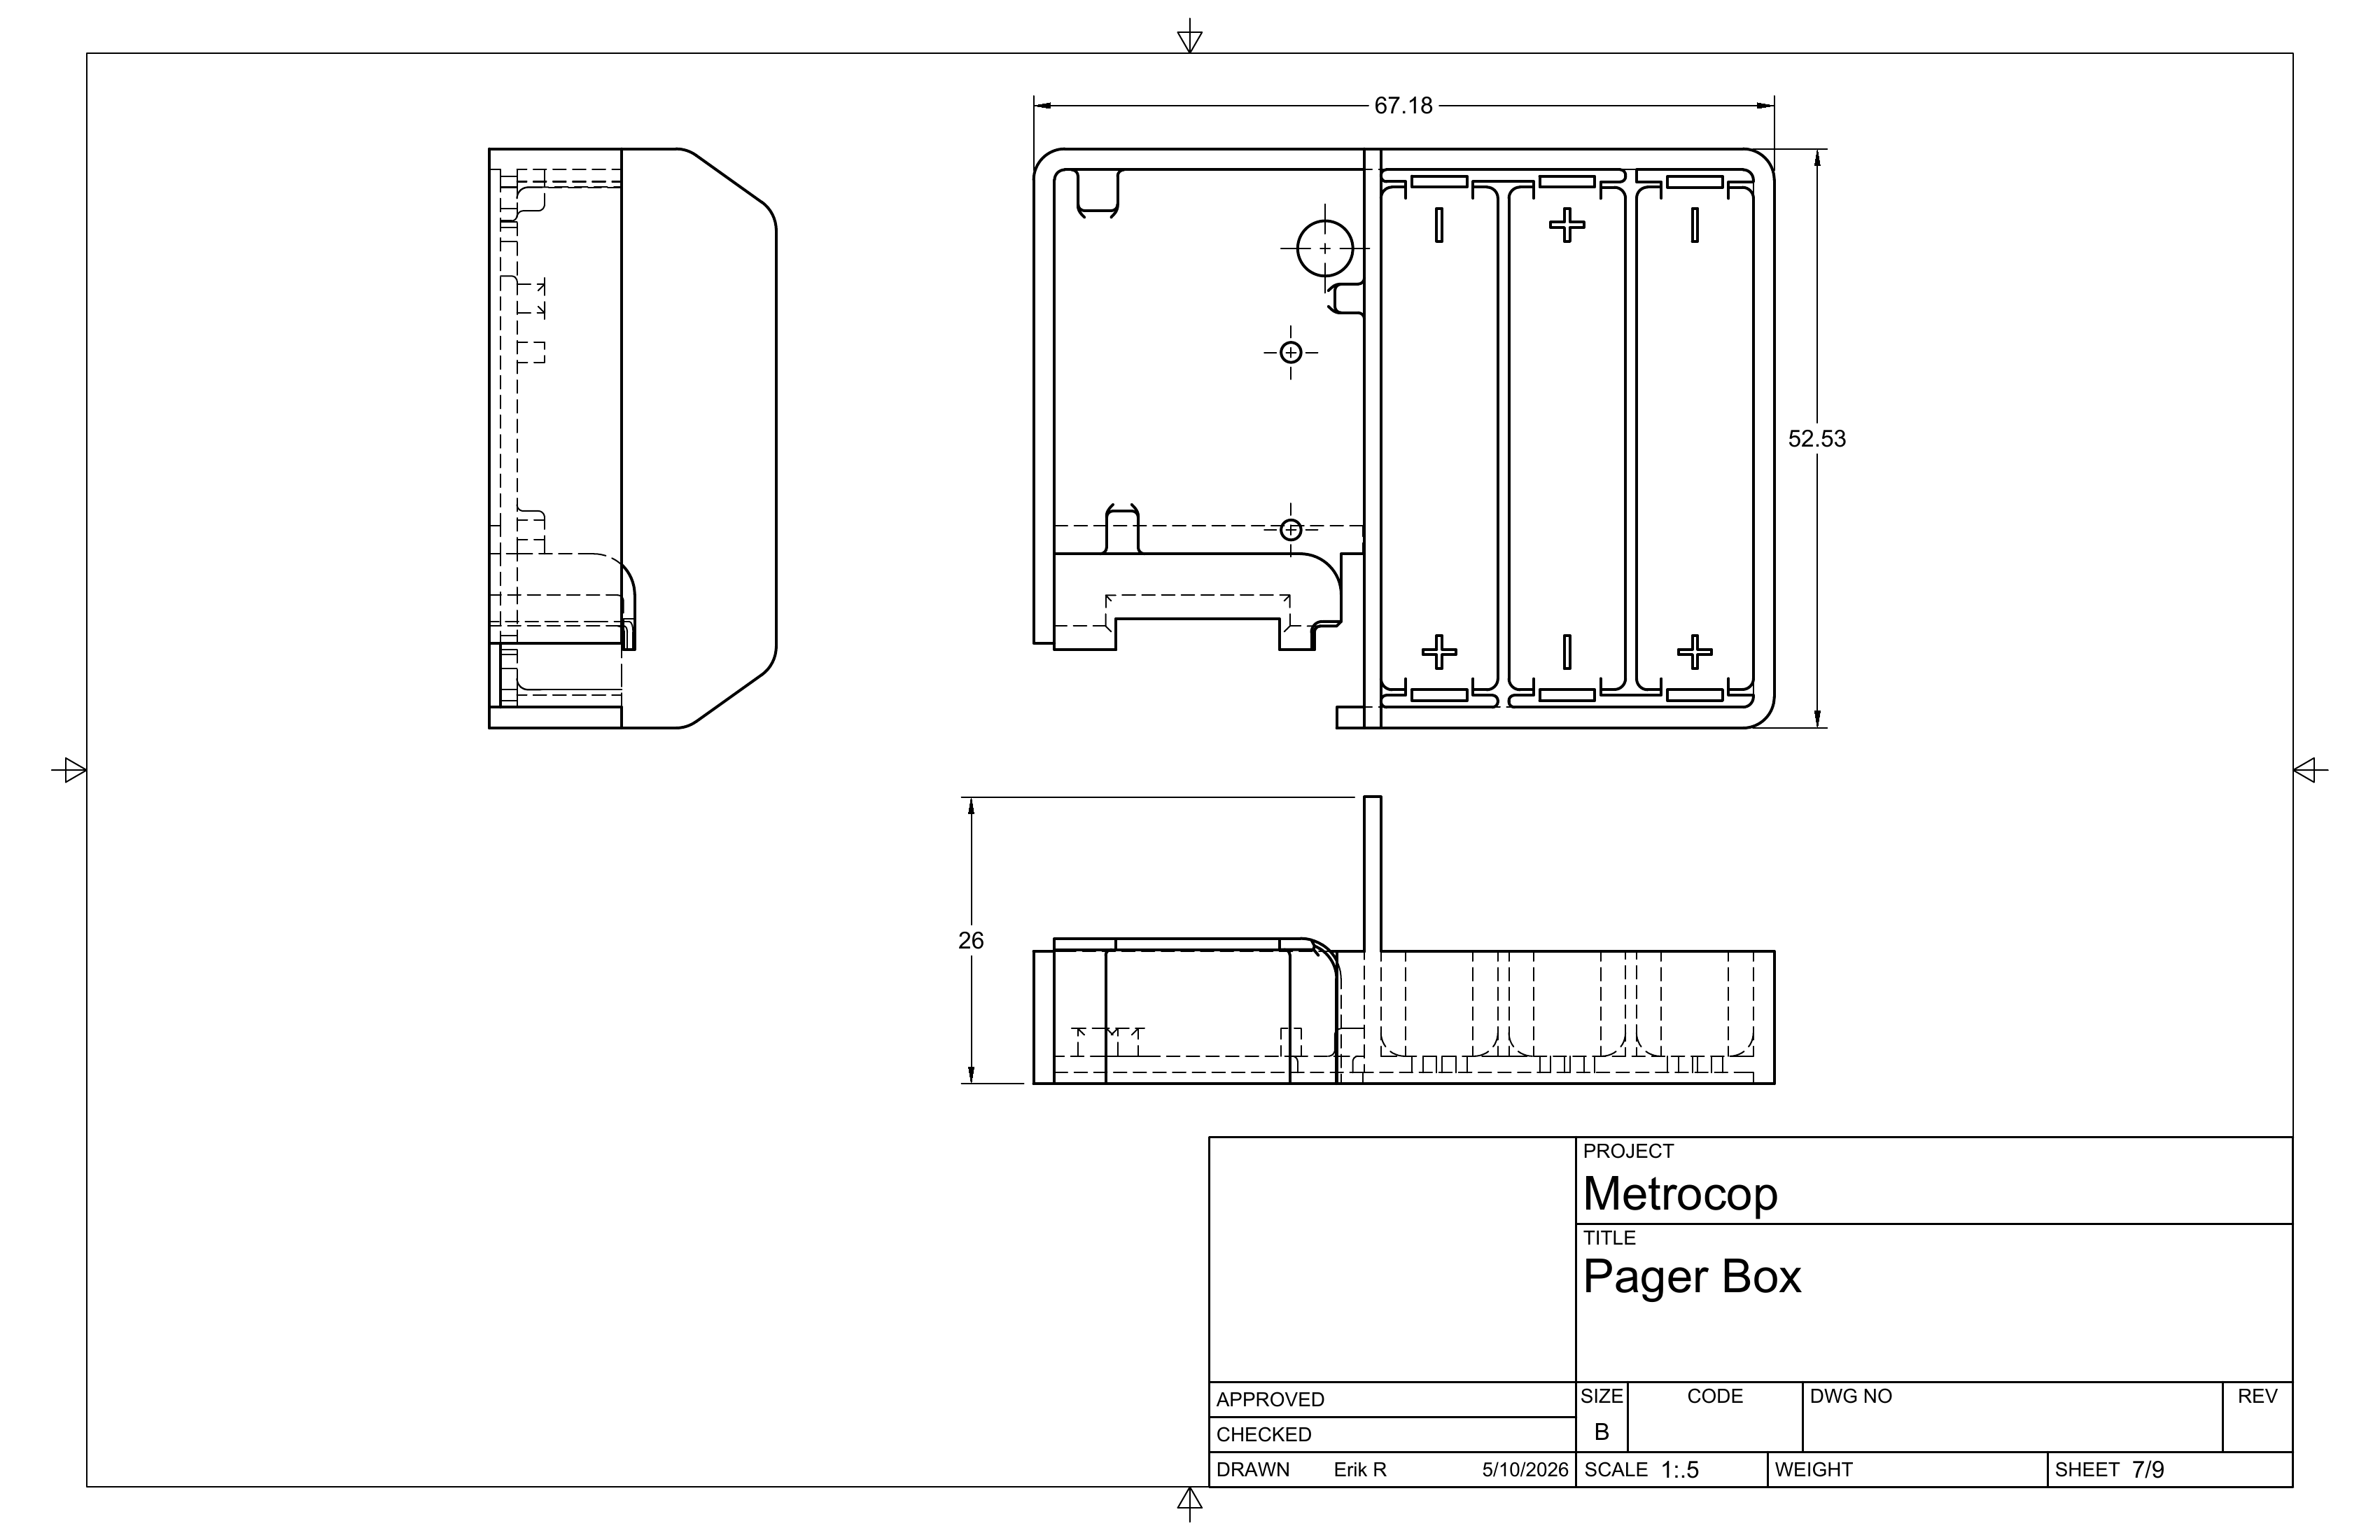
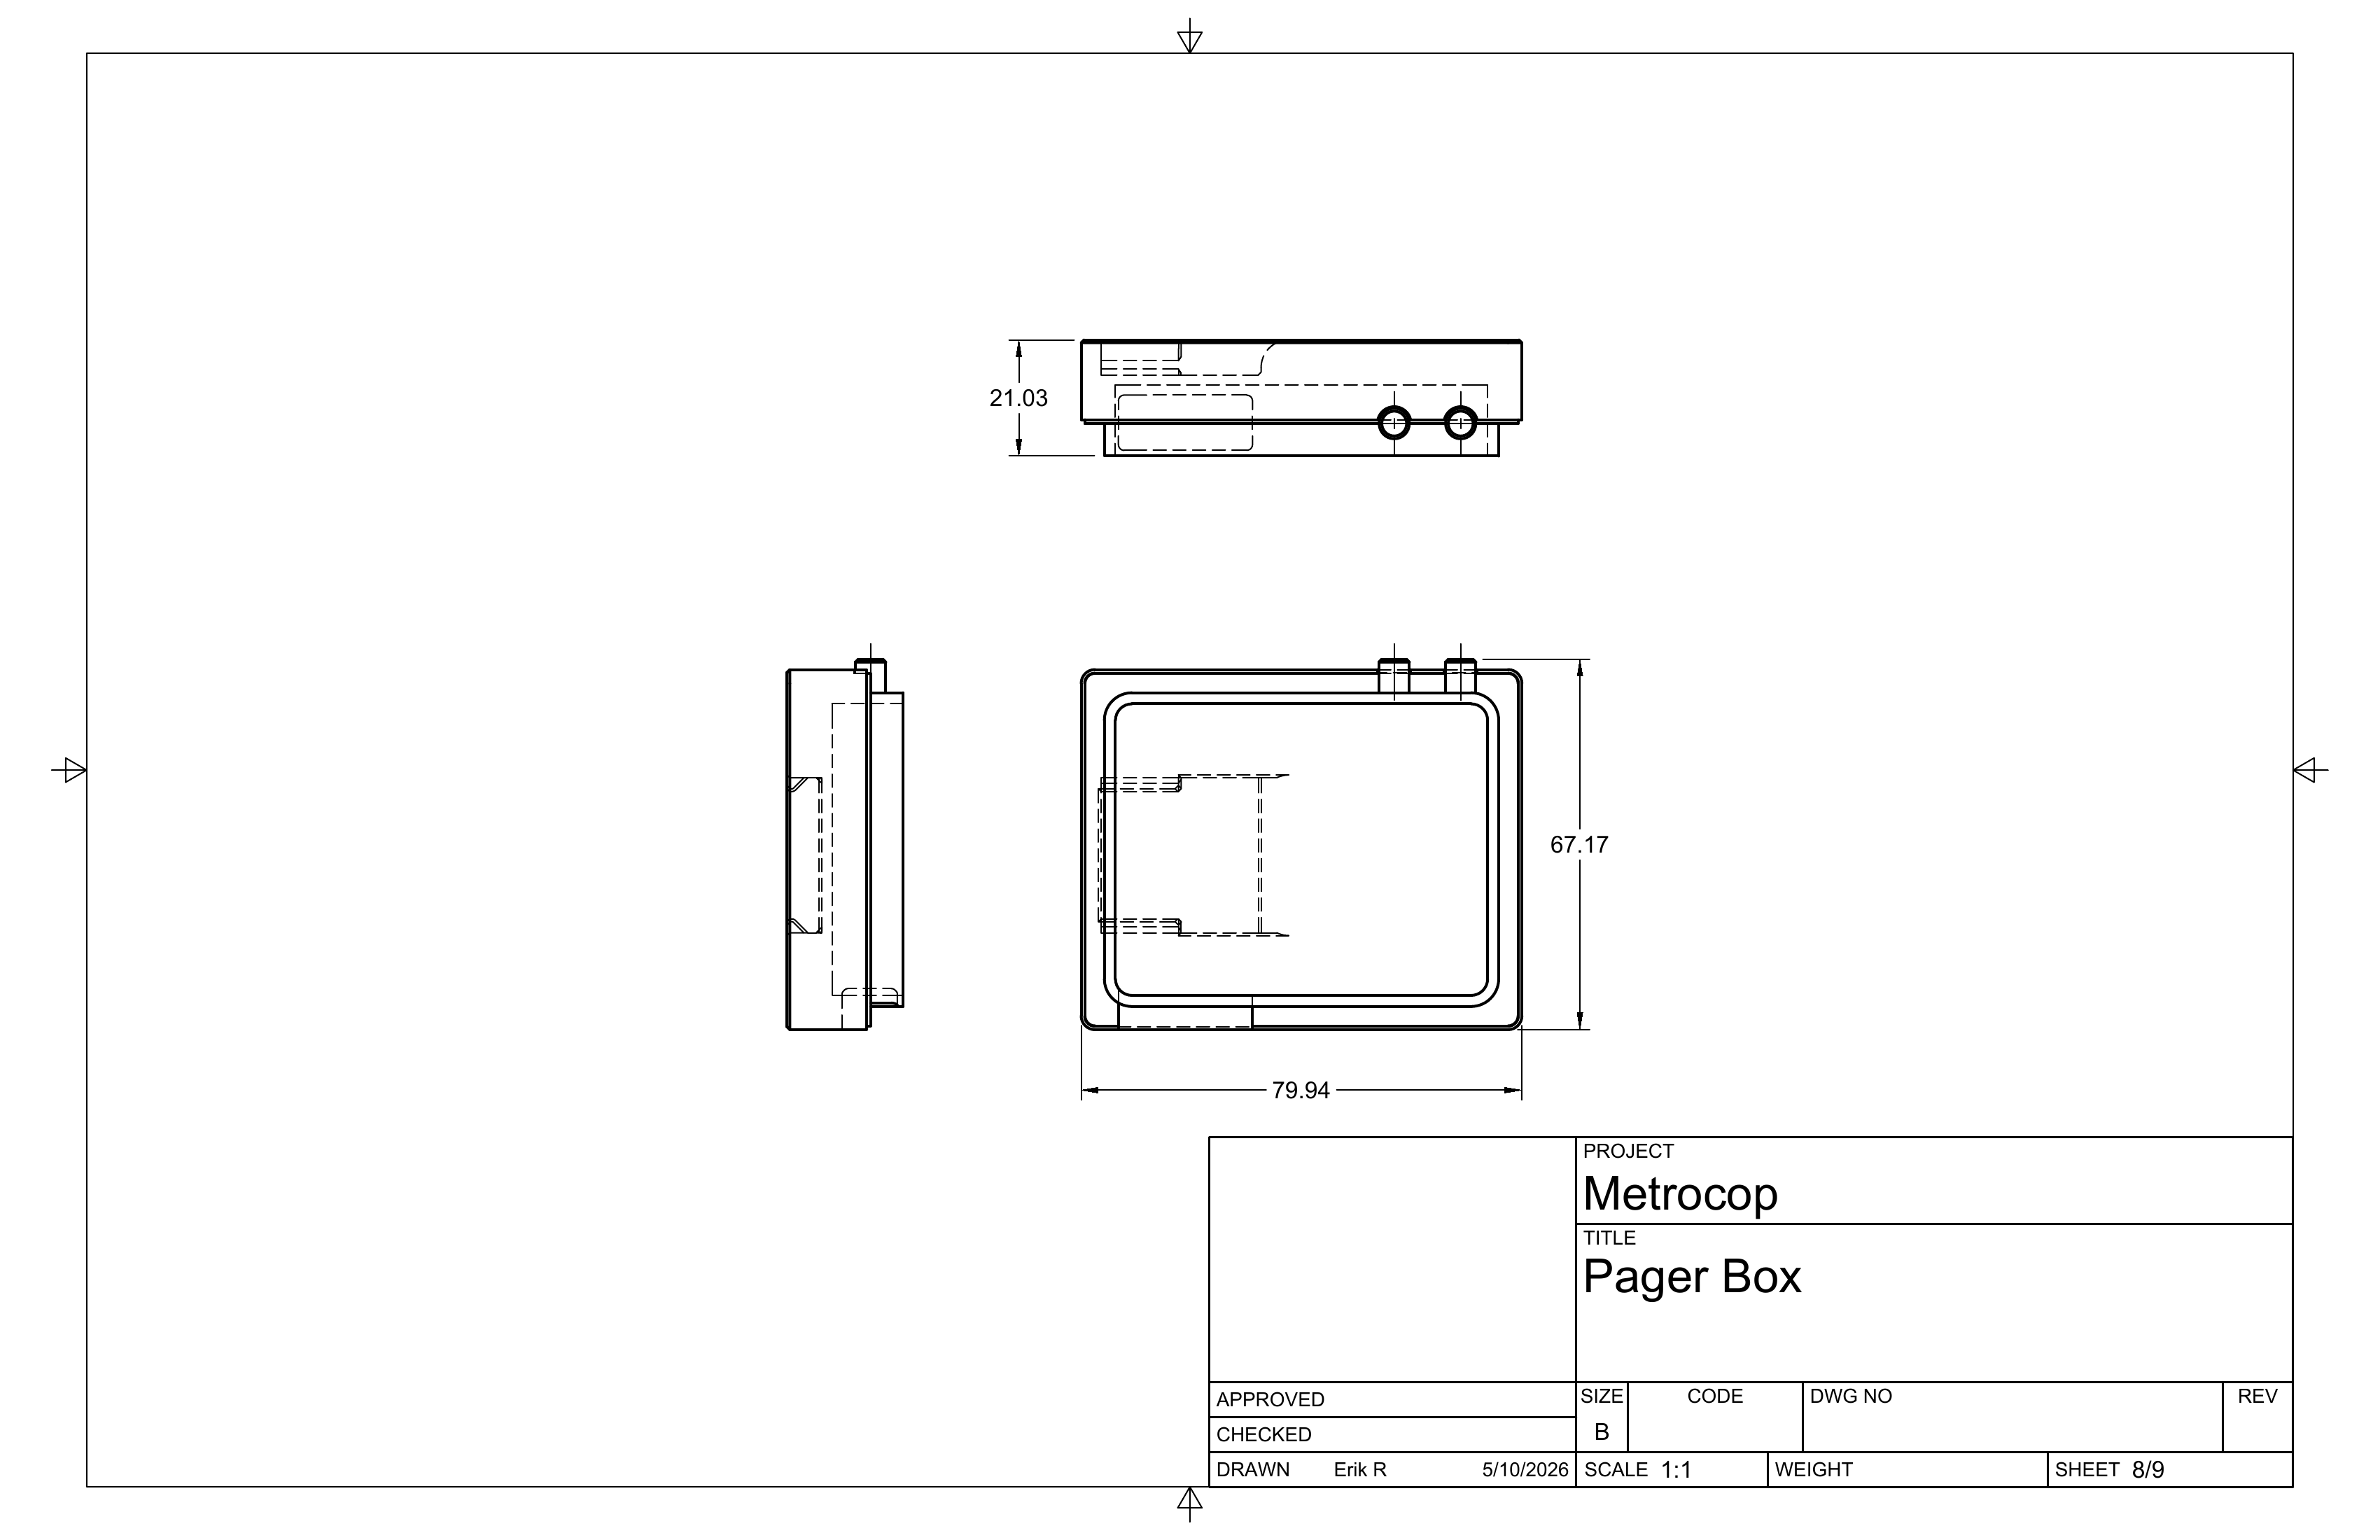
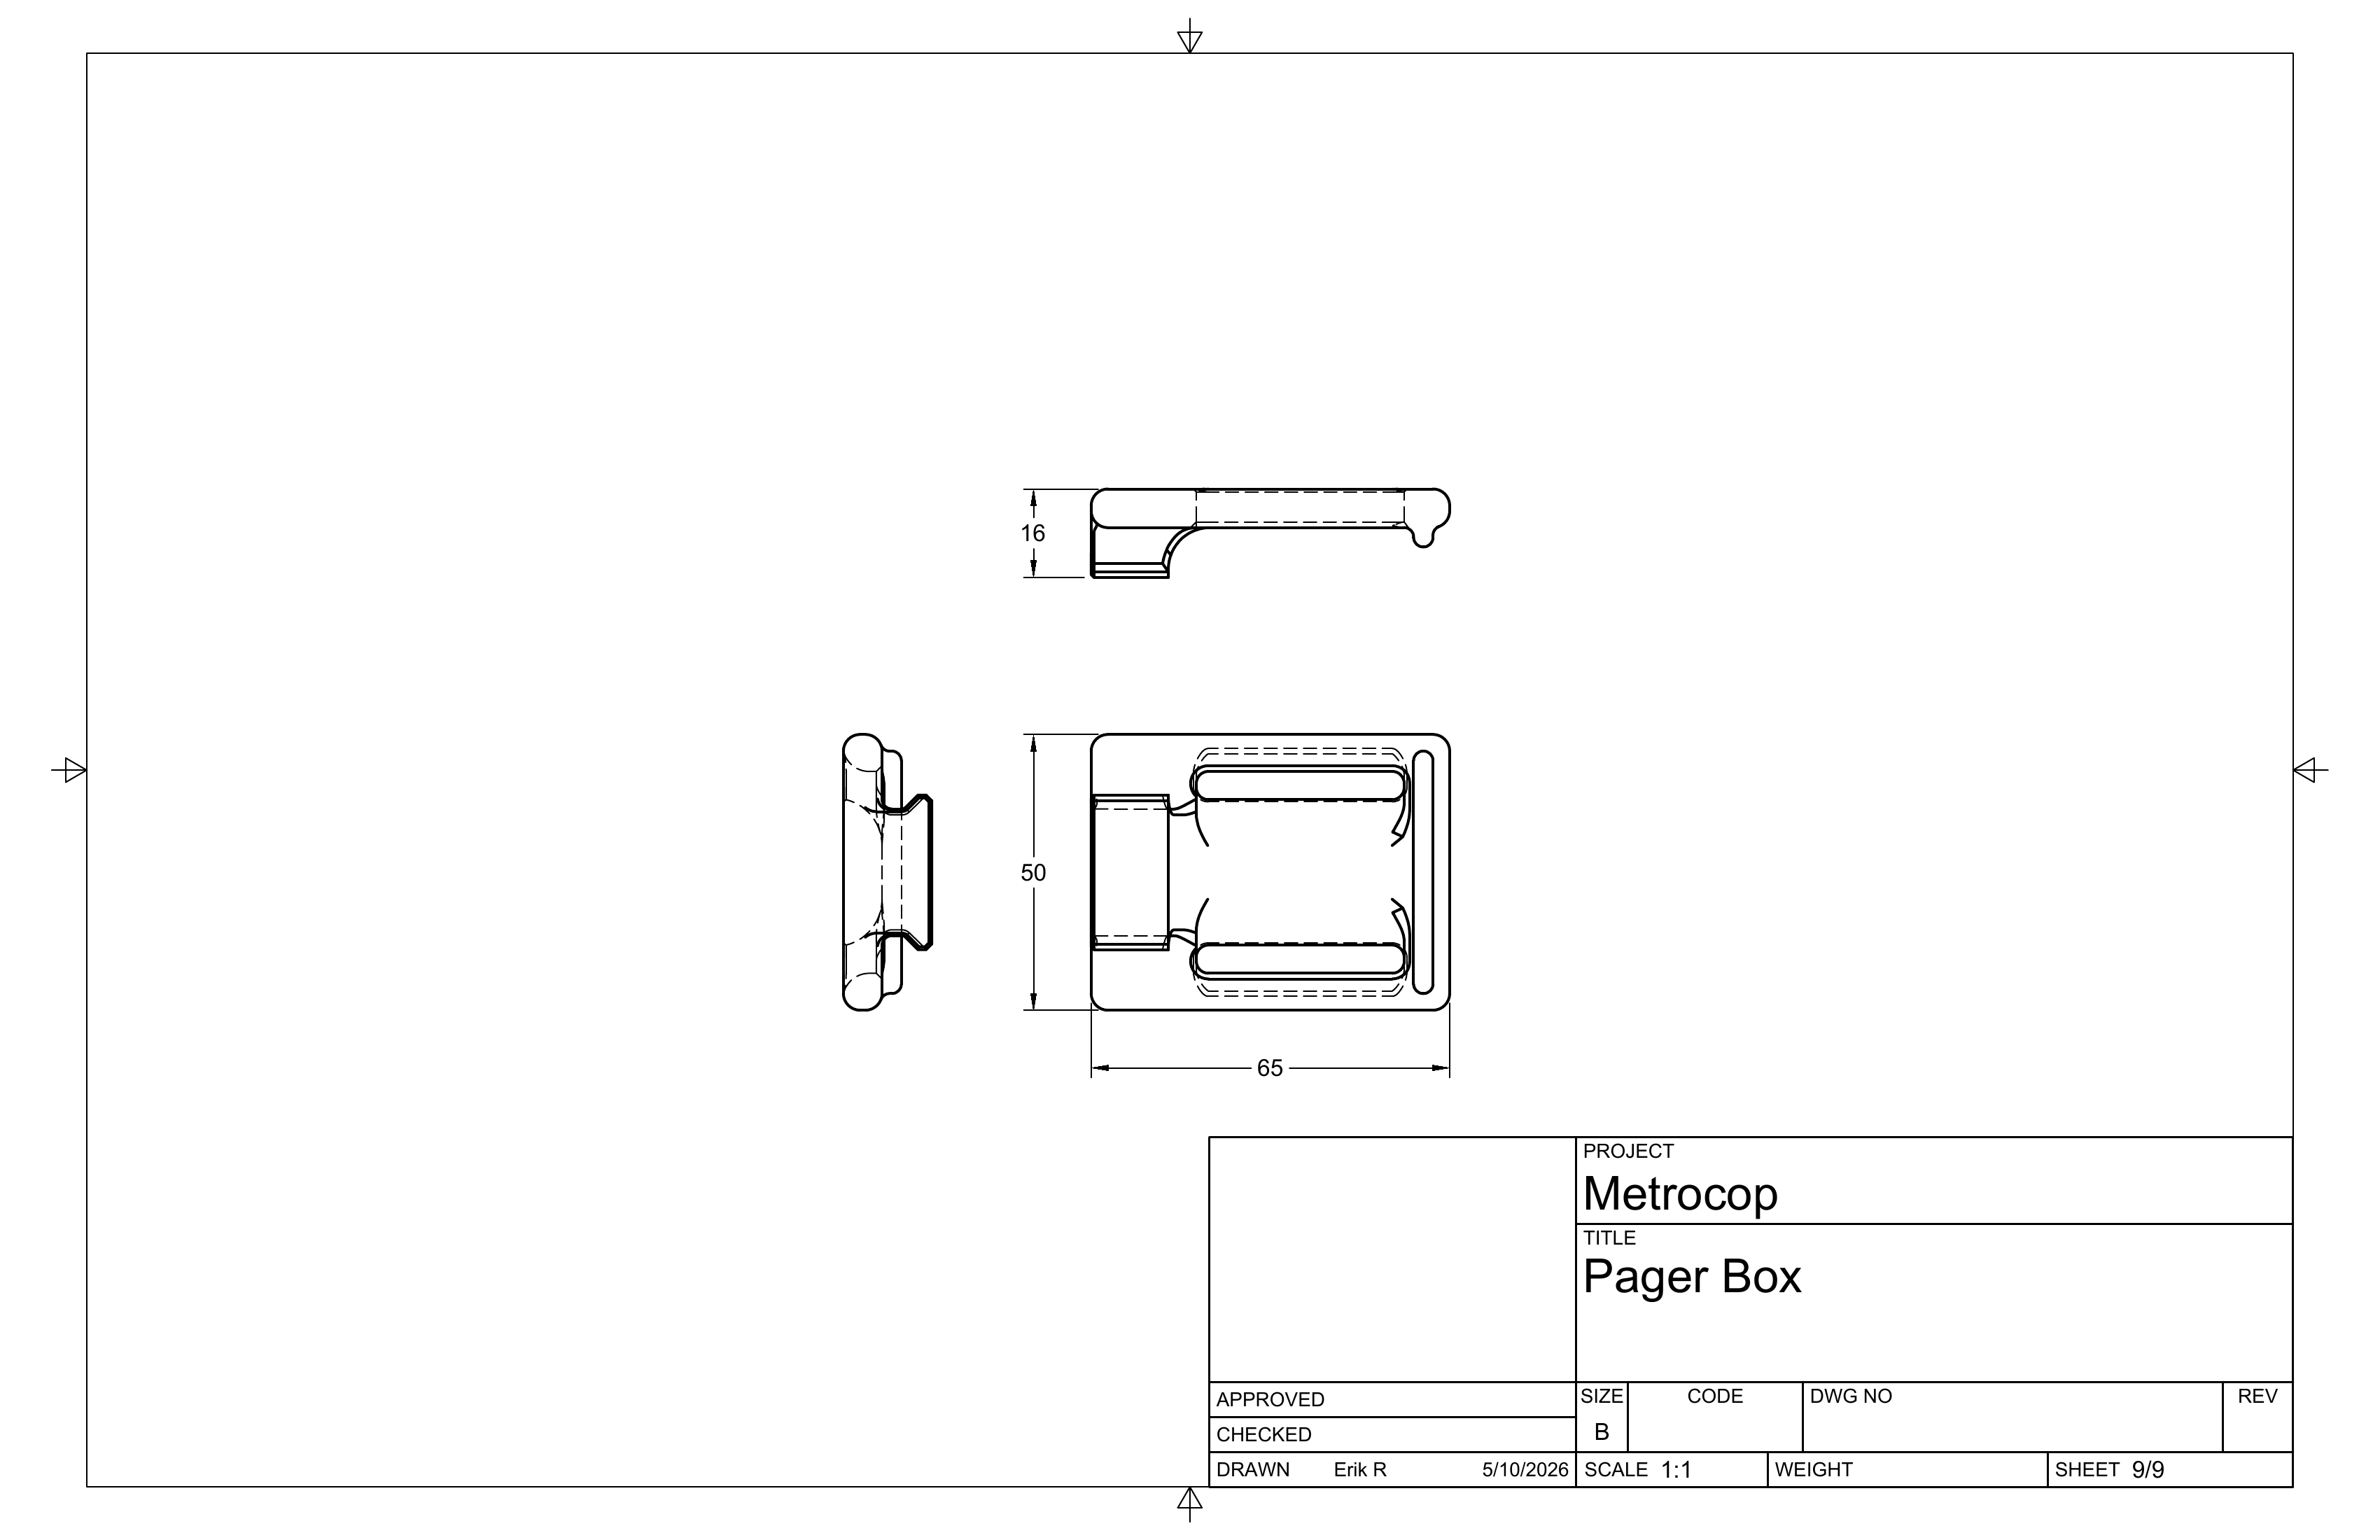
Pager Box
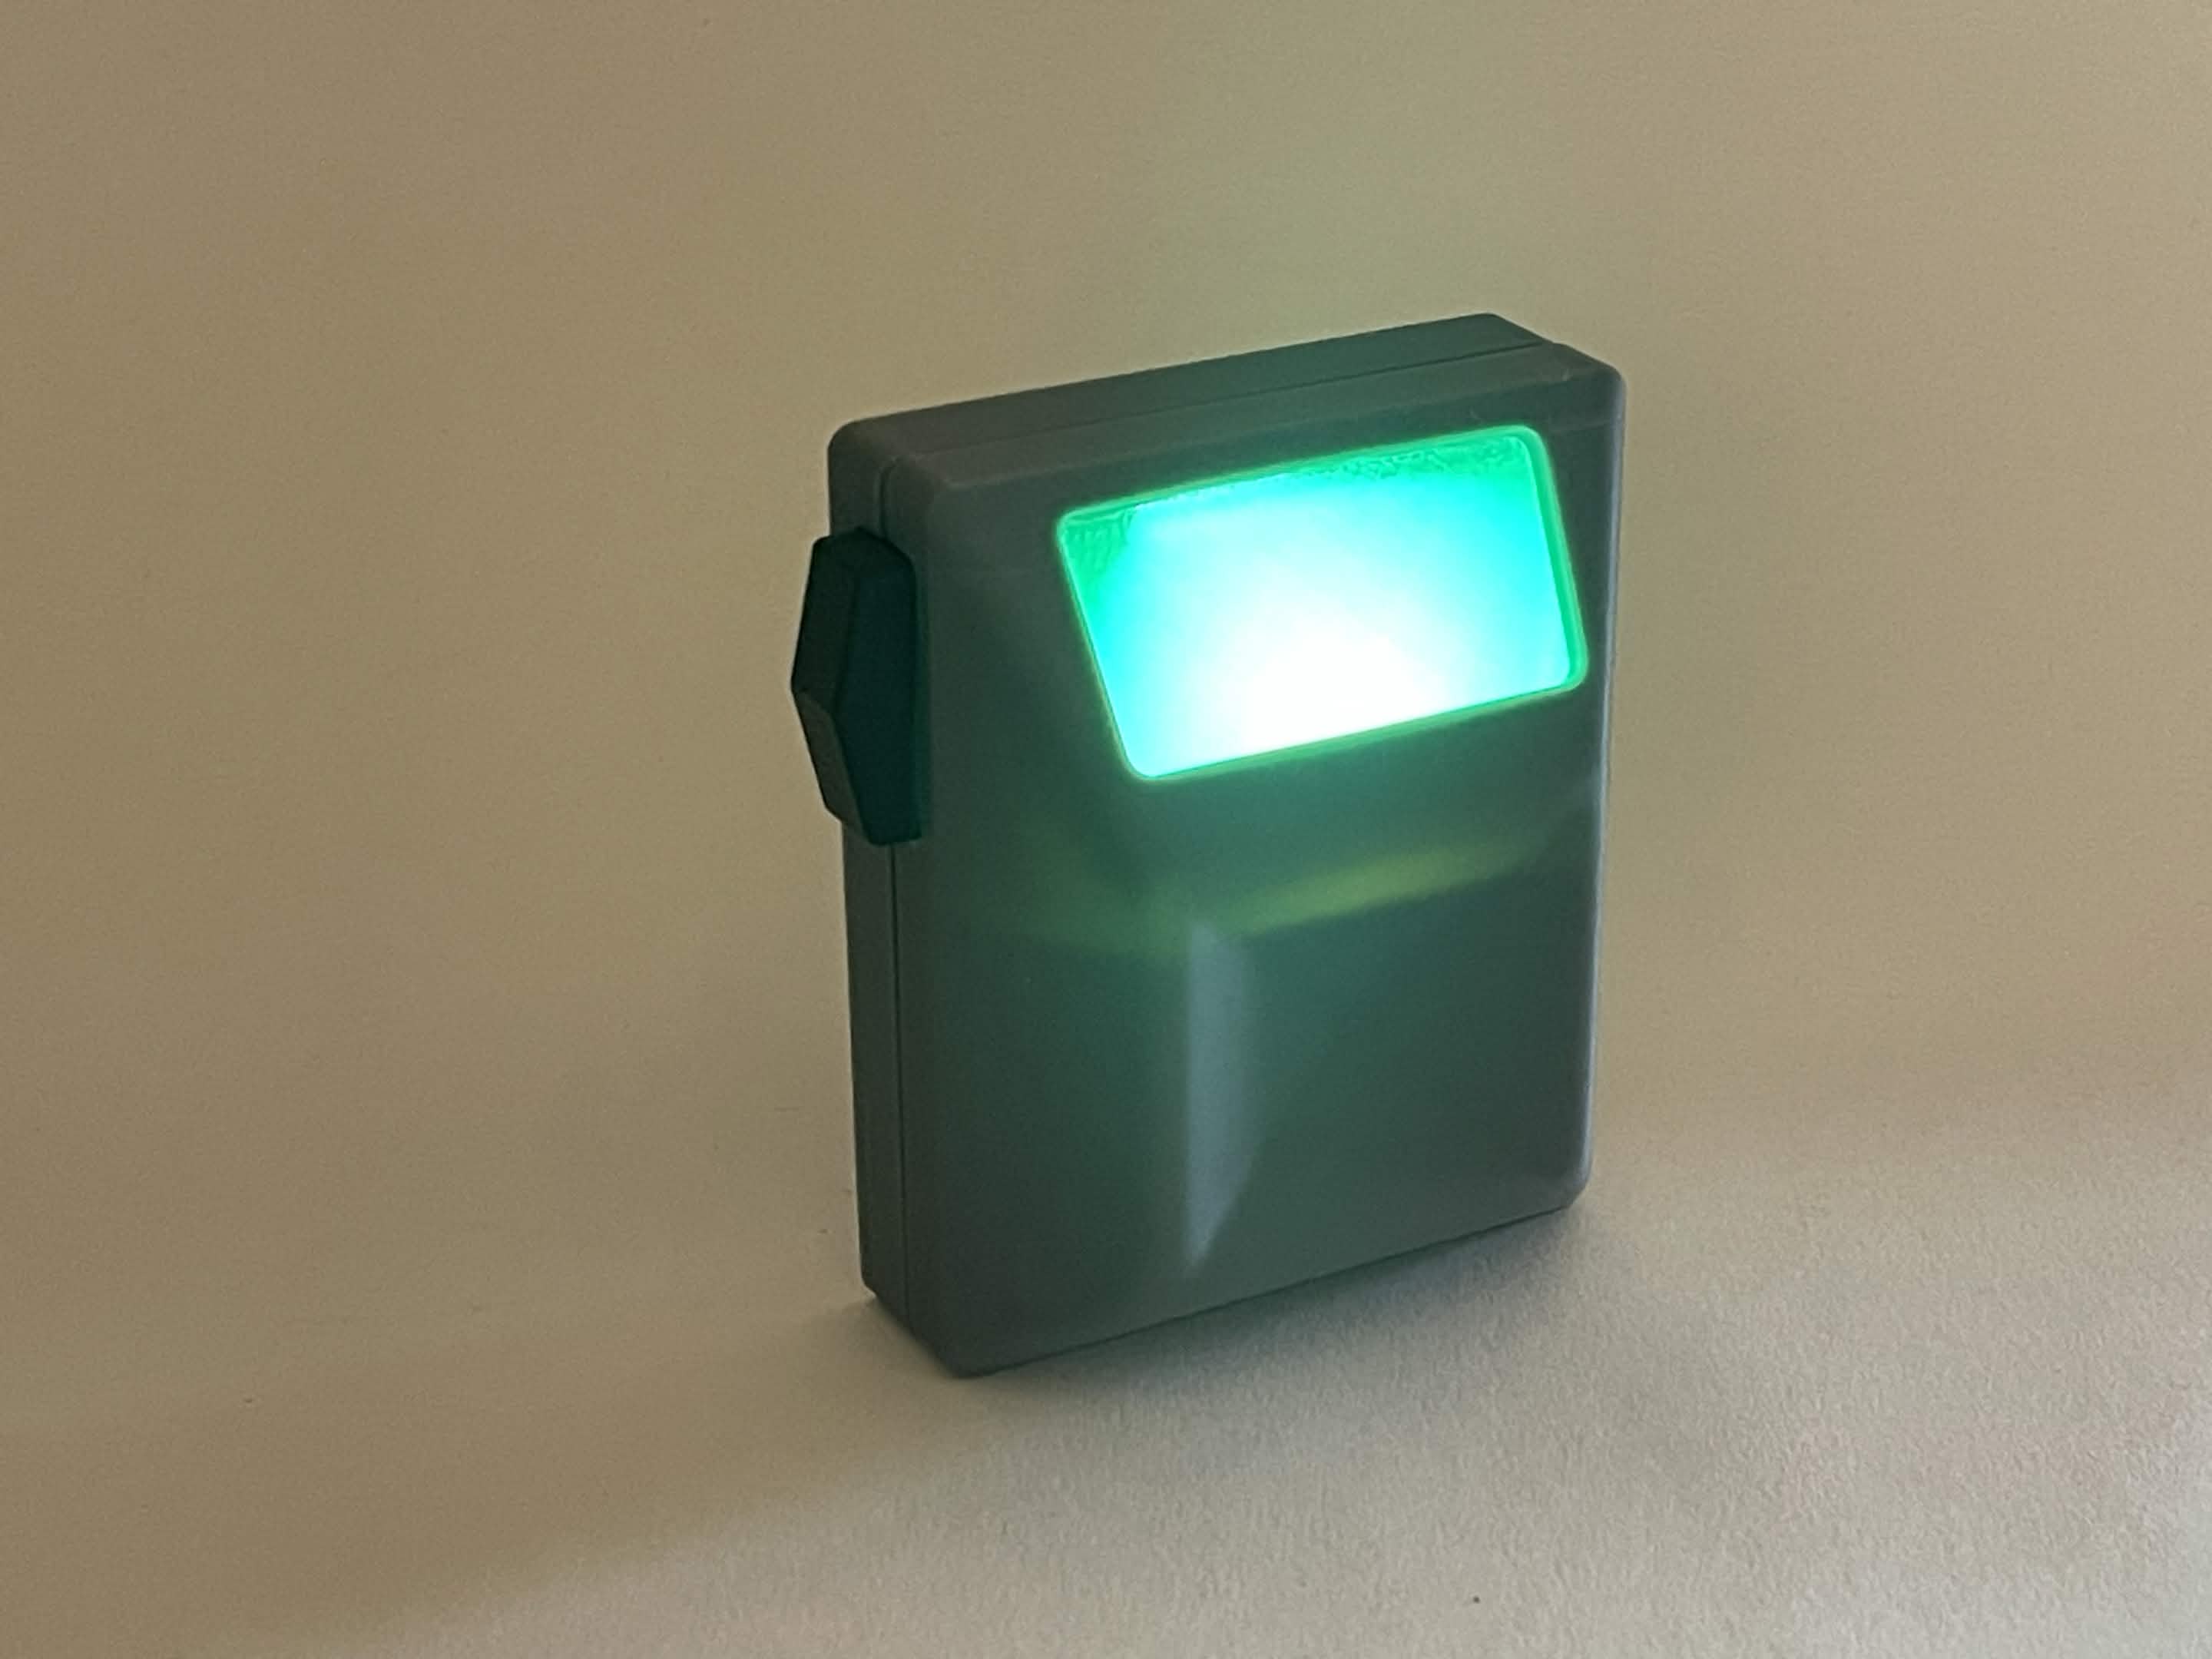
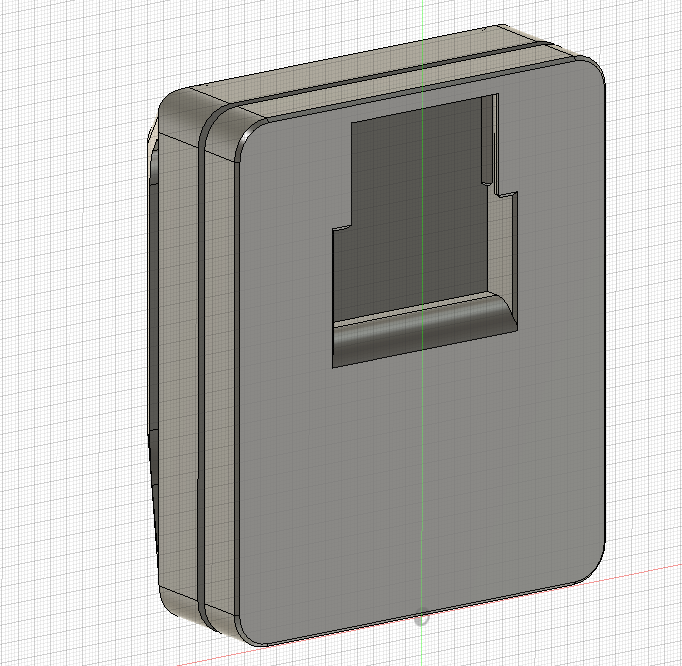
The pager box leaned more on subtle form changes than surface detail, so the challenge was making sure the paneling, clip area, and front recesses felt deliberate instead of plain. Once the lighting went in, it started to feel properly alive.
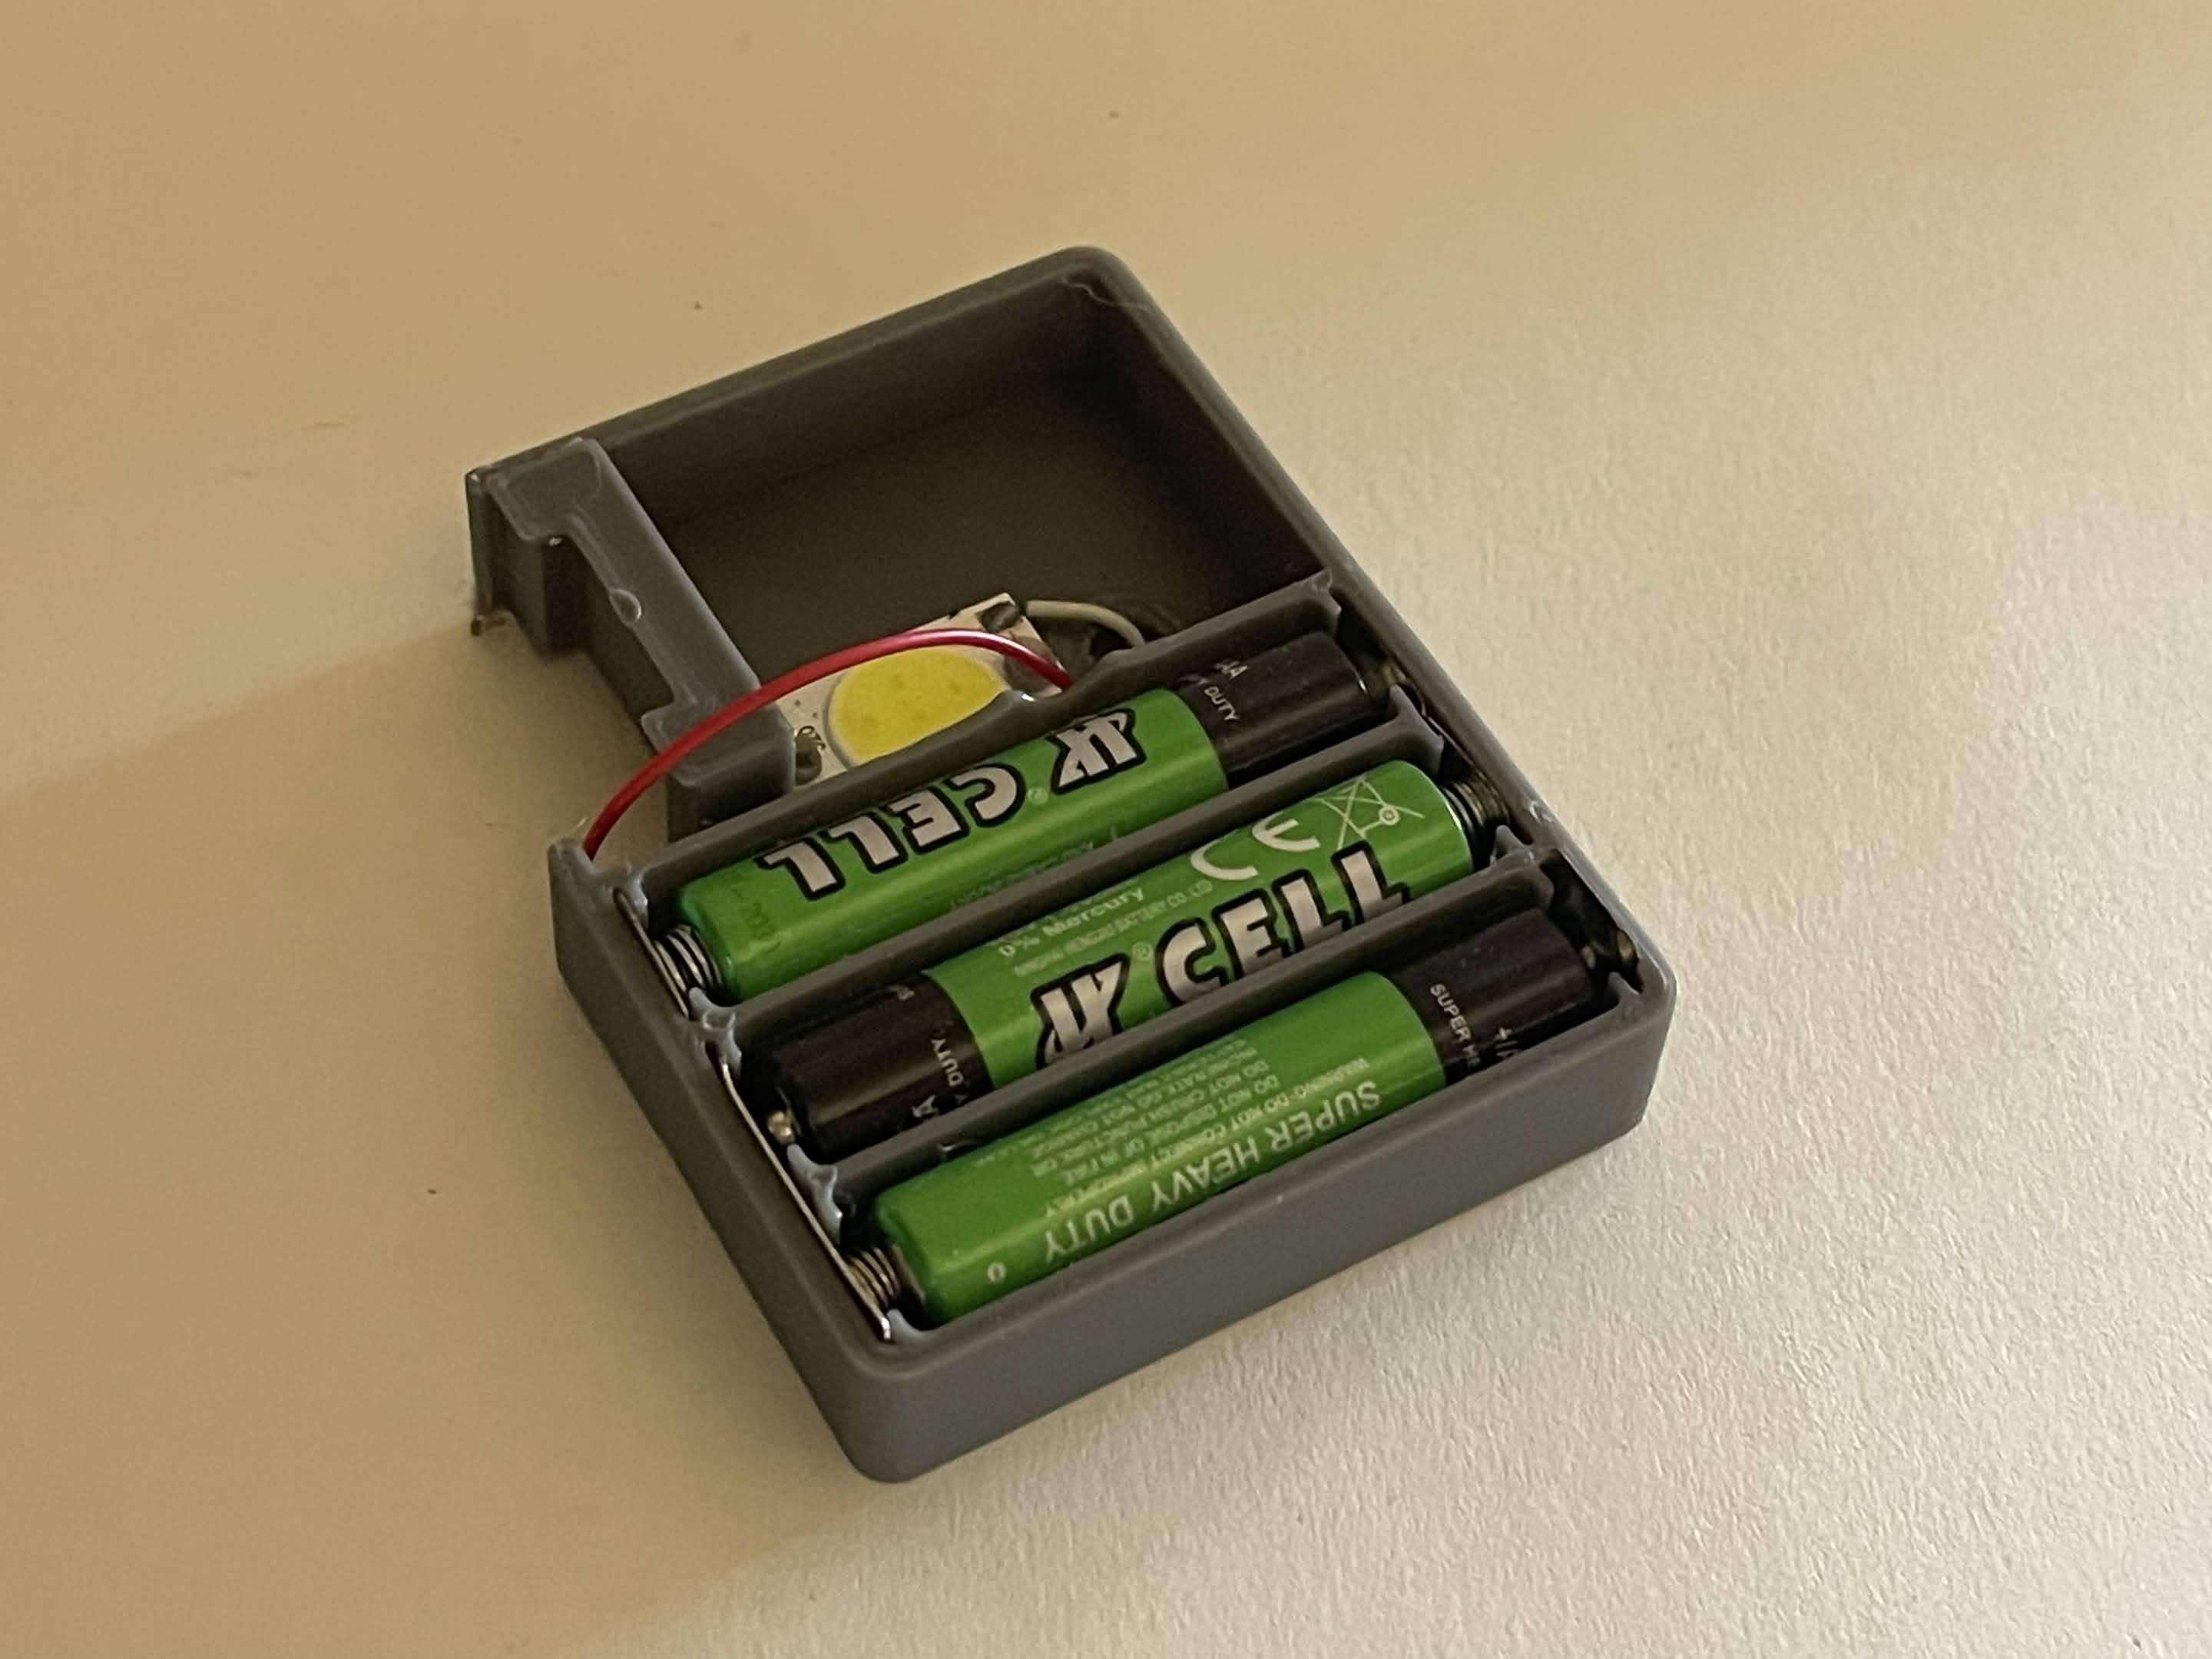
The back and clip side mattered because these props live on a costume, which means the hidden surfaces still affect how convincing the whole thing feels on the body.A view of the pager box without the front panel, revealing the battery compartment and lighting housing within.The finished pager box shows how much the glow and front-face proportions do to sell the prop, even before weathering or belt mounting enter the picture.Under the front panel, the inside is intentionally simple: enough structure to hold the light and batteries securely without overengineering a small prop.
Sheet 1 of 9Sheet 2 of 9Sheet 3 of 9Sheet 4 of 9Sheet 5 of 9Sheet 6 of 9Sheet 7 of 9Sheet 8 of 9Sheet 9 of 9
1 / 9
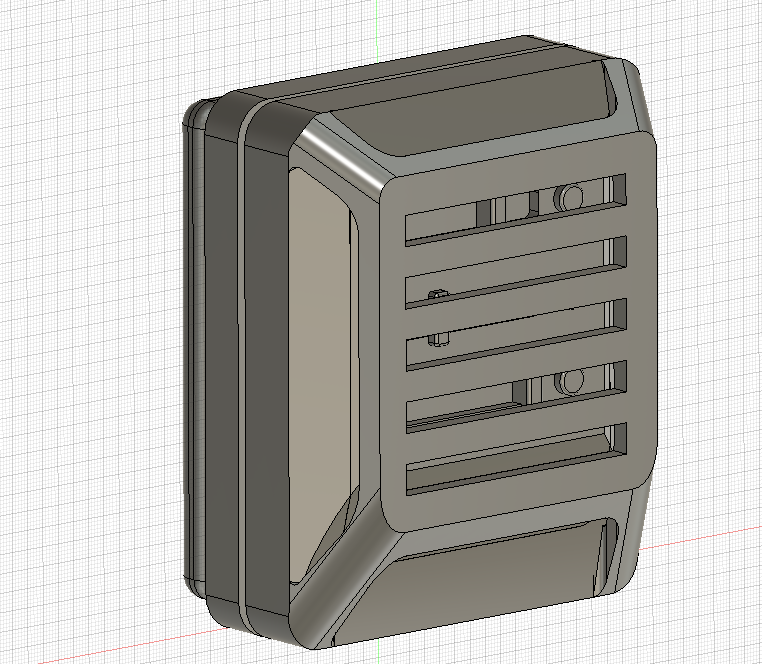
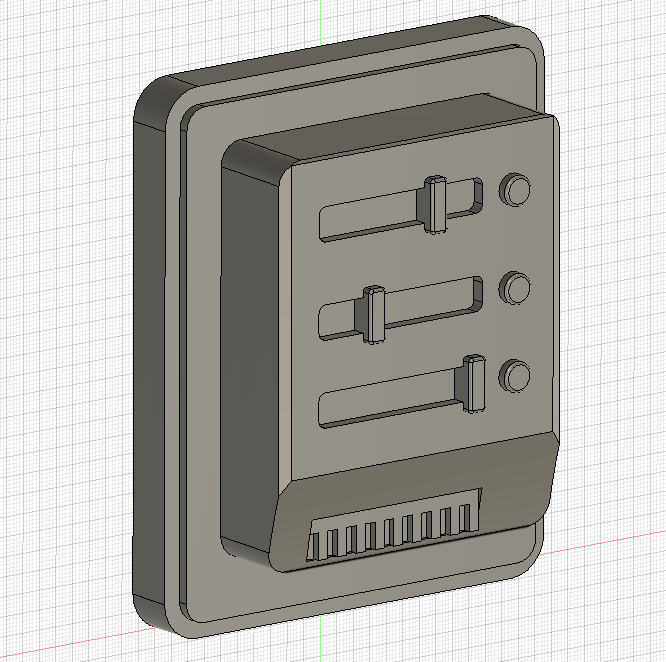
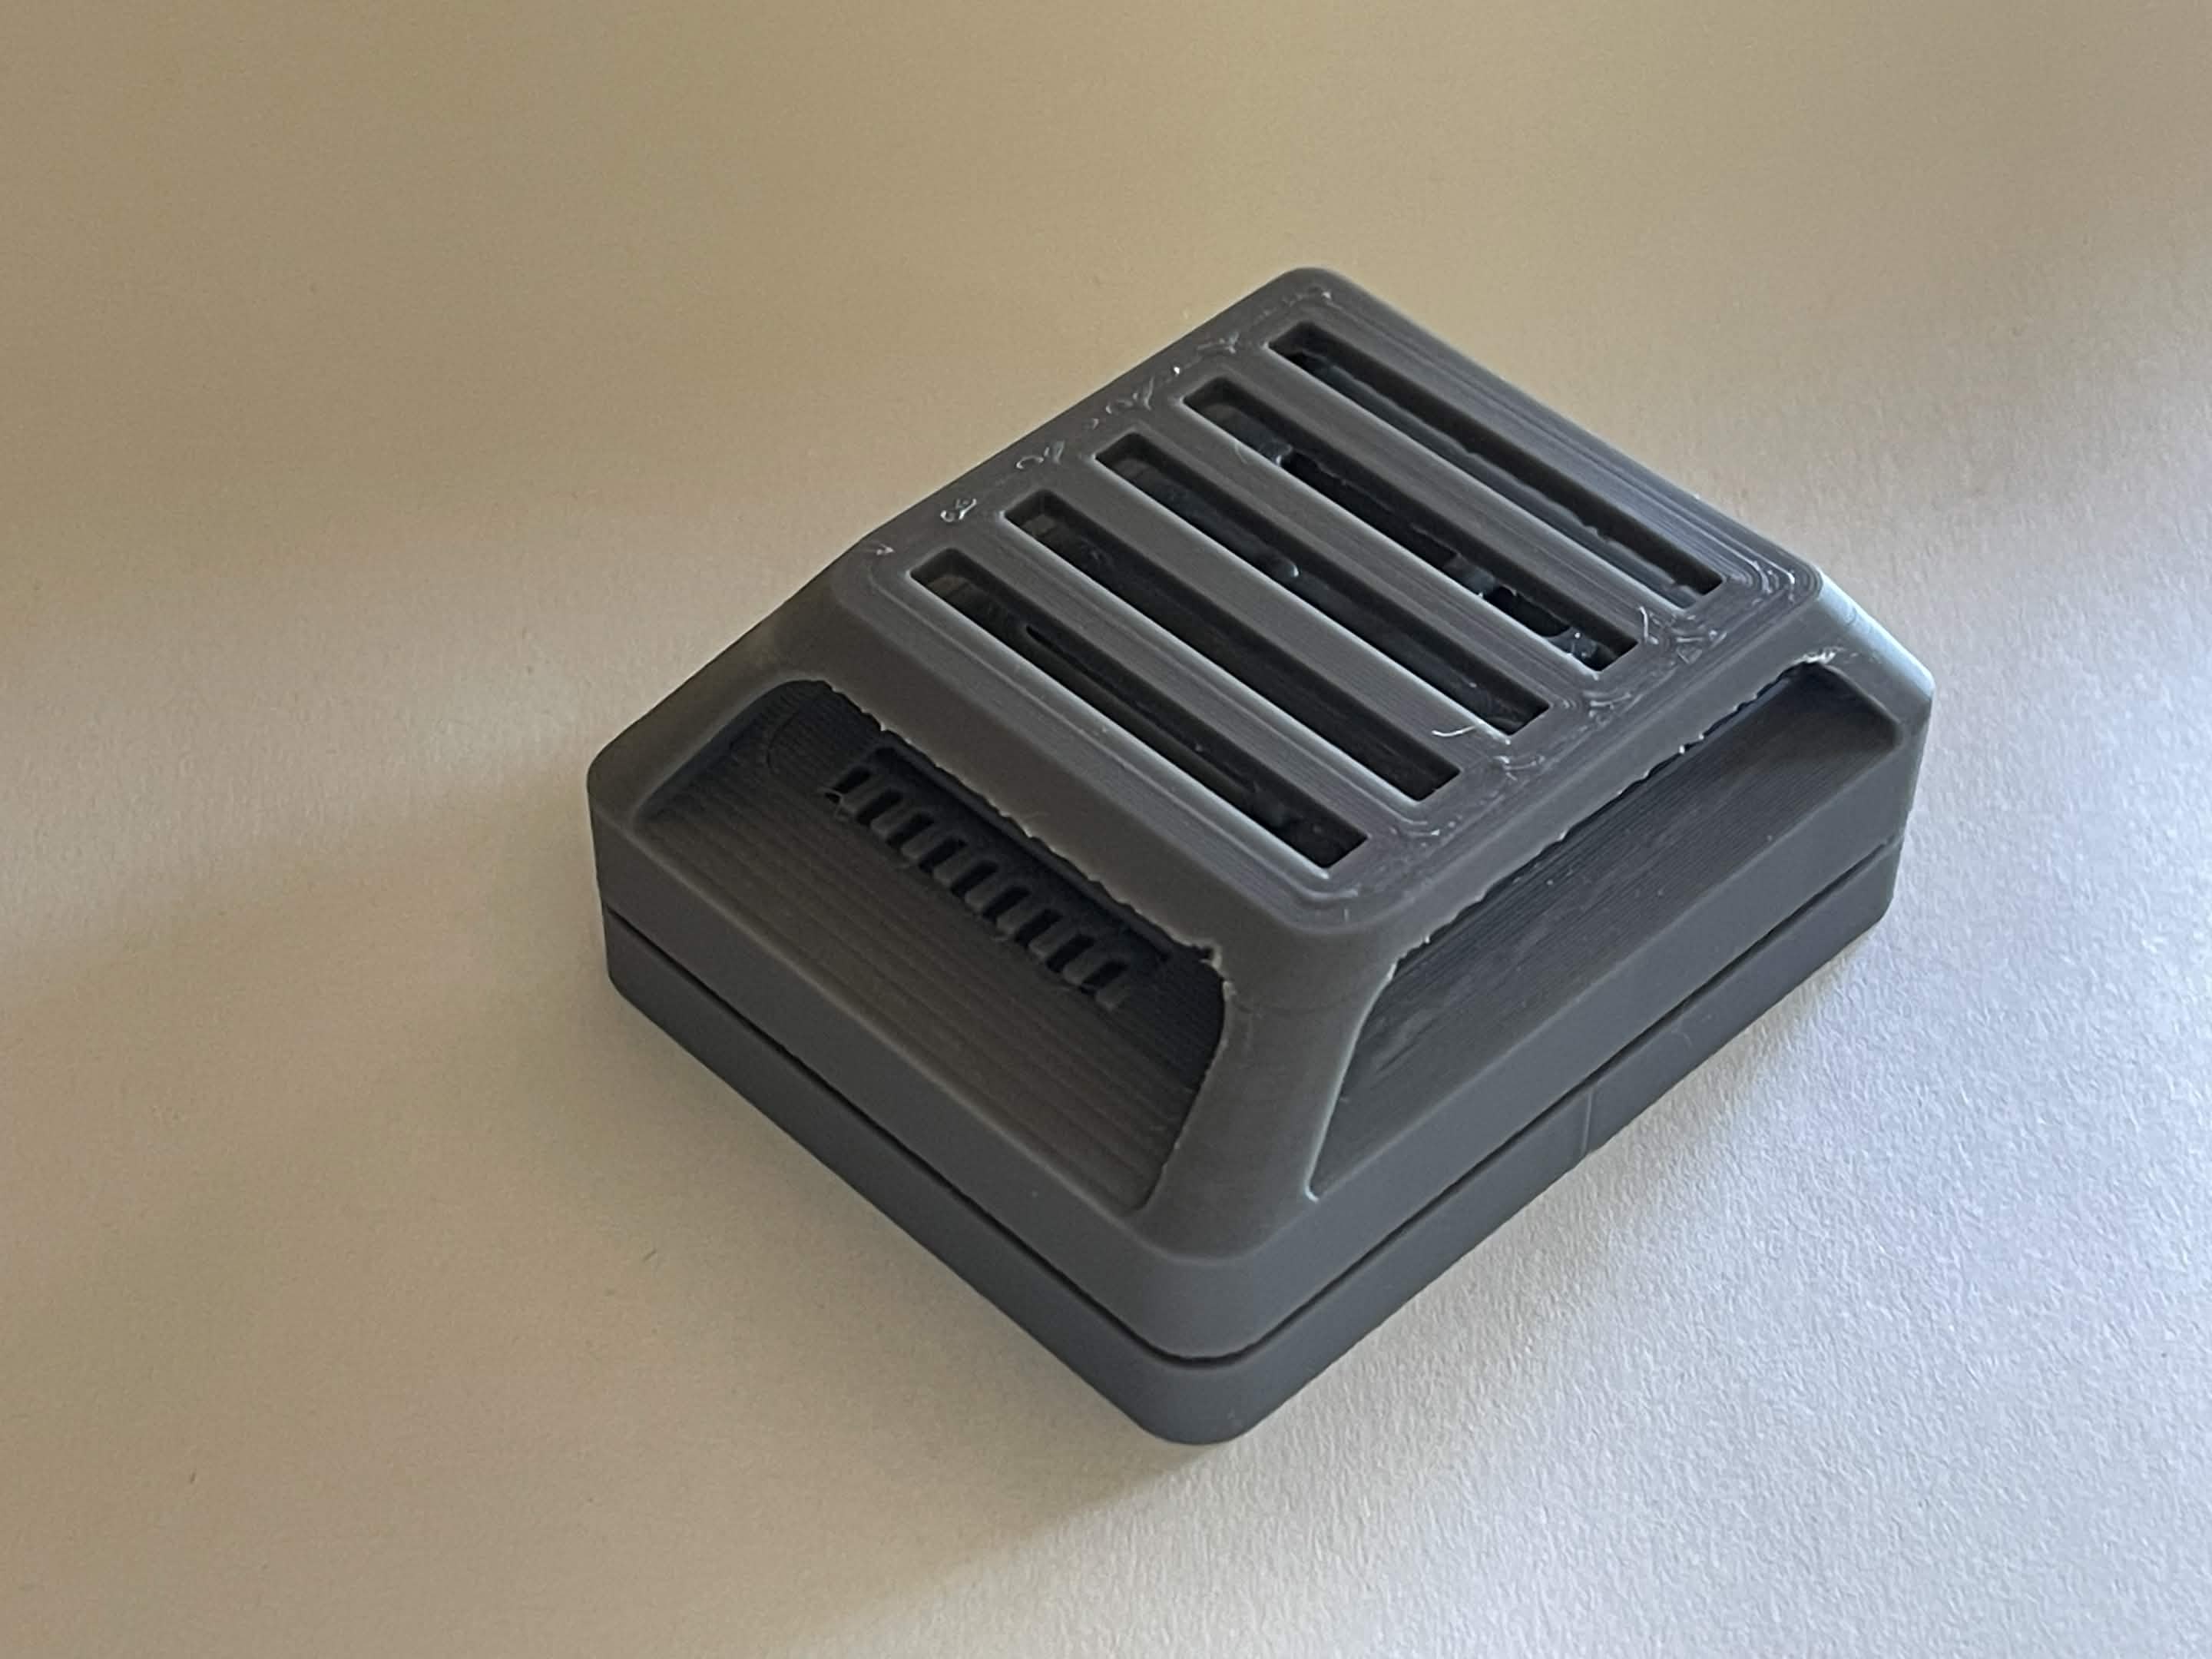
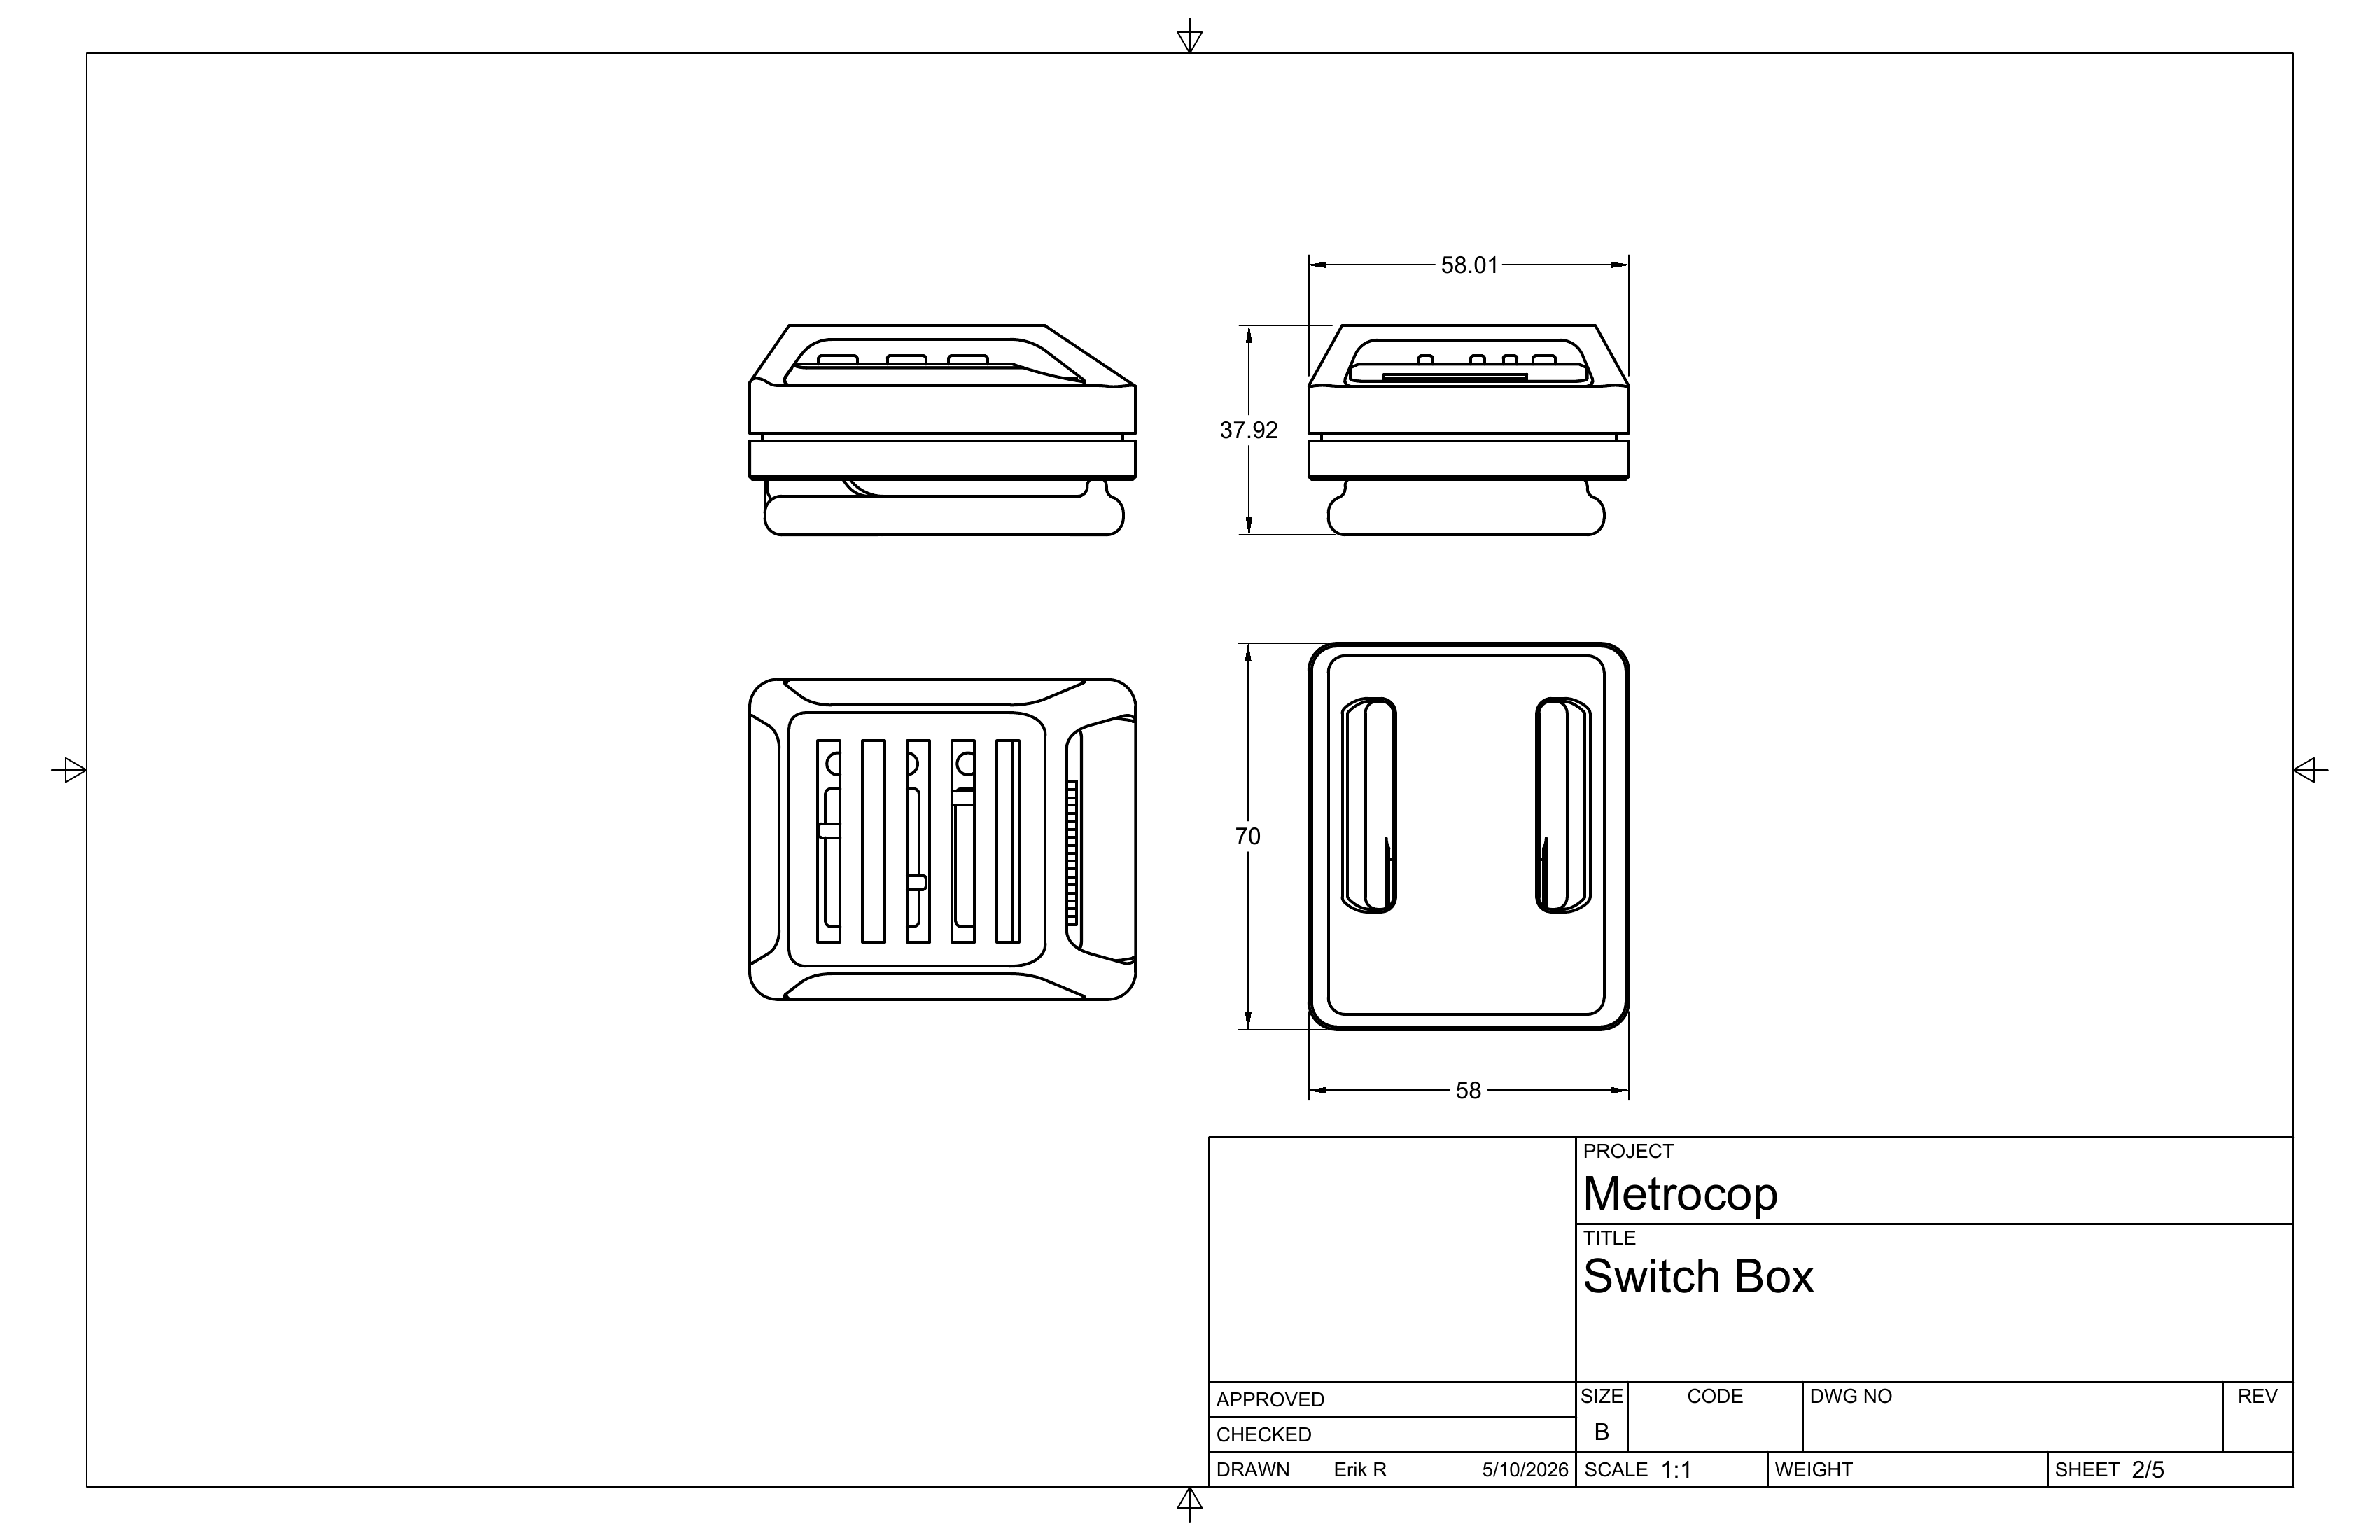
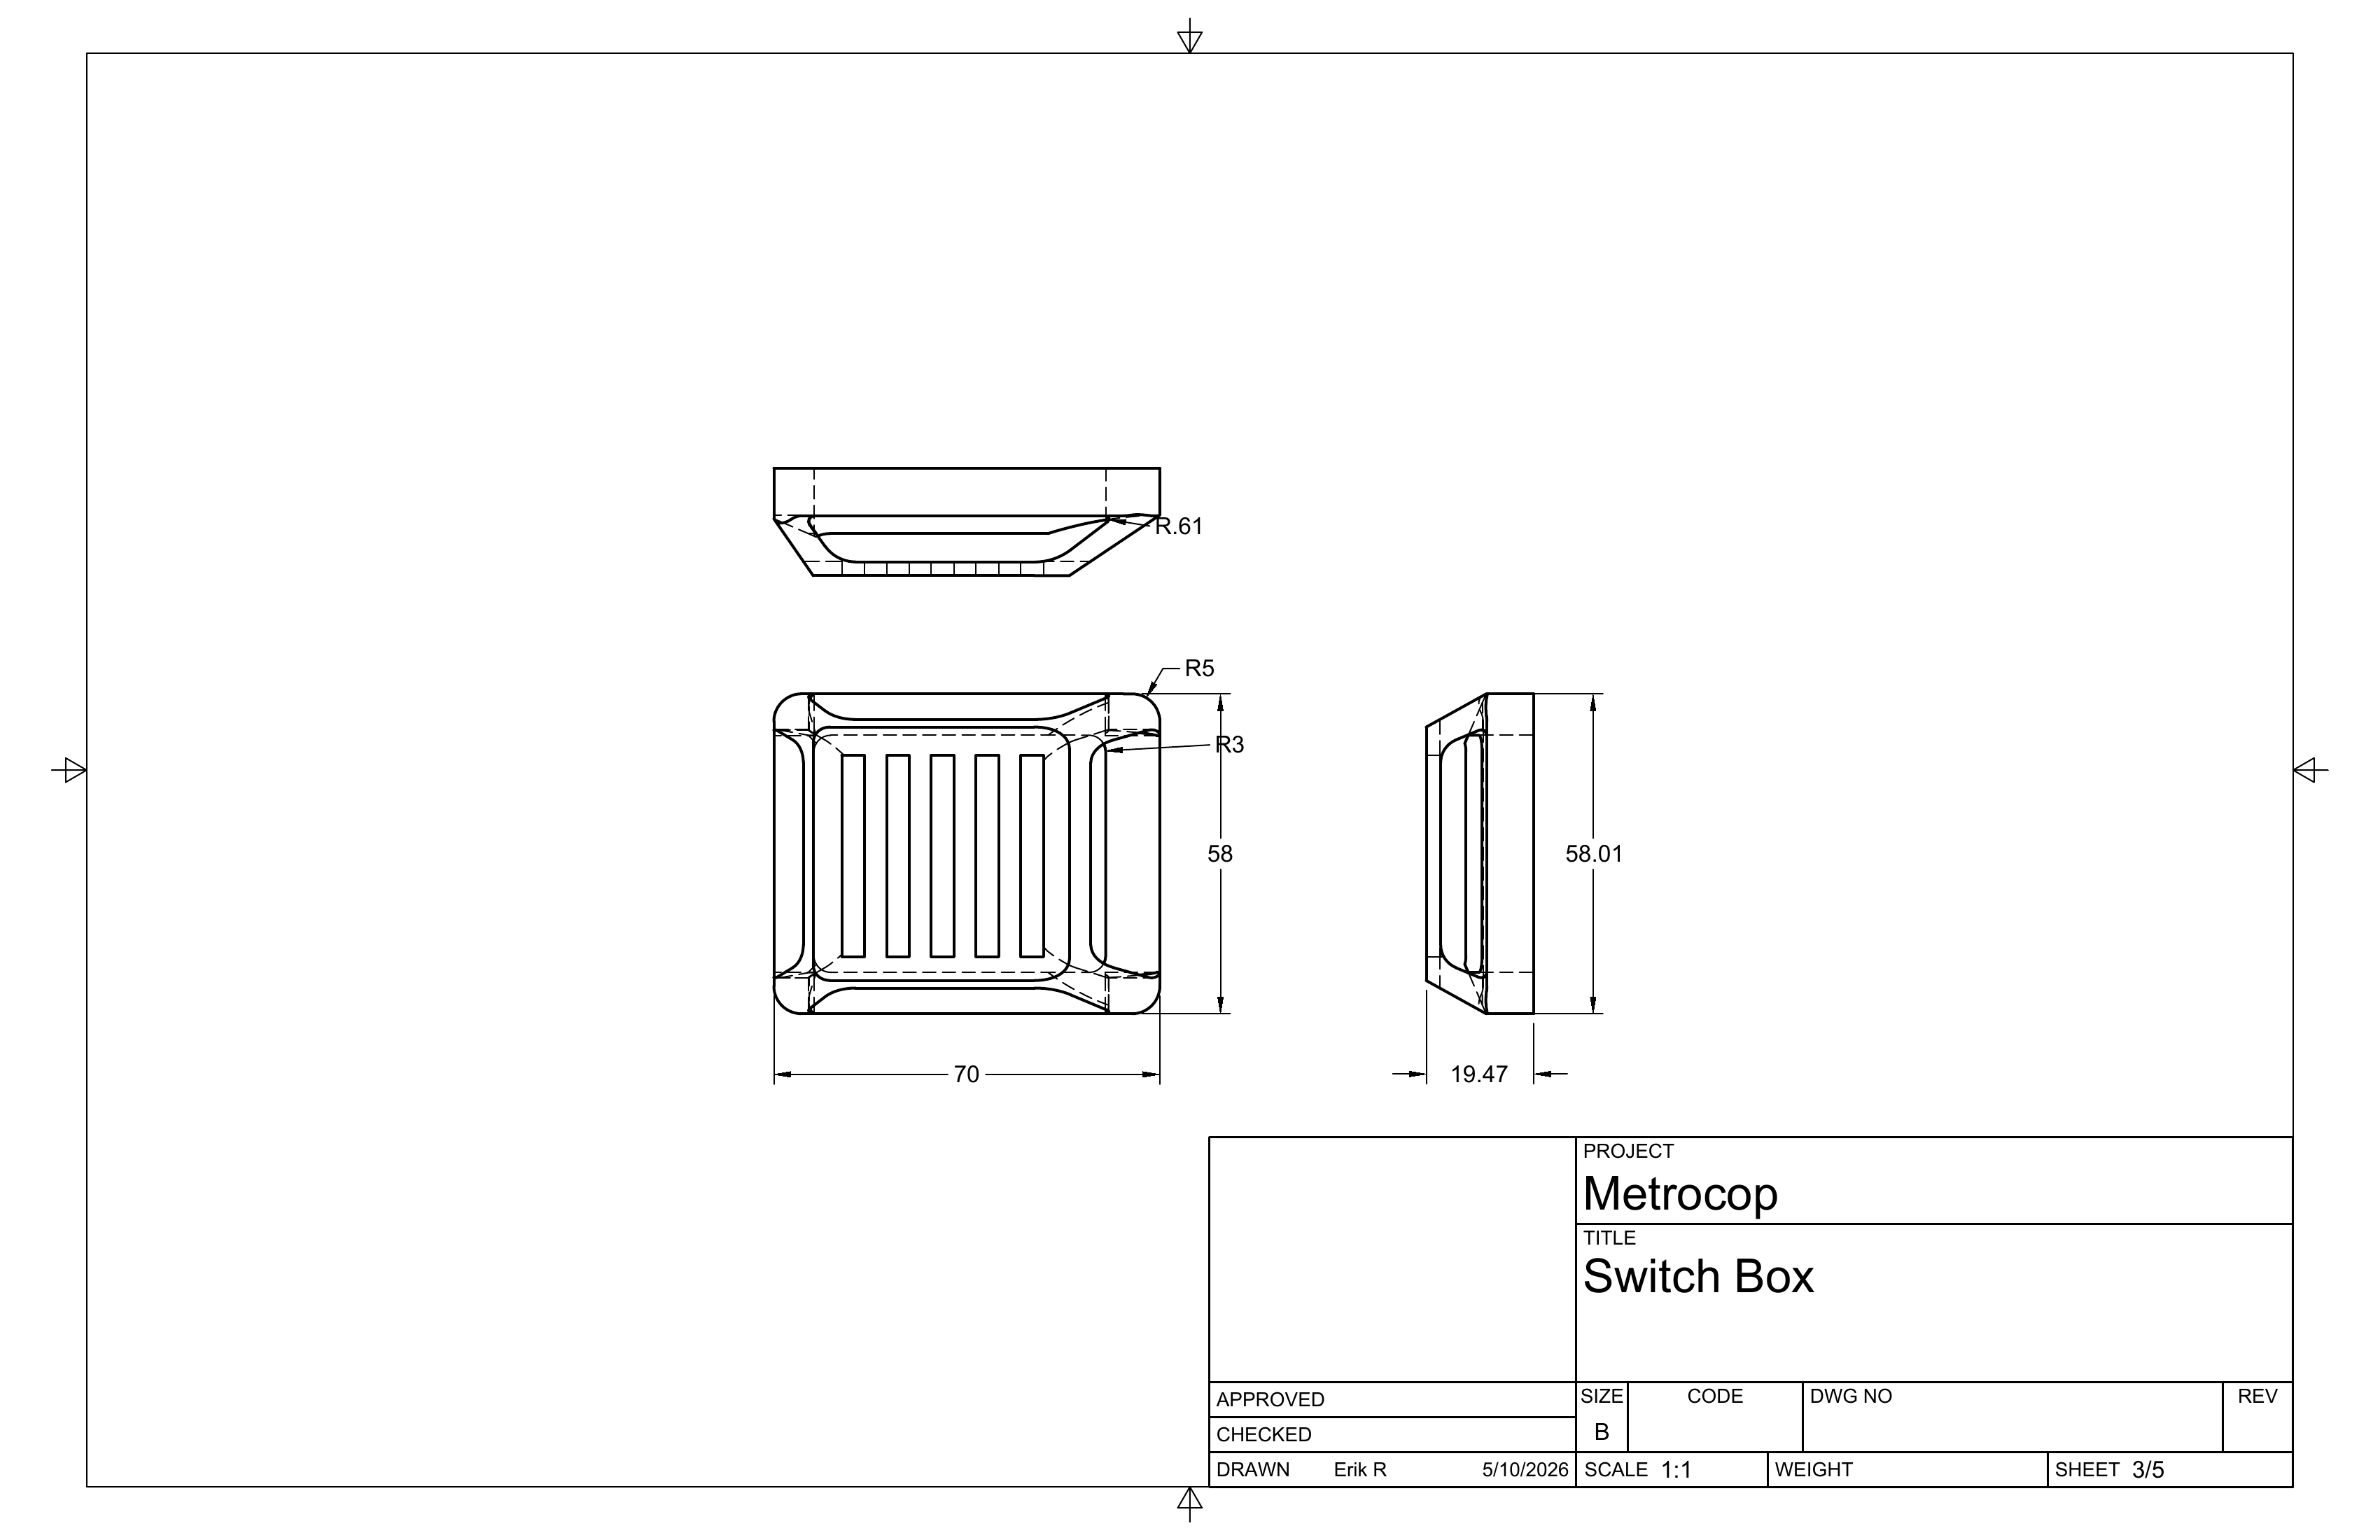
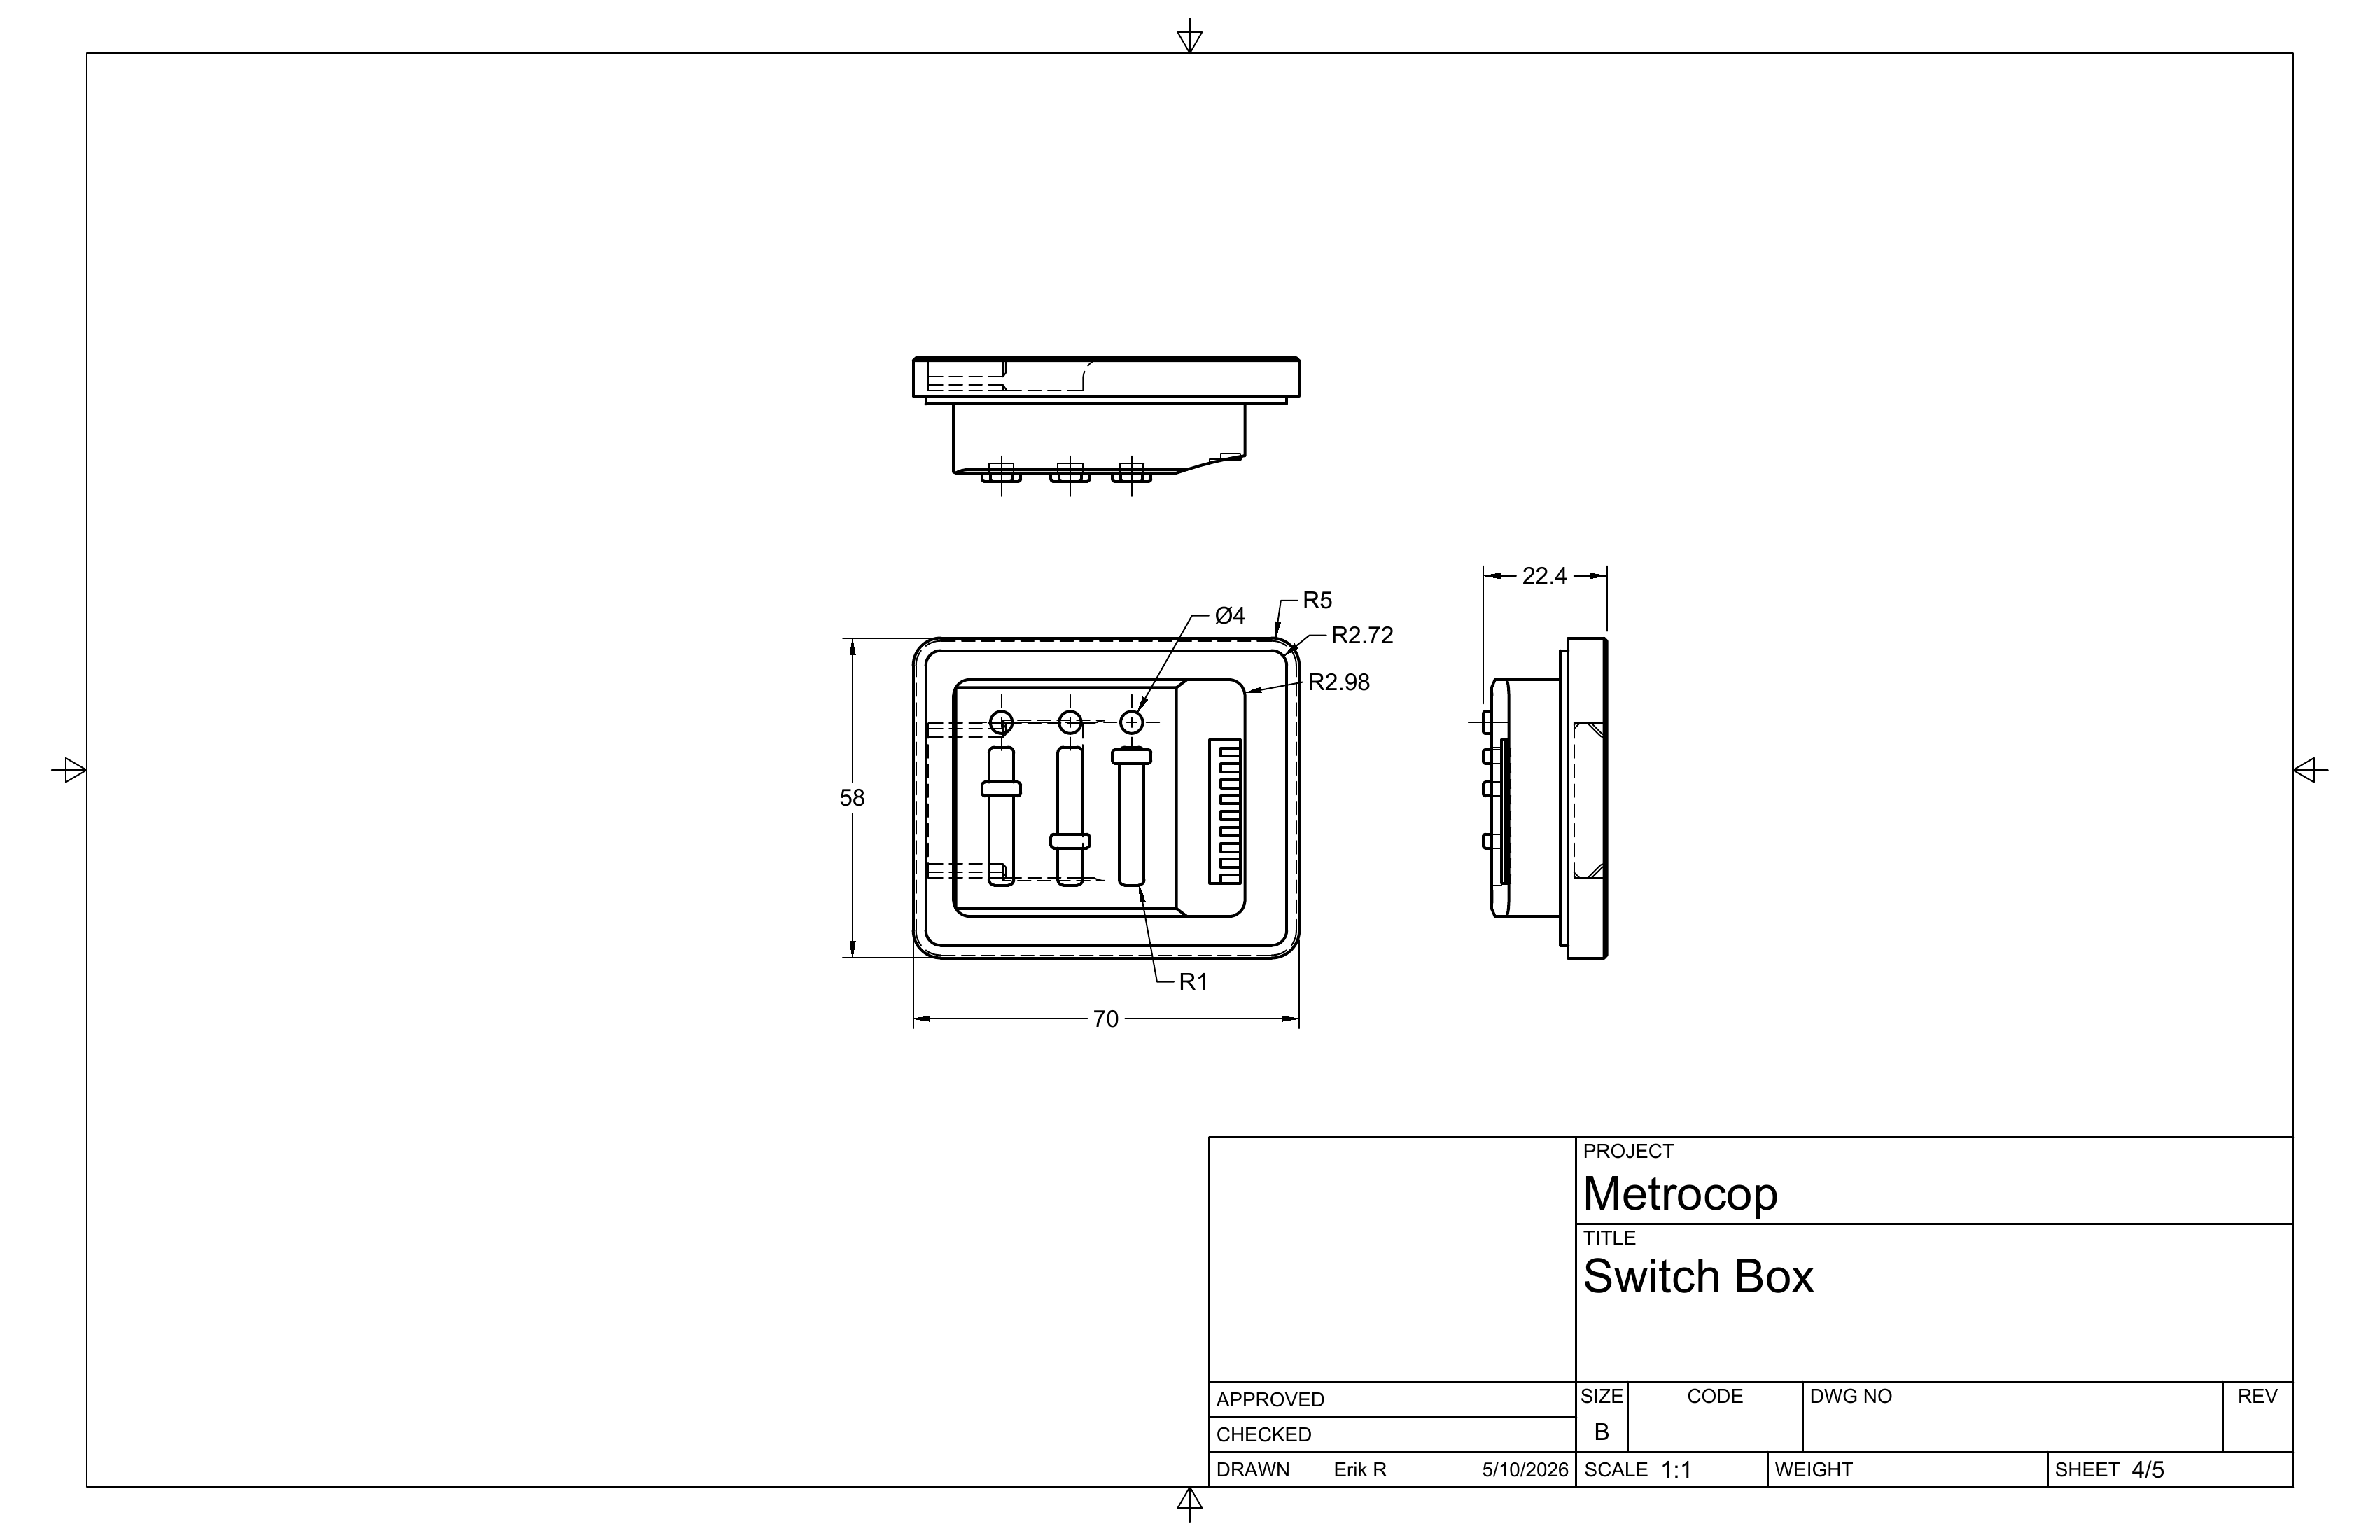
Switch Box
The switch box was the blockiest of the three, but that did not make it simpler. It still needed the same discipline in proportions, seams, vent spacing, and mounting logic so it could sit on the belt without reading like a generic box.
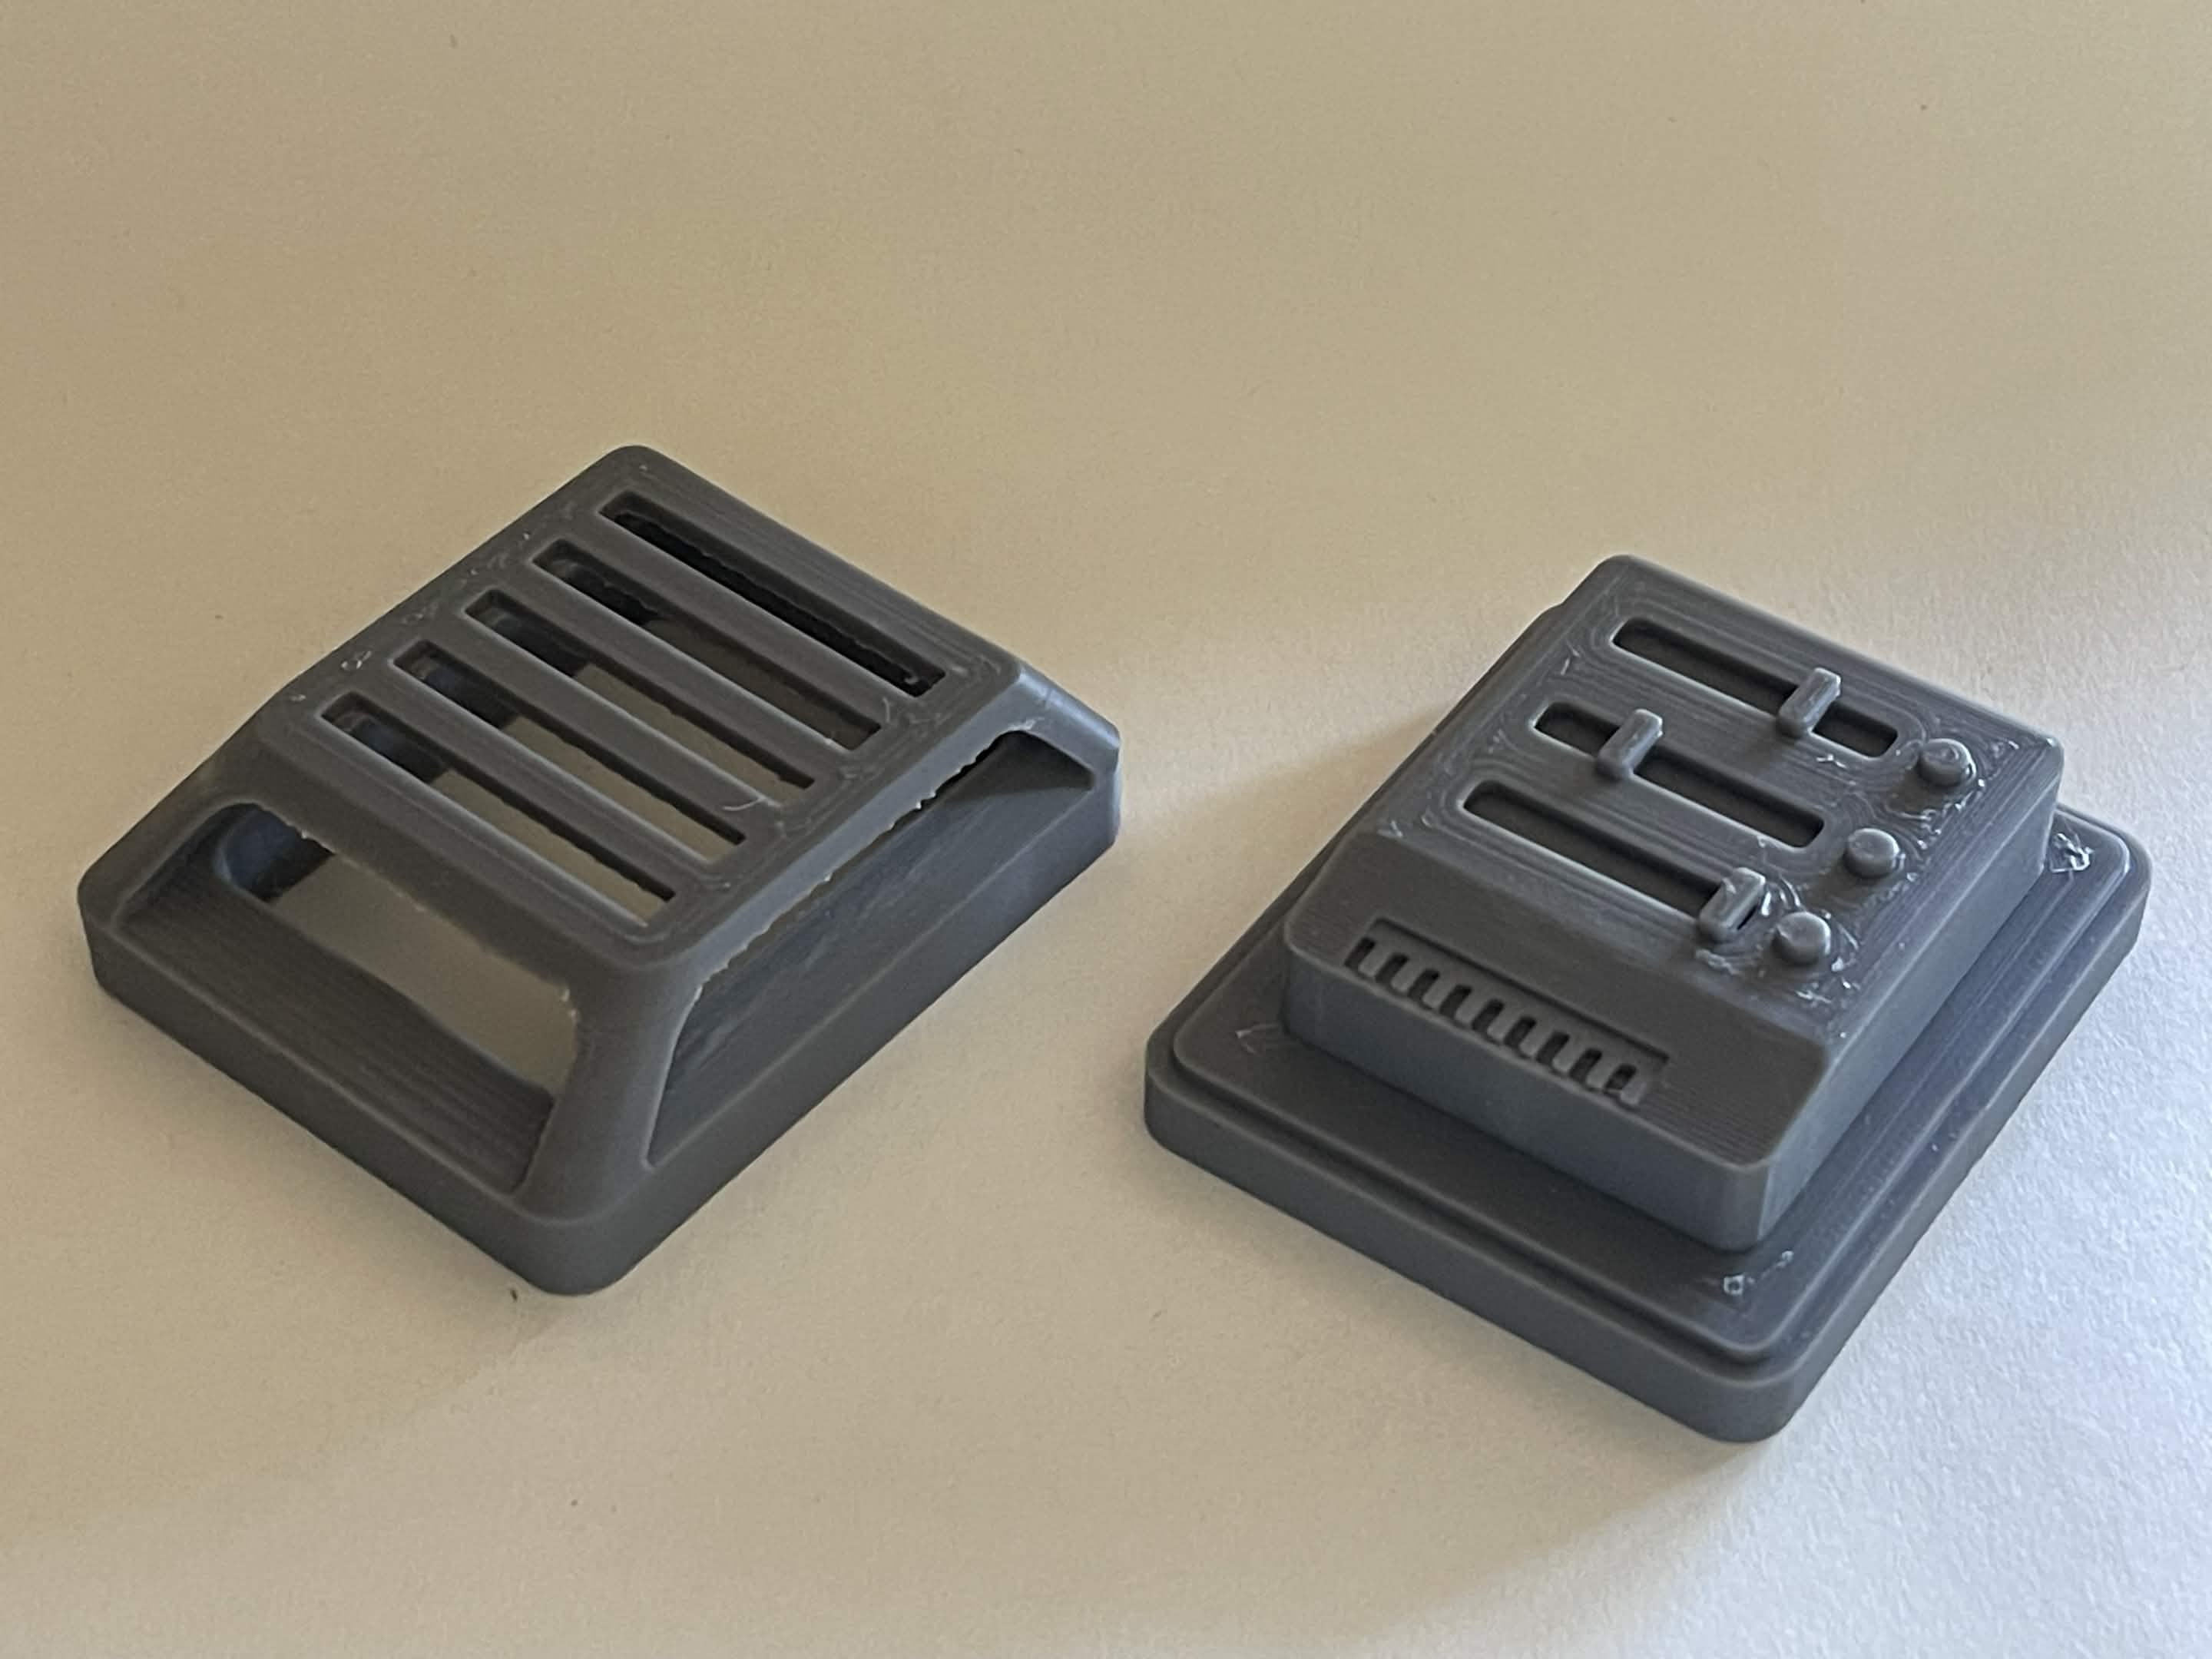
A back view that shows the mount area and how much of this kind of prop design depends on respecting the unseen practical side too.A view of the front of the switch box without the front grate, showcasing the ordinarily hidden switches underneath. Separating these pieces enhances printability and eases finishing after printing.The finished switch box proved that the vent rhythm, layered face, and blockier proportions could still feel like a deliberate costume component instead of a generic utility box.The staged parts shot shows how the box breaks down into manageable pieces for printing, cleanup, and assembly before it all disappears into the final costume.
Sheet 1 of 5Sheet 2 of 5Sheet 3 of 5Sheet 4 of 5Sheet 5 of 5